• Friends, our 2nd Amendment rights are always under attack and the NRA has been a constant for decades in helping fight that fight.

    We have partnered with the NRA to offer you a discount on membership and Muzzleloading Forum gets a small percentage too of each membership, so you are supporting both the NRA and us.

    Use this link to sign up please; https://membership.nra.org/recruiters/join/XR045103

Narrowing the width of a mainspring?

Muzzleloading Forum

Help Support Muzzleloading Forum:

This site may earn a commission from merchant affiliate links, including eBay, Amazon, and others.
Joined
Nov 3, 2021
Messages
559
Reaction score
918
Location
Texas
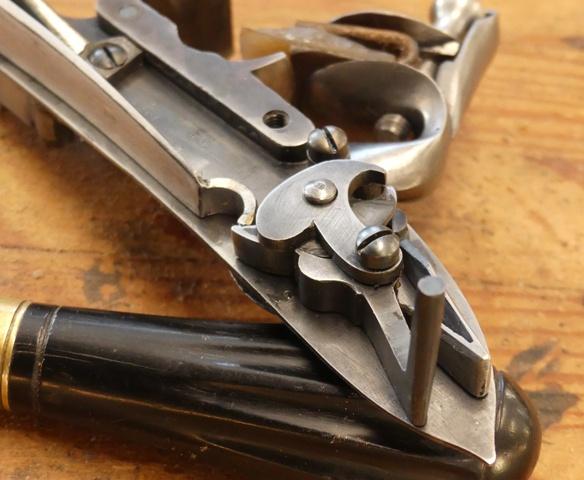
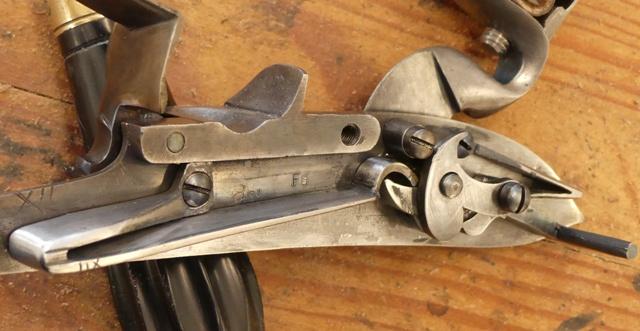
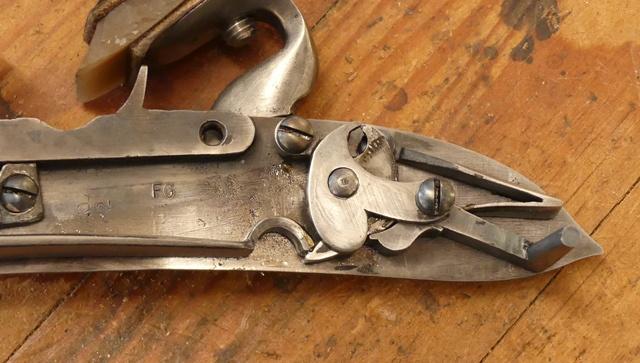
I recently received an Indian made sea service pistol in a trade and I’m looking to lighten the hammer and trigger pull. The amount of force required to **** this pistol is insane.

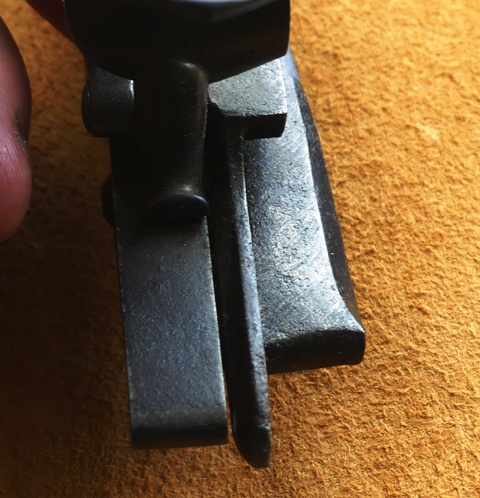
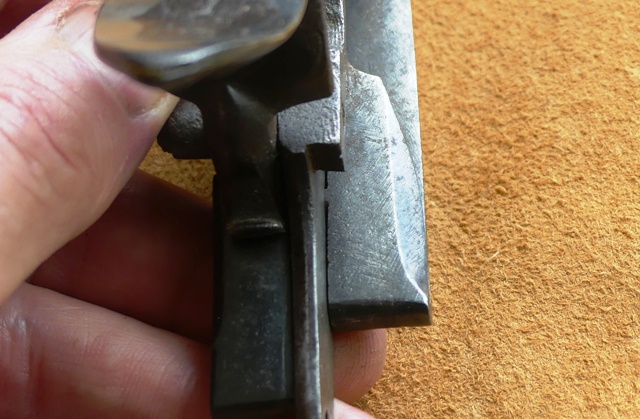
Here’s a photo of the lock (I know it’s filthy, I’ll be cleaning it up and polishing any rough spots). As y’all can see, the mainspring appears to be a bit oversized.

My question is, how far back should I thin the width of the mainspring? I was thinking tapering it back somewhat like how I marked in red on the photo. Would tapering down the width like this make sense, or should I instead narrow the width along the WHOLE spring?
 

Attachments

  • IMG_4943.jpeg
    IMG_4943.jpeg
    208.3 KB
  • IMG_4942.jpeg
    IMG_4942.jpeg
    458.3 KB
  • IMG_4939.jpeg
    IMG_4939.jpeg
    916.6 KB
Hi,
I've worked over many India-made locks. They all had crude mainsprings that were much too strong but the spring may not be the only source of your heavy trigger pull. Look at your sear spring. The bend and lower leaf are almost completely compressed. Moreover, the full **** notch on the tumbler may not be oriented correctly such that the sear has to push the tumbler forward against the mainspring pressure in order to fire. Those are all common problems with these locks. I would certainly thin the thickness of the lower leaf of the mainspring evenly tapering that thickness right from near the bend to the base of the hook. Then I would grind a bevel on the outside edge. Here is an example of a musket lock I made. Note the shape of the mainspring, which matches the original guns.
uaKFfr2.jpg

JLfiU3K.jpg

M5HuHAP.jpg


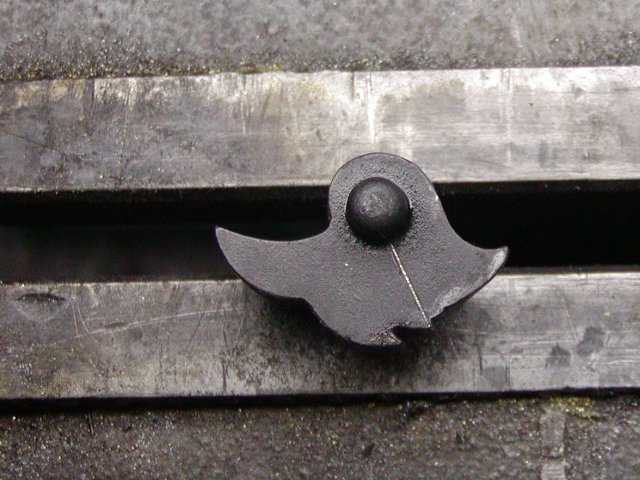
Note how open the bend is of the sear spring. Yours is totally closed except the end curves down to the sear. That spring has almost no where to go when the trigger is pulled so you likely will have to grind the end a little so it does not press on the sear so strongly. Assuming you are not familiar with hardening and tempering springs, I suggest grinding. Alternatively, if I was fixing your lock, I would heat the sear spring red hot, open up the bend with a screw driver, straighten the lower leaf, and then fit it in place. Then I would heat it bright orange red with a MAPP gas torch and quench in brine (salt mixed in tepid water) not oil. Then I would polish it bright and heat with a small propane torch. Heat slowly and watch the colors change from yellow, to bronze, to purple, to deep blue, then keep heating until it becomes a light sky blue color. Stop heating and let air cool completely. After heat treating, install the spring and if too heavy, grind a bevel in the lower leaf to weaken it. Next up, the tumbler. Yours might be OK but often they are poorly made. The face of the full **** notch must be along a line draw straight down that face to the center of the tumbler spindle.
cAi9C4F.jpg

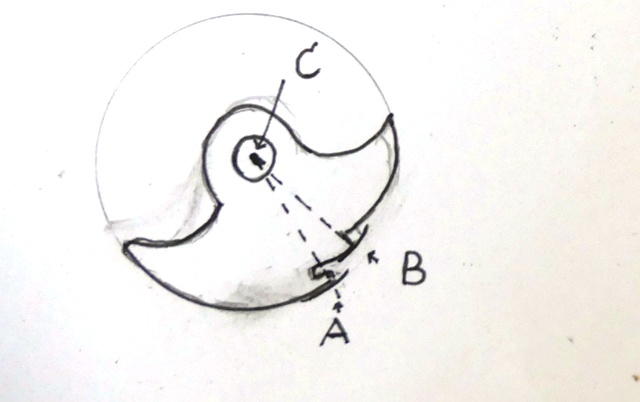
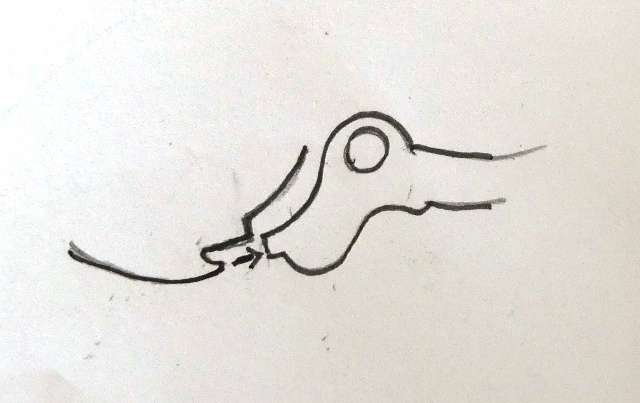
If it is angled too far upward, the sear has to push the tumbler forward to release. Simply stone or use a flat diamond file to orient the face correctly if out of line. Now the next problem you may face if you lighten the trigger. The sear may catch in the half **** notch when fired. I believe so many India made guns have excessive trigger pulls because that way the heavy force of your finger keeps the sear up and away from the half **** notch when fired. As you lighten the trigger, that no longer may be the case. The diagram below shows the problem.

49zVXYv.jpg


Line A-C must be equal to or better, shorter than line B-C. If longer, the sear risks hitting the half **** notch when fired.
AAri4hp.jpg

That is particularly true when lightening the trigger pull on these military locks with no fly detents in the tumbler. After lightening the trigger pull by grinding the mainspring and sear spring, you may have an issue with the half ****. The solution is to grind, or stone, or file the top of the lip down with a diamond file so line A-C is equal to or shorter than line B-C. Hopefully, you don't have need to reduce trigger pull that much to cause this problem but I've described how to fix it if you do. Finally, smooth and polish both the bottom of the sear bar where it hits the trigger and the top of the trigger bar. That will help a lot as well.

dave
 
Hi,
That thread has some pretty good info but Zonie's concern about any real danger in filing sideways across a spring is over blown. Look at many original springs and you will almost always see file marks across the springs. Here are examples of 2 original British guns made in the 1760s and 1770s. Note the file marks across the springs and not polished out.

JEyDcyU.jpg

vitUUAD.jpg


Also note the production marks filed into the side of the Brown Bess mainspring shown in my previous post. I made an exact copy of an original lock complete with production marks identifying components for the same lock and gun. Those deep cuts never caused the springs to break.

dave
 
Maybe they are, maybe they aren't. I think his concern (IIRC) was file marks on the outer edge's of the spring. Those could cause (again IIRC) the spring to break.

I don't think it's a safety concern, but nobody likes to be at the range or hunting and have the lock spring break.
 
Hi,
Remember, the hardened and tempered spring is not glass, It has much more resislience and your concern is totally unfounded. However, it is common among folk who don't know any better.

dave
 
I'm not trying to be argumentative, but a tumbler without a fly doesn't have to be dimensioned exactly how Dave has indicated. That is, the dimension from the axel center to the full and half **** notches.

As an example, our round faced lock is set up for a one position sear. With this the case the height of the half **** notch is a fair amount more than the full **** notch. We are able to run this lock without a fly on a single trigger without any problems with the sear falling in the half **** notch. Trigger pull on these locks are pretty reasonable as well.

There are several variables that impact this. Trigger pull is one, but also the shape of the material forming the half **** notch.
 
Back
Top