I am working on a forged bolstered knife right now and I am having a problem with hammering out the blade. As I hammer the tapered edge in the blade it is wanting to curl up towards the top back like a bananna. I am wanting to keep it straight. What am I doing wrong?
-
Friends, our 2nd Amendment rights are always under attack and the NRA has been a constant for decades in helping fight that fight.
We have partnered with the NRA to offer you a discount on membership and Muzzleloading Forum gets a small percentage too of each membership, so you are supporting both the NRA and us.
Use this link to sign up please; https://membership.nra.org/recruiters/join/XR045103
You are using an out of date browser. It may not display this or other websites correctly.
You should upgrade or use an alternative browser.
You should upgrade or use an alternative browser.
blacksmith forging
- Thread starter wayne1967
- Start date

Help Support Muzzleloading Forum:
This site may earn a commission from merchant affiliate
links, including eBay, Amazon, and others.
Len Graves
45 Cal.
- Joined
- Jan 31, 2008
- Messages
- 689
- Reaction score
- 5
Not being a "real " black smith, you can take or leave my remarks. I have experienced the same thing while forging files into knife blades. As you thin the metal it has to go somewhere, so it will go both laterally and longitudinally on the side you are thinning, the back is staying the same because you are not moving so much metal. Which causes it to bend. I just straigtened out the banana shape as I went along. I don't think you are doing anything wrong. I would like to hear suggestions from a real knife smith however.
I'm not a real knife smith, but I have forged a few knives.
The bend can be straightened, as Len described, if the edge isn't to thin.
There are a coupla ways to reduce, or eliminate that banana bend. One is to bend the knife blank the opposite direction, before forging the edge bevels. Another is to "push" the edge out, using glancing blows that will force the metal in the direction you want it to go. Both can be used if your making a large knife.
When forming the edge bevel, begin by thinning the center of the blade, using light glancing blows, then "push" the edge out, away from the back of the blade, using harder glancing blows.
Either way, there will probably be some straightening involved.
Here's a small one I kept for myself.
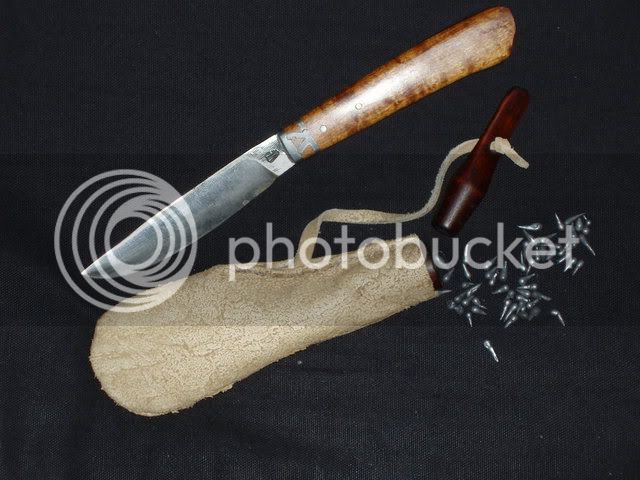
Here's a pretty one
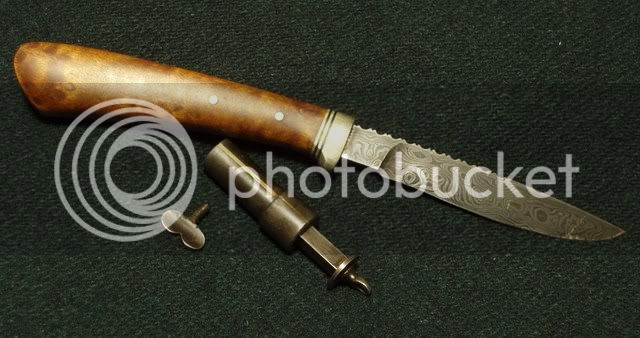
God bless
The bend can be straightened, as Len described, if the edge isn't to thin.
There are a coupla ways to reduce, or eliminate that banana bend. One is to bend the knife blank the opposite direction, before forging the edge bevels. Another is to "push" the edge out, using glancing blows that will force the metal in the direction you want it to go. Both can be used if your making a large knife.
When forming the edge bevel, begin by thinning the center of the blade, using light glancing blows, then "push" the edge out, away from the back of the blade, using harder glancing blows.
Either way, there will probably be some straightening involved.
Here's a small one I kept for myself.

Here's a pretty one

God bless
If I could suggest a few points on knife forging:
1) As suggested bend the blank into a semi circle in the directin of the blade (sharp part) the do your forging. The amount of bend will come with experience, but if you go easy on the edge you can straighten the knife later.
2) Keep the blank clean of any scale, brush often.
3) Use your flatter to remove any hammer marks.
:wink:
Been beatin' steel for some years so here's my take...the suggestions given so far are good, unless you've reached the point where the cutting edge is almost done, say 1/16" or so thick, it's not too late to turn this blade up with one end supported and to go ahead and beat in a counter curve. Time and experience will teach how much you need to end up with the blade back like you want it. Another, more advanced, and harder to describe method is called "distal". As most good knives have a taper in the back from the bolster to the tip, you work that taper, or distal,in at the same time you are working in the taper to the cutting edge. My usual method is to work the distal every other heat (LOL, you've no doubt noticed it takes a LOT of heats to forge a blade..). Done right, the distal negates the bow as you go along...One final tip, don't go too thin with the cutting edge, leave it about a 1/16" or so until after the heat treat. Going too thin increases the possibility of cracking/warping during the heat treat and oil plunge.
Good luck and happy hammerin'
John
Good luck and happy hammerin'
John

$44.99
$53.61
Traditions Performance Firearms Muzzleloader Flintlock Shooter’s Kit
Al's Sporting Goods

$15.99
Muzzle-Loaders Wooden Black Powder Muzzleloader Bullet and Sabot Starter - 6 Jags
IX Properties
hotsparks said:Another, more advanced, and harder to describe method is called "distal". As most good knives have a taper in the back from the bolster to the tip, you work that taper, or distal,in at the same time you are working in the taper to the cutting edge. My usual method is to work the distal every other heat (LOL, you've no doubt noticed it takes a LOT of heats to forge a blade..). Done right, the distal negates the bow as you go along...One final tip, don't go too thin with the cutting edge, leave it about a 1/16" or so until after the heat treat. Going too thin increases the possibility of cracking/warping during the heat treat and oil plunge.
Good luck and happy hammerin'
John
Dang, learned something new. I always forge a distal taper to both the blade and tang, but do it separately. Just never thought of tapering the edge and length of the blade at the same time.
I didn't mention that when pushing the metal to form the edge, tip the hammer up, a bit. Just a bit, and use the edge of the hammer, with light, glancing blows, to begin the edge taper a little above the middle of the width of the blade, then move on out to the edge. Once the metal begins to flow toward the edge, tip the hammer down and use glancing blows with the face to smooth and finish forming the edge.
It does take some practice to learn how hard or light a blow needs to be when using the edge of the face of the hammer to move metal in a desired direction. Once that technique is perfected, it can expand a smiths repertoire of what can be accomplished.
Don't remember where I learned that technique, but it is one good way, of many ways, to form those edge tapers.
Wayne,
Not bad. I consider every day at the forge a learning experience. Some days everything goes the way you want. Other days...well, lets just say that there are days where I shut down the forge and do something else, until I figure out a better way to complete a project.
IMHO, I would forge that tang to whatever shape you want. A good rule of thumb is, 15 minutes at the forge is worth an hour of cutting and filing by hand.
If you mess it up, just chalk it up to experience. Even with a messed up handle, not that you would mess it up. Just speaking hypothetically; the blade can still be heat treated and tested, to gain experience in heat treating.
God bless
jae mobley
32 Cal.
- Joined
- Jan 19, 2007
- Messages
- 5
- Reaction score
- 0
If I may this is from my own expereience. Blades always curve upwards when forging you cans as already mentioned counter bend never seems to work that great for me. I always hammer straight down the center when I notice it starting to curve slightly i go from working the edge and distal to lightly hammering down the middle of the flat side not the spine. if this makes since Im not very good explaining things.also if you will use a hammer with a flat face with low heat in the blade in a couple heats you can remove almost all hammer marks saving a lot of grinding. just my 2 cents from my own mistakes.
Any of these methods will work, however in my experience, I've found if you hit the spine with a hardwood stick (ie., 1x2 or small bat)while keeping the edge longwise on the anvil (or whatever you're using for an anvil), you can bring it back to the correct plane or stop hitting where you want without deforming it...Nifeman
Similar threads
- Replies
- 27
- Views
- 1K
- Replies
- 12
- Views
- 2K
- Replies
- 2
- Views
- 331


