• Friends, our 2nd Amendment rights are always under attack and the NRA has been a constant for decades in helping fight that fight.

    We have partnered with the NRA to offer you a discount on membership and Muzzleloading Forum gets a small percentage too of each membership, so you are supporting both the NRA and us.

    Use this link to sign up please; https://membership.nra.org/recruiters/join/XR045103

Dickert crawlin' and carvin'

Muzzleloading Forum

Help Support Muzzleloading Forum:

This site may earn a commission from merchant affiliate links, including eBay, Amazon, and others.

mikemeteor

45 Cal.
Joined
Nov 16, 2008
Messages
660
Reaction score
3
still waitin' on the raw materials for my homemade nickel silver nosecap.
ordered from some jewelry joint in Calieforney.
probably a mistake.

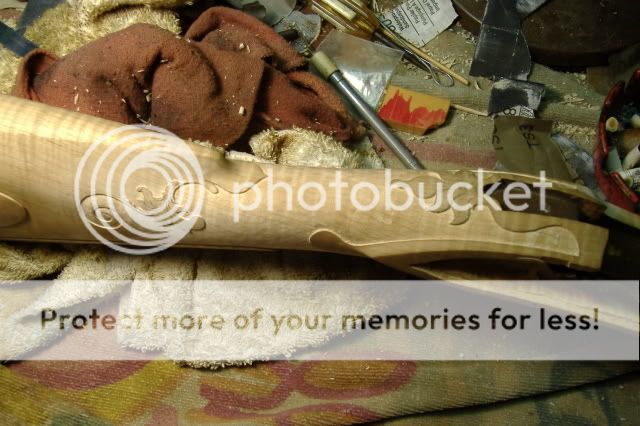
so I started carving.
practiced a little on a cherry board, then jumped in.
humbling experience.
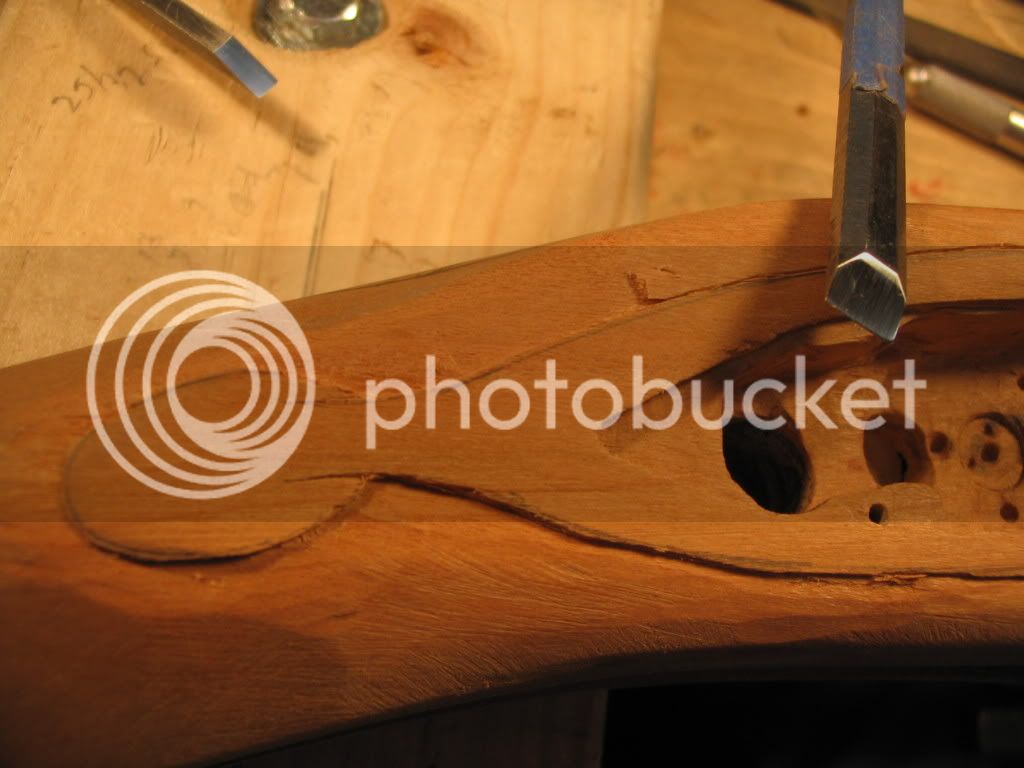
here's the rough start.
lockplatecarving2.jpg


can't seem to get the 3-D look that I see in all the pictures.
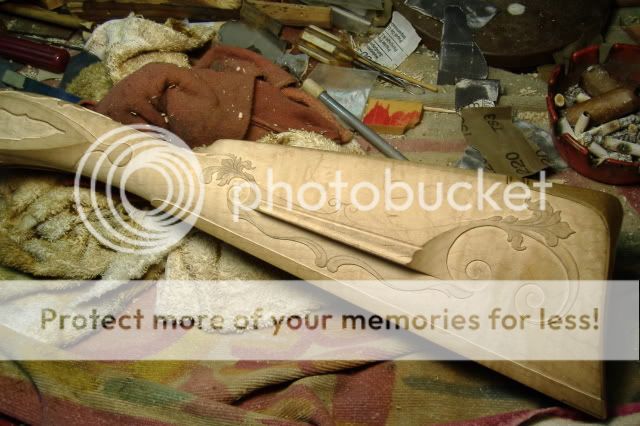
I think when I took down my lockplates, I didn't leave enough for the relief I needed.
- that radius that goes from stock up to lock panel - I'm missing that :shake: !
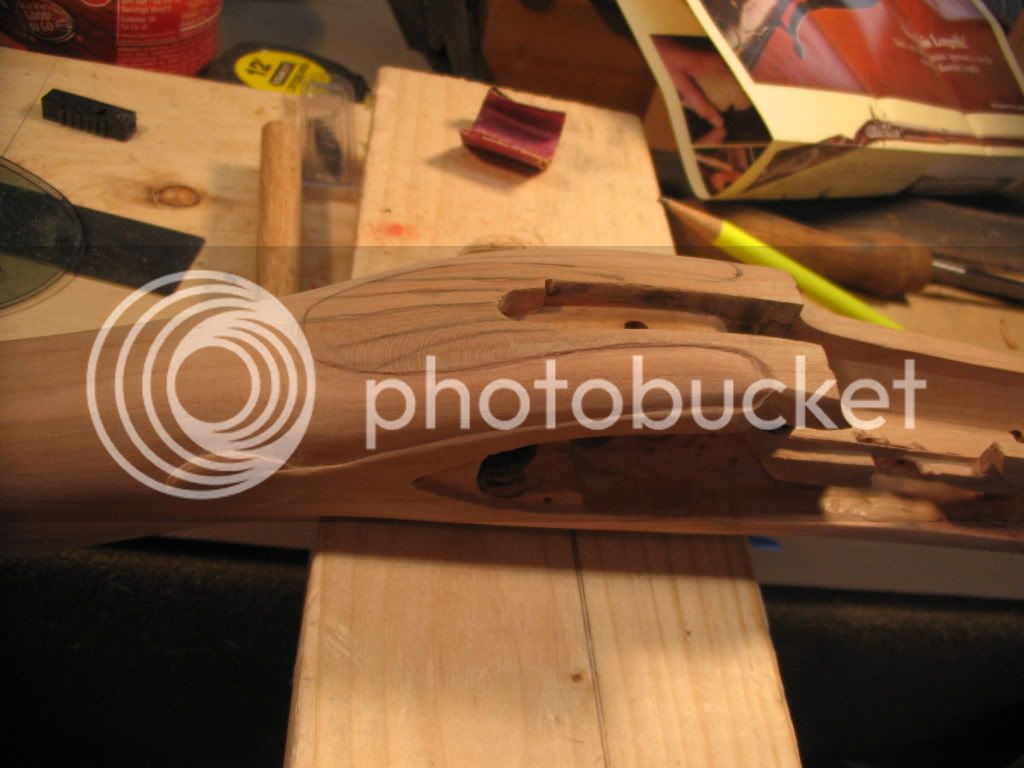
Either that or I gotta make my wrist a fair amount skinnier - which makes me nervous.
lockplatecarving4.jpg


Plus I'm too dang cheap (right now) to get some quality gouges, so I'm doing everything with straight blades.
Another source of self-inflicted frustration.
 
You've got plenty of wood there. The 3-D look is very subtle. If you started from a blank, really work on rounding things AFTER you remove a lot of wood by going from square, to octagonal, to 16 sides, etc. If from a precarve, don't be fooled by the shape that is there. They always have plenty of extra wood that needs to go.

Make sure that the wood beside the tang really slopes down to the lock panels. Looks like right now your shape is too humpy beside the tang. It's got to almost parallel the angled flat of the barrel. The lock panel top edge on the sideplate side should visually line up with the lower edge of the angled barrel flat/top edge of the side flat of the barrel.

You might need to go ahead and take a bunch of wood off even if it removes some of youre caarving and re-establish the carving after you get it nice and rounded.
 
Take my advice, and get some decent tools. They make all the difference in the world.

I am new to the gun building thing, but have mucked around a bit with wood carving for years. I recommend the following kit: (look for the SK 108 kit part way down the page)

It has a lot of good chisel shapes well suited to the smallish work you are looking to do. They are top end steel, and American made. Also, they come pre-ground and stropped right from the factory, ready to use. They are also handy because of the system where the blades fit into the handles. Therefore, they don't take up much space. The kit has a palm handle, and a mallet handle. Also, the stropping compound on a buffing wheel with your dremel tool is really good for polishing those metal parts.

Seriously .... you won't believe how much better things will go with these tools instead of just a big flat chisel.
 
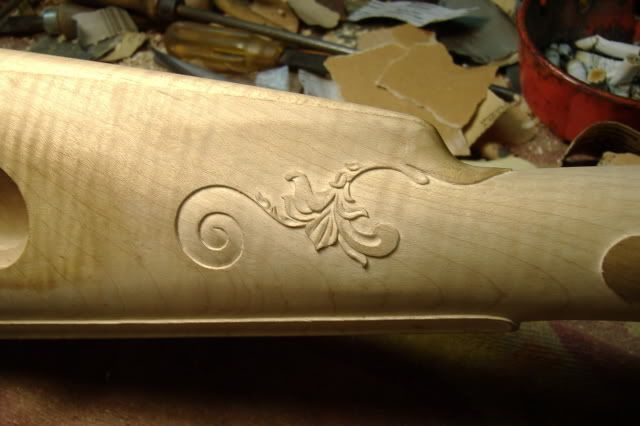
Rich is certainly right about the tang area. I may be wrong, but it looks like you started carveing a wee bit too soon. All the stock shaping should be done first, and sanded to about 220 gritt, at least. Many will leave maybe 1/16th at the butt on the cheek side, but other than that, it should be finished in all shaping. Then you carve. Much of the carving is simply blended to what you already have, but around the wrist, you must take out enough to not leave a noticable break in the flow of the shape. The butt carving can be as much as 1/16" high, but the rest should be no more than 1/32". Good tools are nice, but do not make up for skill. My chisles are dime store quality, and some homemade. Tools will not do the work for you. You have to learn how to use them. Learn to sharpen until your chisles can castrate a gnat, then learn how to use them. I do 98% of my outlining with an Exacto knife, then use chisles to skulp, model, and remove background. I don't care about the quality as long as they work for me.
pennyknife028_640x480.jpg

pennyknife026_640x480.jpg

pennyknife059_640x480.jpg
 
Gotta say i admire both of you for the carving,i bought 3 kit's 3 year's ago and would have never thought of carving,having a considerable amount of Curly Maple at my disposal,i may have to reconsider the stock option and toss the factory stock's aside when i can find time to start on these rascal's
 
Have you studied Mike Brooks' "Gun Building Tutorial" that's on the top of the page? His photos of the lock and side panels and the areas from the breech to the wrist and from the tang to the lock and side panels are self-explanatory. Also one of the "how to" books should be studied. Your shapeing of these areas is not correct but your enthusiasm is laudable...Good luck....Fred
 
Compare the area around the tang and wrist in your second photo to Wilk's first photo. I think you'll get what these fellows are saying. It looks like you've got plenty of wood to remove still. Which means, you're in good shape. :thumbsup:
 
That's some nice work there! And you are right that high quality tools can't beat skill. But I also surmise that you didn't do that carving with a 1/2" flat chisel. But you are right that extreme sharpness is really what makes the difference. I have had good luck with flexcut tools, and have been impressed with their ability to hold an edge.

What do you do for patterns? Do you trace them from somewhere, or come up with them yourself?

I read once that a good way to make small gouges is to get the small round tube from umbrella frames (They are apparently good spring steel) and grind them lengthways down to half or less of their original diameter along a length of an inch or two from the end, leaving the other end round to be fitted into a piece of hardwood dowel for a handle. You can file a bevel either on the inside of the curve, or on the outside if you prefer. One of these days I might try to make some of my own carving tools.
 
Small gouges can also be made from spring wire, often called music wire. It is tempered, but not too hard to file. I just grind it about halfway in the thickness, then use a small round file to make the hollow by filing as long a hollow as is practical. Here are a couple with antler grips. One is 1/8", the other 3/32".
pennyknife087_640x480.jpg
 
Guilty as charged. :doh:
I started carving when I shoulda been rasping.

I had it backwards in my mind - outline the raised/relief parts then rasp/chisel away the rest down to final grade.
Now I understand that one can get the whole area down to final form, and THEN carve in detail.
The "good thing" about my amateur carving effort is that it won't bother me at all to scrub it all away!

I have indeed studied Mike B.'s tutorial - looked at it about 50 times so far.
The few artistic brain cells I have apparently blink out during that short trip from the computer down to the shop in the basement.

Thanks for the homemade gouge tips - I'm gonna try some of them.
 
Have been building MLers since 1978 and have no trouble until I have to draw the carving. Many erasers and hours later a passable design is on the wood and the actual carving begins which usually doesn't pose a problem.. Should really be building Hawkens or Southern style LRs which don't have carving. Wick Ellerbe is a gifted artist as his work attests and few of us, even w/ study and perseverence, will ever produce carving such as his. I'll admit I'm envious of him but one either "has it or not" and that's reality.....Fred
 
Yup, I agree. I have Jack Brooks' DVD on carving and I could use an entire DVD just on how to do the drawings! Does anything like that exist?
 
75% of carving is the drawing, and seeing enough of others work to digest what looks good, and what does not look good, just as it is in engraving. You should look for others mistakes as well as their good work, and learn to avoid their errors. Good engravers have put in many hours, upon hours of just drawing. Learning to draw good scrolls as a second nature, without even trying hard. This I cannot do. I have to work hard at it, and am seldom satisfied with my finished work. I always find something that I could have, or should have done better, and most of that was the layout drawing. To find the basics of designing carvings, look at engraving basics, and books on carving. Of course, if you are going to copy an original, you can use it as inspiration, and often the designs used on originals will vary from school to school, kinda sorta giving you the path to follow in your design in order for the gun to stay within that particular school. Like Fred, I burn up a lot of erasers. I use the stab in method of carving, and do most of it with the large Exacto knife. The one that has the plastic grip. In tight areas, I may use the small gouges, or the smaller exacto. Then I remove the background with different flat chisles, or whatever is required. My main gouges are a set I bought at Sears in the seventies, for $10.00. The rest are just different sized flat chisles.
 
I'll bet those $10.00 1970's sears gouges are better steel than a lot of the made in china manure floating around out there today.

As for drawing scroll work: Do you find that drawing a design that looks good is harder on the complex curve surfaces of a gun stock as opposed to on a flat surface?
 
Don't forget other art forms where "carving " is involved, as sources of sketches, and ideas. I am thinking of LEATHER TOOLING, where some of the floral patterns involve just as intricate a design as some of the best engraving and wood carving does on the guns. Practice on Leather is good training, before working on wood and steel, or brass.

Wicke is being modest, I believe. He wrote me that he spends as much as 2 full days doing his layout work, and then takes only about 2 hours to cut the metal. Of course, the cutting took much longer when he was beginning, but he still complains about all the hours it takes him to do lay-out work.

I think for all carvers, and engravers, that is a good ratio of drawing to carving time to expect, so you don't get down on yourselves.The artistry is in the set up, and lay out work. Coming up with a design is the most difficult- followed by sizing the design so that it Looks Right on the part being carved or engraved.

The hardest thing for beginners to do is LEAVE SPACE between and around design elements so that they stand out to the viewer, and give the viewer some chance to use his own imagination to add to the design by filling in those empty spaces. The accomplished artist is not afraid of leaving SPACE on, and around his carving or engraving.
 
I would not say harder, but often different than on paper. Some designs that are great looking on paper, sometimes just don't look right on the gun. I usually draw directly on the gun. That way you can make things fit in. For a layout on one side, that is to be repeated on the other, I pick a side and lay it out like I want it to look. Then I use a lot of measureing and hash marks to get the opposite side as close as I can.
 
Wick Ellerbe said:
Small gouges can also be made from spring wire, often called music wire. It is tempered, but not too hard to file. I just grind it about halfway in the thickness, then use a small round file to make the hollow by filing as long a hollow as is practical. Here are a couple with antler grips. One is 1/8", the other 3/32".
pennyknife087_640x480.jpg

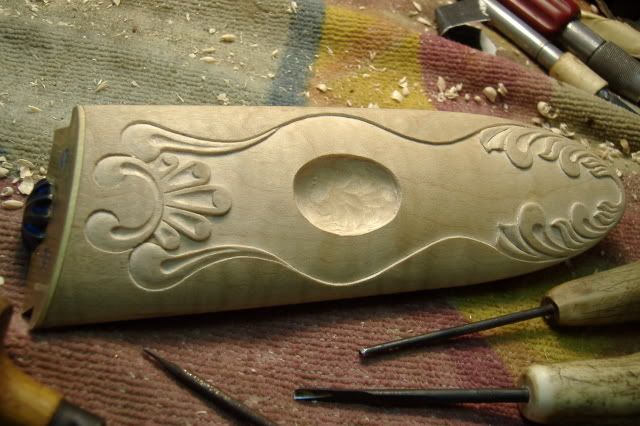
Wow! That's a pretty lid there Wick. What's going in the oval in the center?
Dan
 
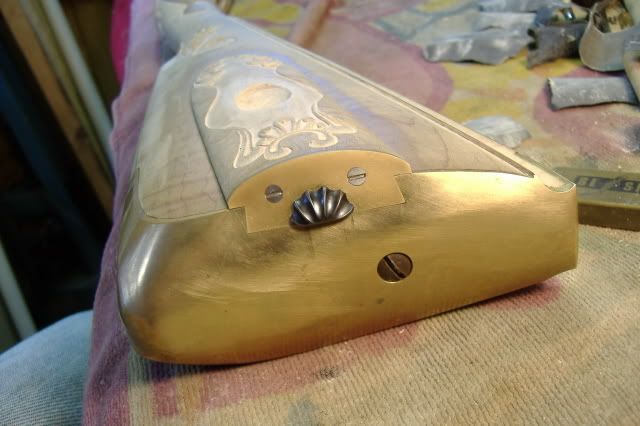
The hole is for the thumb to grip so you can lever the latch at the rear. This was from the Edward Marshall rifle. It was a Tip Curtis, "in the white" gun I was commissioned to finish out. Same as this one below, only different. Below that is another shot of the Marshall where you can see the latch.
FH000012_edited_640x480.jpg

pennyknife093_640x480.jpg
 

Latest posts

Back
Top