• Friends, our 2nd Amendment rights are always under attack and the NRA has been a constant for decades in helping fight that fight.

    We have partnered with the NRA to offer you a discount on membership and Muzzleloading Forum gets a small percentage too of each membership, so you are supporting both the NRA and us.

    Use this link to sign up please; https://membership.nra.org/recruiters/join/XR045103

Flintlock Kit Help

Muzzleloading Forum

Help Support Muzzleloading Forum:

This site may earn a commission from merchant affiliate links, including eBay, Amazon, and others.

RaggedySquid2

Pilgrim
Joined
Jul 20, 2015
Messages
4
Reaction score
0
Hello Guys,

I ordered a Bedford Co.flintlock kit about a week ago and at the time I ordered it I thought rifle kits were basically a stain/blue/assemble job. Well, haha, after a little research I found this is not the case but I think it's something I can handle and seems like a TON of fun. My question is, some of the brass parts are sand cast and left in the rough, where would I find information on how to polish that to high luster? I've searched all over the internet and after days of searching I think I've mastered the art of polish brass cabinet fixtures but I'm still at a loss on rough brass. :confused: :cursing: :surrender:
 
Hey Squid. I just finished doing one of those and it came out very nice. the brass needs to be filed into shape with hand files, then the surface finished with emery paper, first coarse, then medium, then fine, and then finished again with steel wool, in various grades finishing up with 0000. If you want a great set of video instructions, take a look at Mike Bellivue's youtube channel. He's duelist1954 on youtube and his "Bucks County Track of the Wolf Kit" is a series of 32 videos on how to do the whole thing. Let me know if you have questions. Good luck.
 
Hard work, with files, sanding blocks, and I hesitate to mention Dremel. A holding jig is very helpful. I think you can search for information on that. Unless you are very skilled with a Dremel, things can go wrong in a hurry. A nice selection of files, both round and flat, will let you move at a more controlled pace. Start with big pieces, like butt plate, and by the time you get to smaller pieces, you should fell a bit more comfortable. You can make sanding tools out of dowel rod, gluing or using two-faced tape to make it easier. Your imagination, will begin to take shape, the more of this type of work you do. I never tried to make them perfect, most of the originals weren't. This might be the first of many. Good luck.
 
Sand castings require a lot of mat'l to be removed and some methods are easier and faster than others. On the flat or gently curved surfaces, I use a 1/2" dia. coarse sanding wheel in the Dremel, but this is not for everyone. As a tool and diemaker using hand grinders, it was a skill that was needed...w/o it, many tasks couldn't be performed, so some time was spent on learning how to use these handy tools.

Otherwise, coarse files and then finer files are used and gradually the coarse and finer grit papers are used. Final smoothing can be done w/ steel wool or if a brushed look is desired, then green "Scotchbrite" can be used.

Both buttplates and trigger guards should have thin edges and this requires a lot of mat'l to be removed...if not, the Bplate and TG look only half finished. Good luck on your venture.....Fred
 
Thank all of you guys for the help, thats exactly what I needed to know! I actually have a little experience in wood and metal work and some gunsmithing, I did a full restoration on an M44 Mosin last year plus I've done a couple of floating barrels and a handful of trigger job so this shouldn't be too awful bad.

BlackJack I've actually watched most of Mike's videos and I think I'm going to be consulting them and this forum quite a bit during this adventure haha.
 
a tip for filing- rub chalkboard chalk on your files, it will help keep the brass from clogging and sticking in the teeth causing galling and seemingly dull files.
 
Emory cloth (or paper) was mentioned and I'll admit that it will do the job.

Emory is a fairly soft abrasive so it doesn't remove the cast material very fast and it wears out quickly.

Because of this, I use the black "Silicone Carbide" wet/dry sandpaper.
Silicone Carbide is almost as hard as a diamond and the waterproof glues they use does a pretty good job of keeping it attached to the paper backing.

I've also been known to use a medium or fine grit sanding belt made for a belt sander for the first, rough stage of removing the as cast surface.

If you use one of these sanding belts by hand, it works best if you cut thru it in one place leaving just one long strip. It's pretty rough on your fingers so a pair of leather gloves might be useful.
It's even rougher on whatever you use to cut it with so don't use your good filleting knife. :grin:

After the real rough surface is smooth, that is when I change over to the silicone carbide papers starting with the roughest available (around 120 grit or less).
Again, when the surface looks uniform in roughness, change to the next finer grit (like 180).

This can be carried on thru the 320, 400, 600 grits but I would stop when it gets to anything over 800. At that roughness, polishing with a polishing compound made for brass lamps will work.

Stop when your happy with the surface.
 
Sounds like you've done this before. :haha: I'm just glad it's not one of those "well you really need a (insert power tool) to do it" jobs.
 
I will use a drill, and have done some rough conturing of wood with a drimil, but all and all go slow and by hand. Every time I've tried to speed something up with electricity I just screwed it up.
 
My mentor on black powder gunsmithing told me once that just remember anything with power can and will most likely be the fastest money you ever spent on a mistake. And to keep in mind that you're working on a $250-300 piece of wood that will be an expensive piece of kindling! I've always kept that in the back of my head while building my muzzleloaders....
 
RaggedySquid2 said:
Sounds like you've done this before. :haha: I'm just glad it's not one of those "well you really need a (insert power tool) to do it" jobs.
The way I figure it, yes, doing it by hand is a lot safer.

Besides, at least for me, if it takes a little longer, that's not a bad thing.

Most people, when they've finished building a rifle will suffer severe withdrawal if they don't get another pile of parts to build into a gun and not many can afford to buy several "kits" per year.
 
The good news is that the sandcast furniture is generally real brass. The nice investment cast furniture is often bronze. Brass is better.
 
I use investment cast Bplates and TGs from Goehring and Chambers and they're yellow brass. Some others might not be.

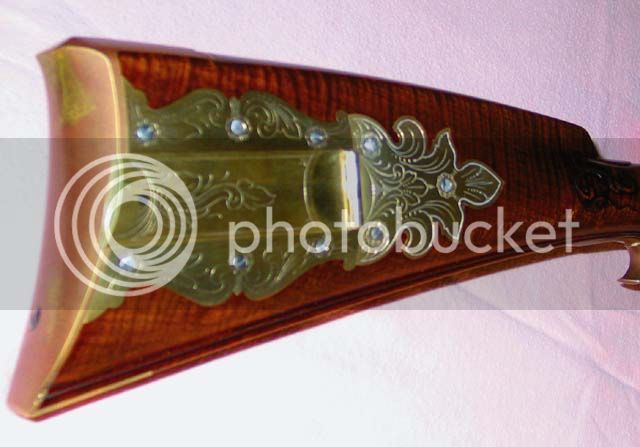
The LR pictured below has a Bplate cast out of bronze and it's readily apparent because of the contrast w/ the yellow brass. This was my 2nd LR and it's owned by a nearby customer so I see it once in awhile. This Bplate if polished would look more like brass...but he doesn't want to do it.....Fred

 
I have polished out many rough cast brass parts by using emery cloth. I started with 100 grit and worked my way down by steps to 400 grit and then finished with buffing compound. It takes time but it works. :idunno:
 
I avoid the dremel because it is so easy to make a mistake, but beyond that, I kind of enjoy the process of shaping the brass with files and papers to the precise shape and appearance I find most pleasing. It may be work, but as they say, it ain't work if you like it, then it's just artistry in action.

Just de-sand casted a set of brass for a rifle today. Reminds me of how clever these simple craftsmen were to create things of beauty with such simple tools. You can do a LOT with a simple flat file and a round file.
 
A cabinet scraper can be used to great advantage on brass castings. Also be aware that you need to use new files on brass. If you use a file on steel it will perform very poorly on brass after that.
If you do chose to use power tools, look up your castings on the TOW website, because sooner or later you will probably need a replacement part.
 
Guys I've gotta say thanks again, y'all have been a huge help. I did actually pull out my dremel last night and did some polish work on an old bronze valve with a felt wheel and it turned out OK. I think I will smooth the other side with files and polish it just for a little practice. I've still got about 18 days before I even get the kit anyway. Another quick off topic question I can't seem to find the answer to is, what color stain would be a close match to that dark reddish brown you see on those old rifles? I've looked at quite a few and to me it looks like a mixture but I'm honestly lost as last years easter egg in antique rifle building. Haha, don't kill me.
 
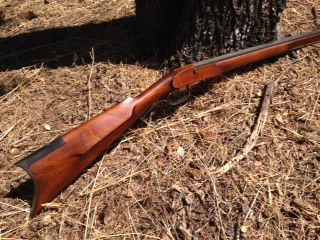
Take a look at Aqua Fortis, it will give you a finish like this:


Five applications of Aqua fortis and many hours of hand rubbed oil finish.
 

Latest posts

Back
Top