• Friends, our 2nd Amendment rights are always under attack and the NRA has been a constant for decades in helping fight that fight.

    We have partnered with the NRA to offer you a discount on membership and Muzzleloading Forum gets a small percentage too of each membership, so you are supporting both the NRA and us.

    Use this link to sign up please; https://membership.nra.org/recruiters/join/XR045103

Goofed Inlet fix?

Muzzleloading Forum

Help Support Muzzleloading Forum:

This site may earn a commission from merchant affiliate links, including eBay, Amazon, and others.
I get my wood epoxy from Lee Valley but you can find it at most of the big box places.

My first few builds could be described as "inletting challenged" :)

The patches on those are quite a few years old (like 20 years in one case) and still seems to be holding up fine.

When I can't find a colour "close enough" I experimented with the light epoxy and "kneaded in" oil stain (the same as my intended finish) - also seemed to work fine - the epoxy set-up fine and just as durable as the product "without" stain mixed in.

My inletting is much better now, but occasionally I will get a blow-out on a pin or something and this is the stuff I grab for if I can't glue a chip back in...
 
I'd "can", that toe plate, and make a new one. A simple toe plate would be easier. I wouldn't go for too much bling, unless I had several builds, behind me.
 
hadden west said:
I'd "can", that toe plate, and make a new one. A simple toe plate would be easier.
I'd agree. Your shape leaves areas that are more prone to chipping/breaking. Just make a longer toe-plate from brass sheet...
 
galamb said:
Not that I have ever done something like this myself :)

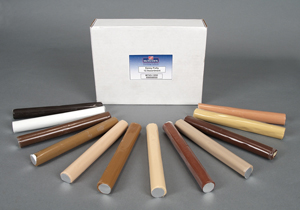
Personally, I would grab a stick of Wood Epoxy - the stick about the size of a roll of quarters that you cut off and knead a chunk - patch the missing pieces there and call it good.

It hides very well when stained/finished and you can get it in "maple" as well as a number of other wood colours.

54z3101s2.jpg


M743-1200b-1.jpg

I've had great success with a similar product called PC Woody. Seems to be available at most of my local hardware stores. It DOES take stain. In fact, after a couple coats it can take more stain than the wood (depending on the wood) and can even end up darker. But, where that happened for me it just looks like some darker grain. Few would recognize it as a repair. I used Brownell's aerosol release agent and that worked fine for bedding.
 
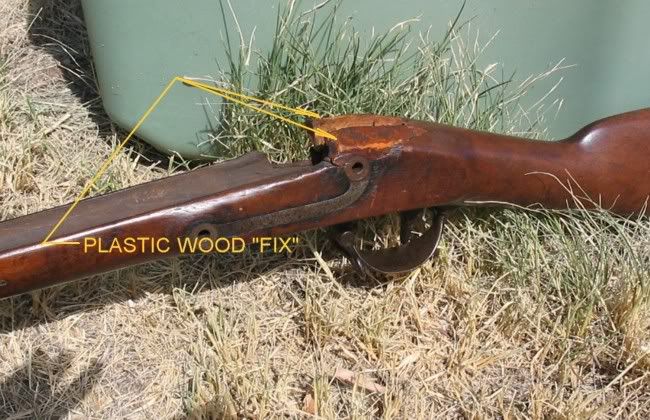
I sure hope these new products are better than "Plastic Wood".

Some knothead tried to rebuild the stock behind the breech of this 1842 Springfield with it years ago.

When I bought the gun, the plastic wood was falling apart (not to mention Plastic Wood doesn't stain so I'm sure it looked like hell even before it started falling apart. Someone had painted it brown).


I ended up removing the stuff and replacing it with a piece of walnut.
It ain't perfect but it sure looks better than it did when I bought the gun.

 
Plastic wood does have a nice intoxicating smell when you're working with it, though !!

I have a similar problem . . "the easiest inlet" according to Gunsmith of Greenville County . . the SIDEPLATE . . is the one I screwed up on.

I went a little hog wild and got the top curves too wide. I can stick my fingernail in the crack between the edge and the plate. Not done with the rifle yet, but I am contemplating fixes in reading this thread.

I have some 3M "stainable" wood filler I haven't opened yet. I question the definition of stainable, but will test that on a scrap. Has anyone used this wood filler for a similar fix?
 
Mac1967 said:
I went a little hog wild and got the top curves too wide. I can stick my fingernail in the crack between the edge and the plate.

Before you start using filler, try pouring boiling water over the area but leave the side-plate in place when you do this. I've found this method to minimize gaps and have used it on several occasions for different inlets.
 
Black Hand said:
Mac1967 said:
I went a little hog wild and got the top curves too wide. I can stick my fingernail in the crack between the edge and the plate.

Before you start using filler, try pouring boiling water over the area but leave the side-plate in place when you do this. I've found this method to minimize gaps and have used it on several occasions for different inlets.


I'll try that . . I tried steaming with a wet washcloth and iron, but didn't do a lot of it. . . that's perhaps a better idea and with the plate in . . . THANKS
 
Mac1967 said:
I went a little hog wild and got the top curves too wide. I can stick my fingernail in the crack between the edge and the plate. Not done with the rifle yet, but I am contemplating fixes in reading this thread.

I have some 3M "stainable" wood filler I haven't opened yet. I question the definition of stainable, but will test that on a scrap. Has anyone used this wood filler for a similar fix?

For your fix, why not just glue in a little sliver of wood and finish the inlet?

You could also try mixing up a paste of wood dust and glue as the OP asked about- I have done this successfully with Elmers Wood Glue Max which is also takes some stain. If you build the paste up a little bit and then sand or file it to final shape once it is hard, that should also expose and open up some of the saw dust within the glue to help the stain match even better. But keep in mind that no matter what you do, even if you glue in a piece of wood, you may still end up with a slightly different hue due to grain that may be slightly different than the surrounding wood.

The PC Woody I mentioned above definitely takes stain. However, I do not know how well if would respond to aqua fortis as in the OP's case, since AF gets its color by reacting with the wood. I would do a test first.
 
I am not going to use Aqua Fortis - I want a specific color range which I think best fits my likes with LMF Lancaster Maple.

I don't really have any extra wood slivers to make from my rifle at this point but I do have a small bag of saw dust I save just in case.
 
You can peen the back of the plate to stretch in a little bit. Plastic wood is NEVER an option for any gun work (and very seldom for any thing else).
 
For little gaps I use slivers of the same stock made with a spoke shave. I stuff them in the gap and consolidate it was super glue.


Store bought fillers of any kind look terrible.
 
I am afraid to show you all a pic of my inlet . . it really was me not paying attention, or something. . . perhaps I'll get brave and take a pic. . humility is a virtue right ???
 
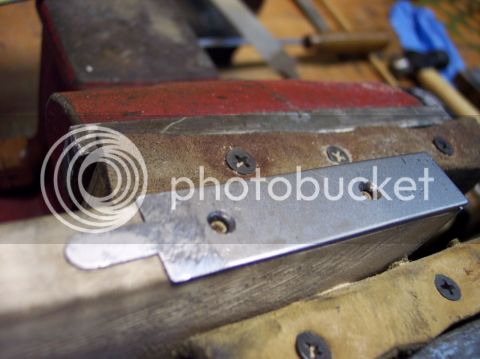
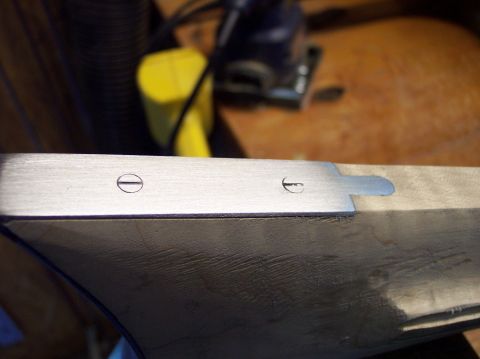
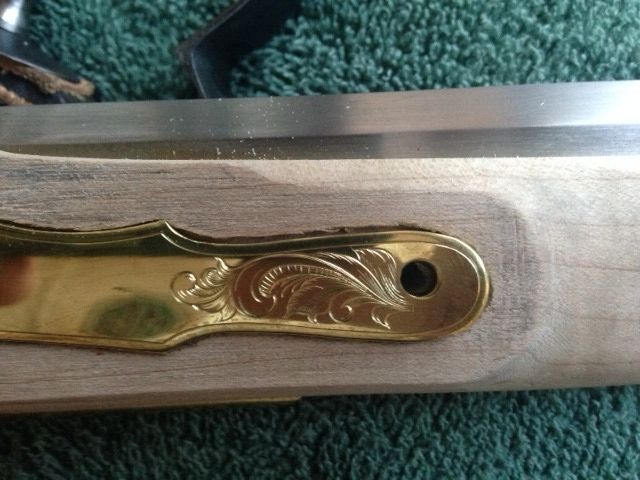
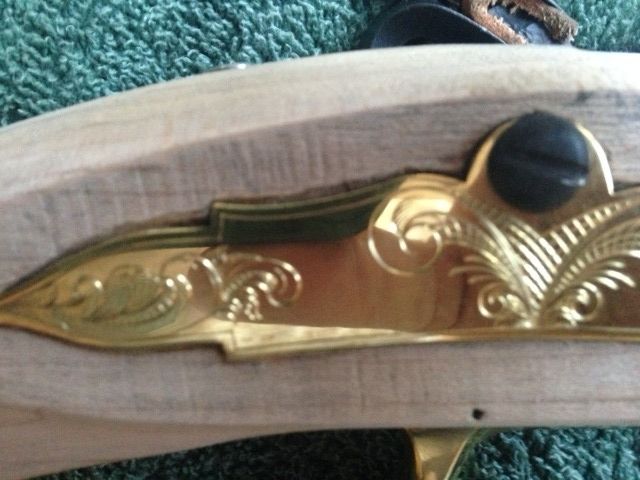
OK here we go . . . As you can see I have a gap on top in some places of the side plate, the bottom is good . . .and I can live with the front divot gap, but the top is longer and more noticeable.

e468d712-9bc8-46d8-b3ba-97b1a0067f7c_zpsgqadazs3.jpg


68decd5a-9a0d-4676-9ff1-070f32fe51ff_zps4pqxgqqc.jpg
 
I would at that point make a new sideplate.. keep the old one for a future build
 
Well, I didn't make the side plate to start with . . .came with kit from TVM. I just spent some $$ on engraving it recently . . . which probably draws more attention to my goof now - opps, I didn't think of that !!
 
That's a tough one.

You might be able to get a few slivers from inside the barrel channel to fill the gaps.

Worst case: Is there enough thickness to plane down the panel and inlet the sideplate again?
 

Latest posts

Back
Top