• Friends, our 2nd Amendment rights are always under attack and the NRA has been a constant for decades in helping fight that fight.

    We have partnered with the NRA to offer you a discount on membership and Muzzleloading Forum gets a small percentage too of each membership, so you are supporting both the NRA and us.

    Use this link to sign up please; https://membership.nra.org/recruiters/join/XR045103

Hawk New England Fowler

Muzzleloading Forum

Help Support Muzzleloading Forum:

This site may earn a commission from merchant affiliate links, including eBay, Amazon, and others.
Hi Folks,
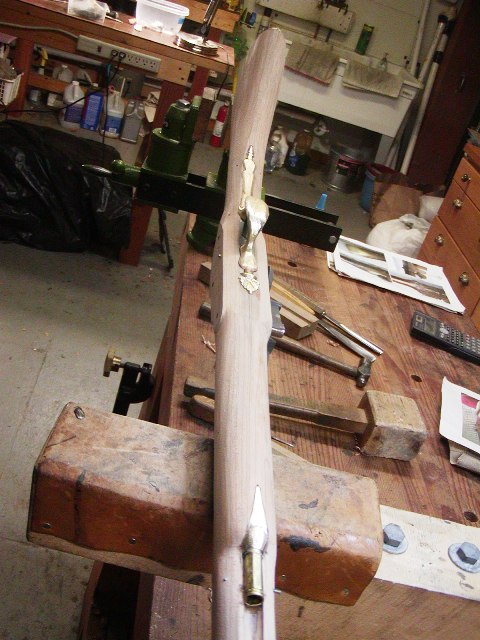
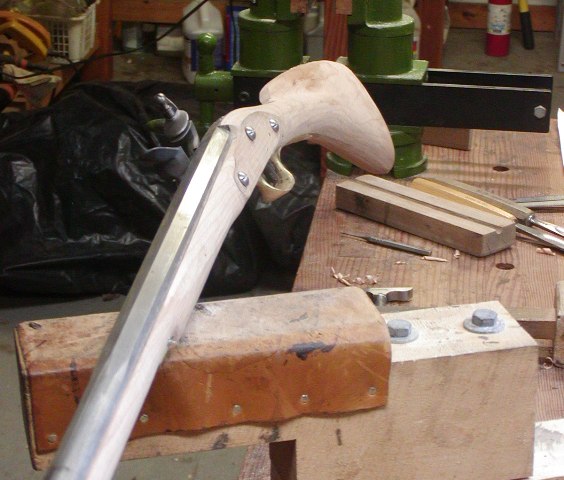
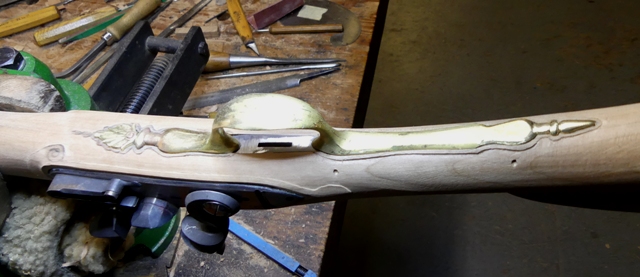
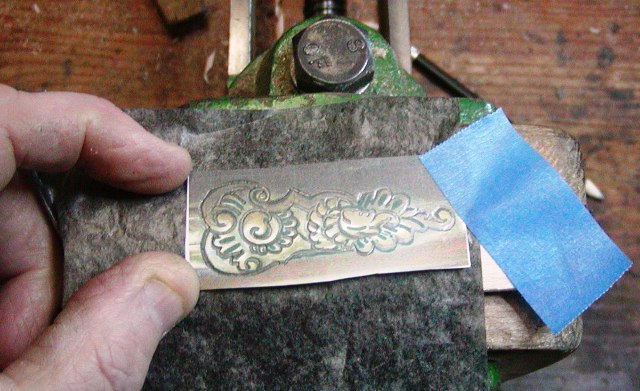
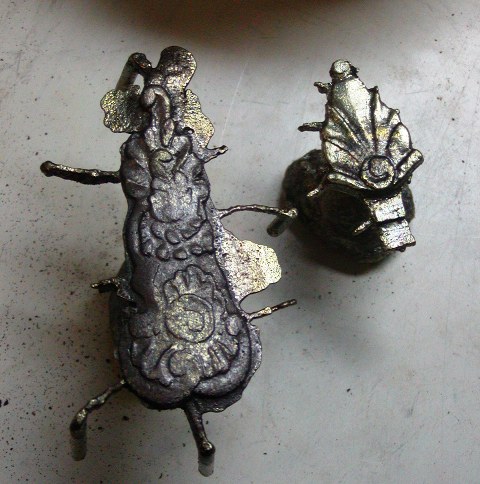
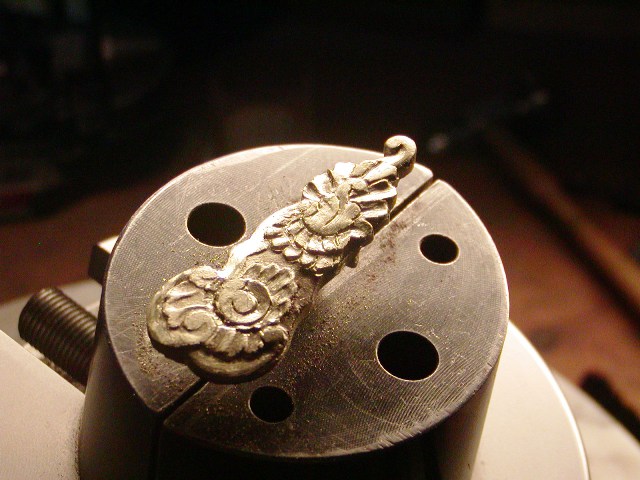
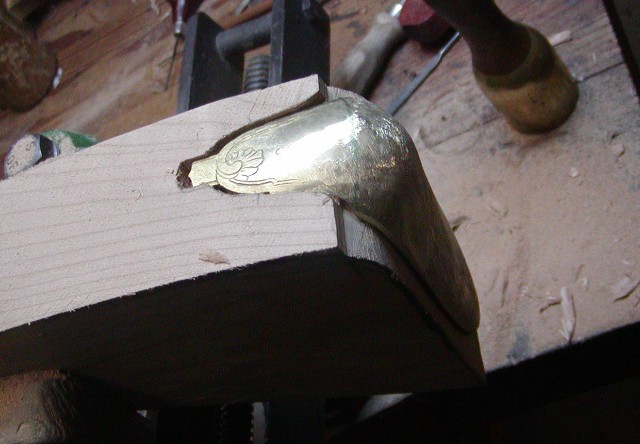
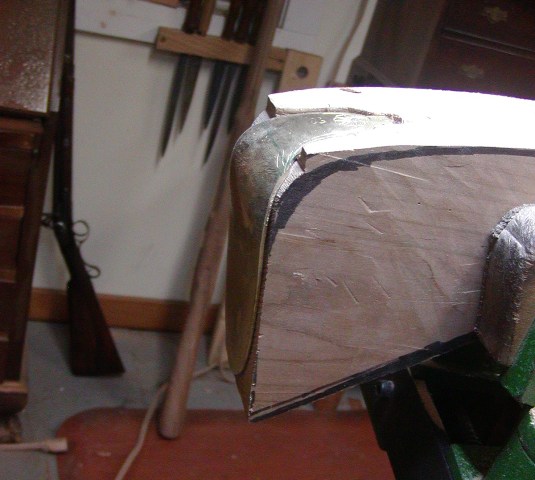
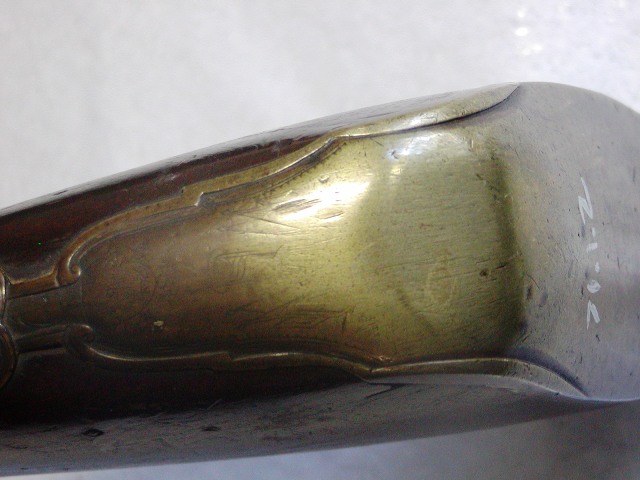
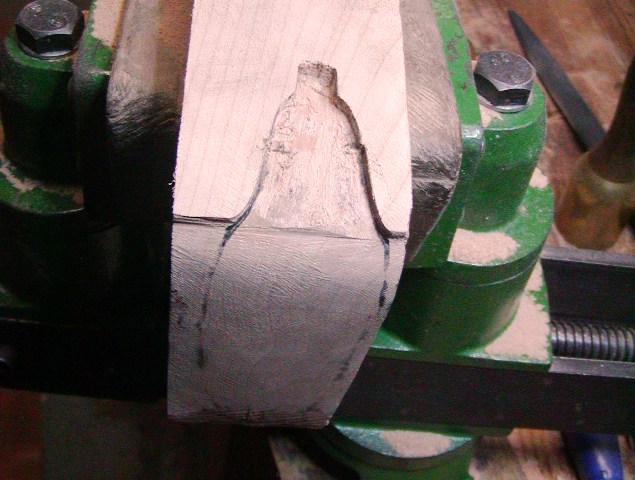
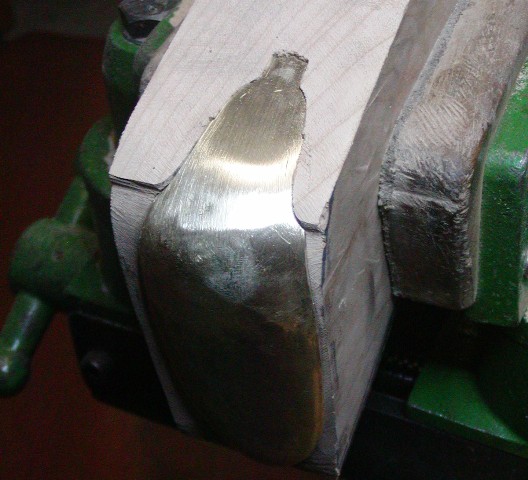
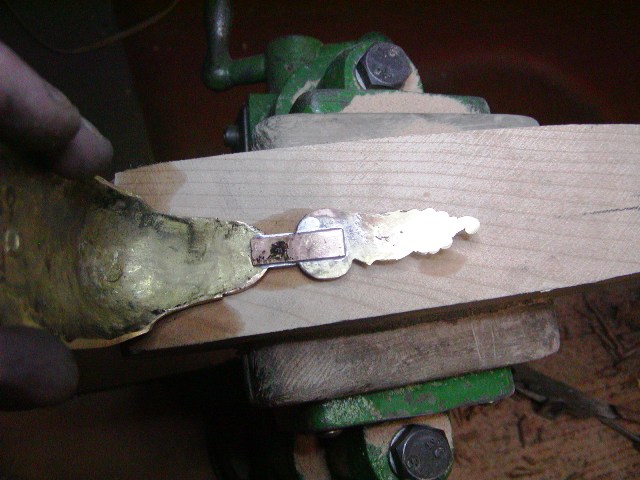
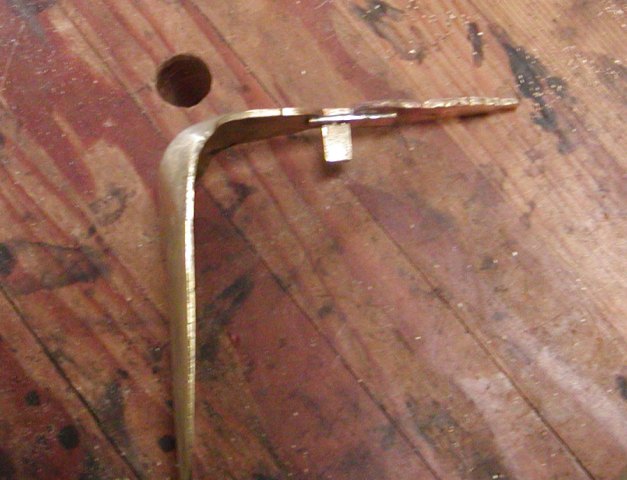
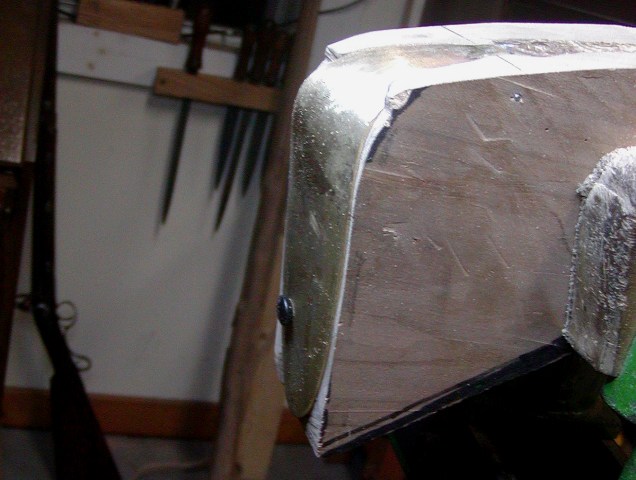
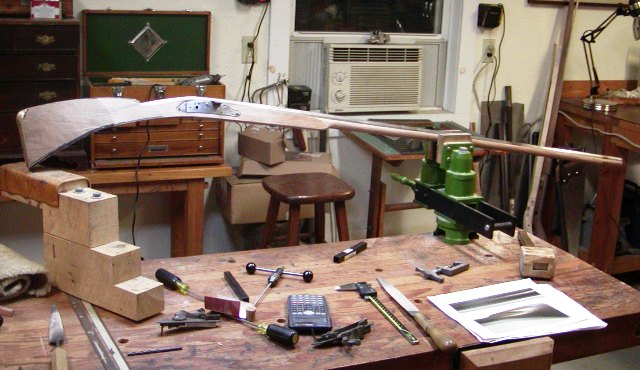
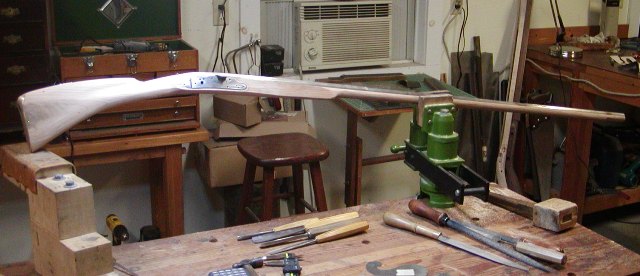
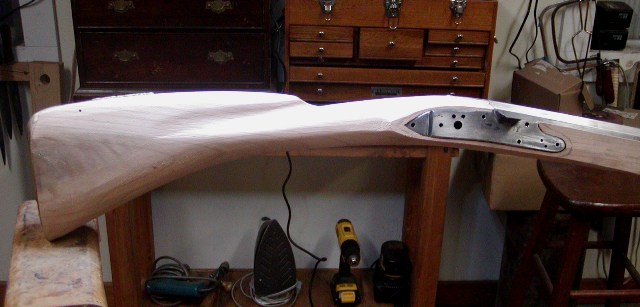
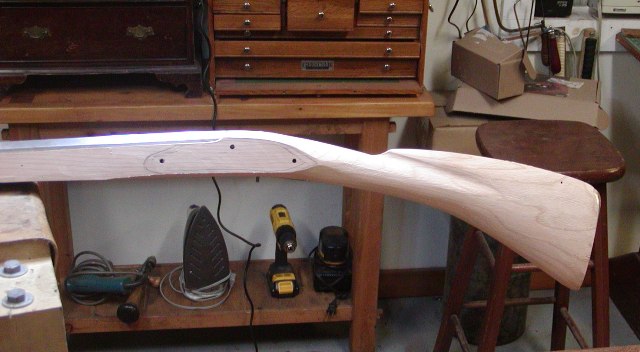
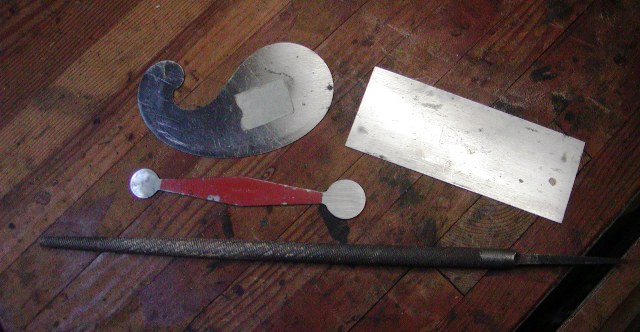
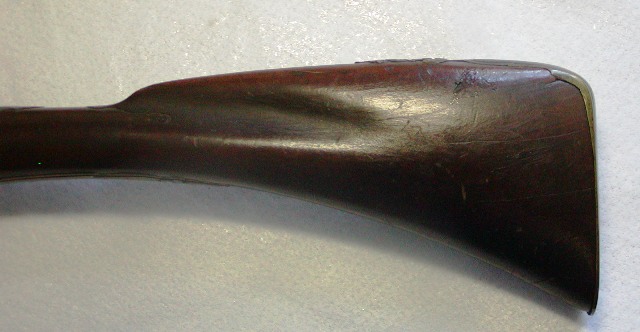
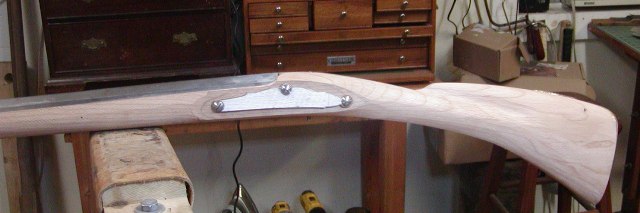
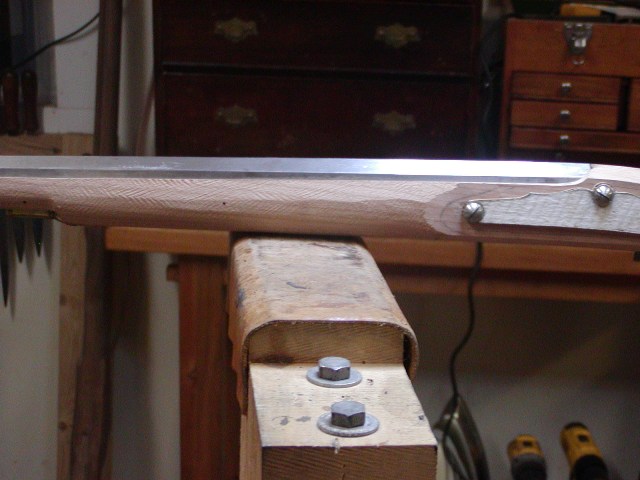
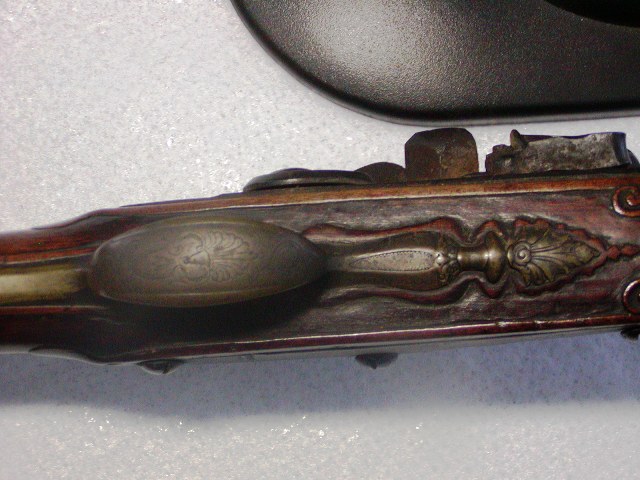
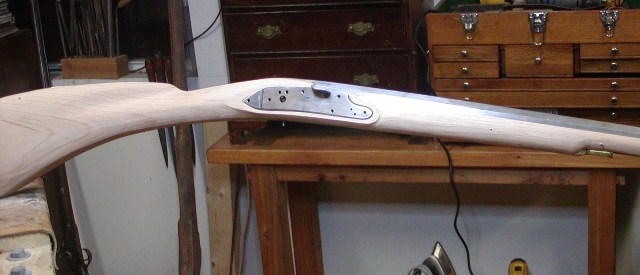
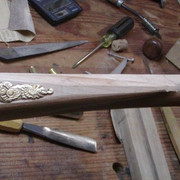
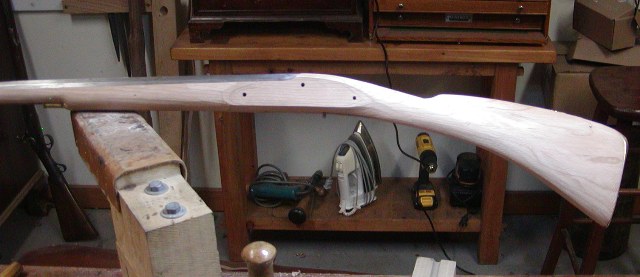
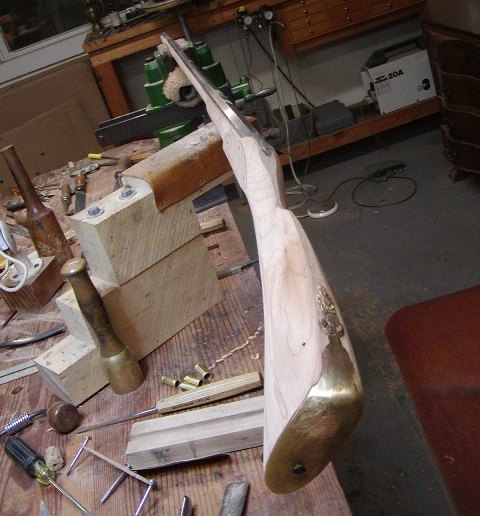
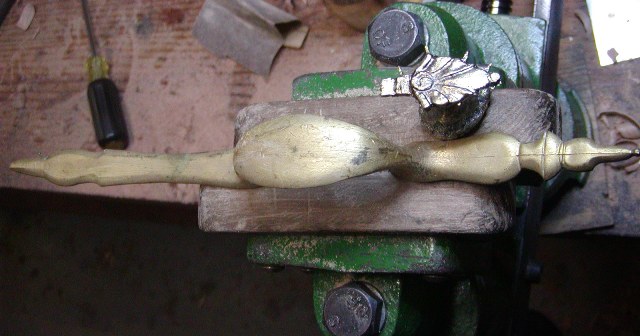
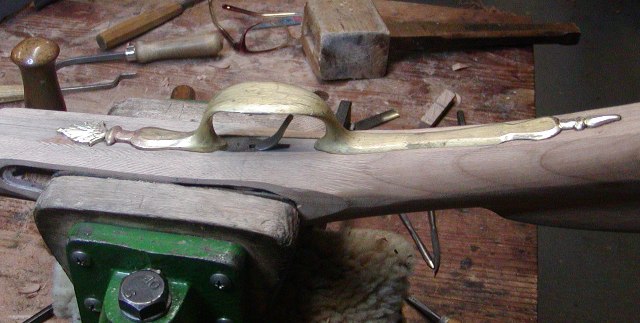
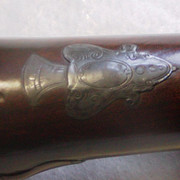
I was down for most of a week after getting my Covid 19 vaccine. It whacked me pretty hard but I am back to normal. The Hawk fowler is one of the hardest guns I've ever made. There are no components you can buy that can simply be used. Everything has to be modified extensively or made from scratch. I think I could make 2-3 other guns from rough blanks or 25 Kibler kits in the time required for this one gun. My next challenge is the butt plate. I bought a wax cast French trade gun butt plate that will provide the base. I peened and stretched it longer and wider. Then I reshaped the heel of the plate and cut off the forward finial to be replaced by one matching the Hawk fowler. To make that finial, I had to cast it. First I scaled a photo of the original finial and traced its outline and details. Then I shaped a piece of hard maple and glued a little handle on the under side. Holding the maple blank and handle in a vise, I traced the return on to the wood using graphite paper.


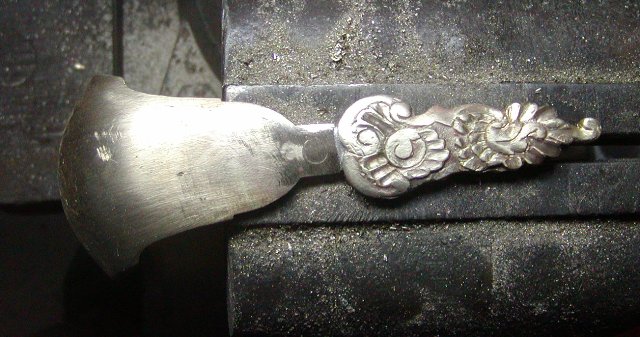
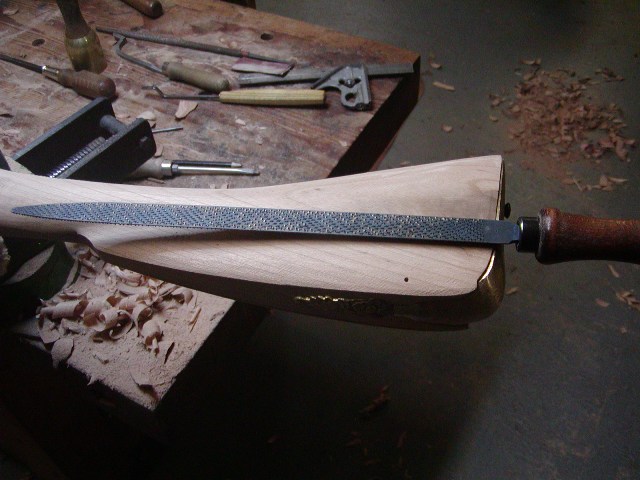
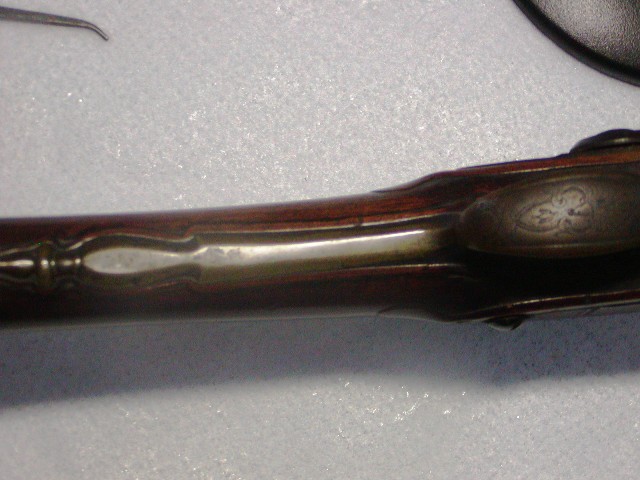
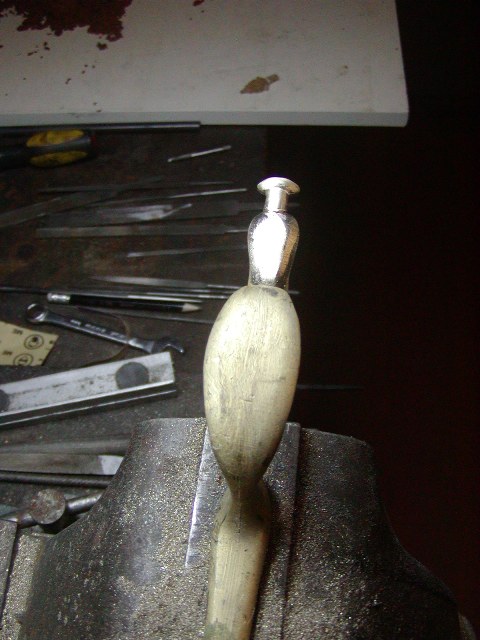
Then I carved the tang in 3D relief.


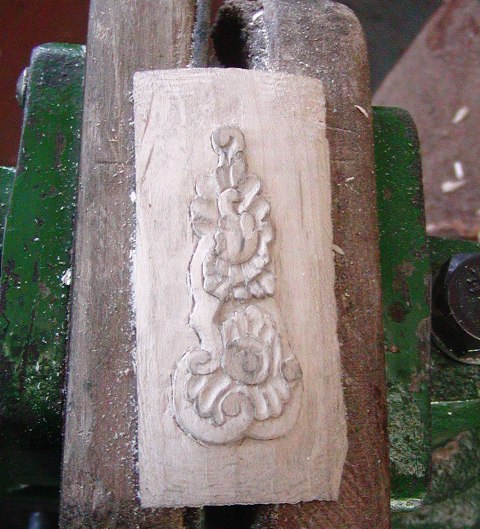
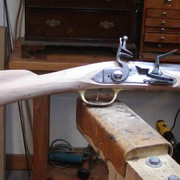
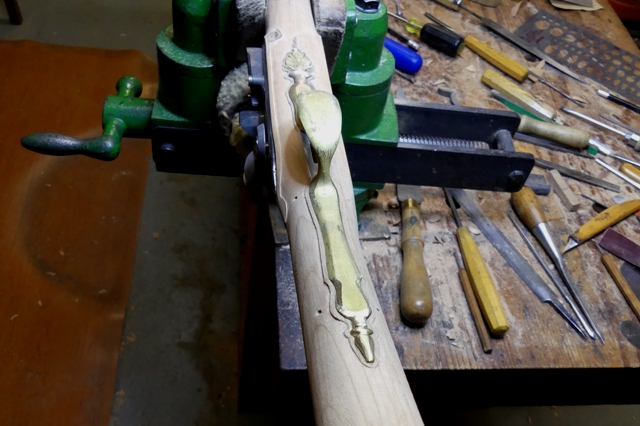
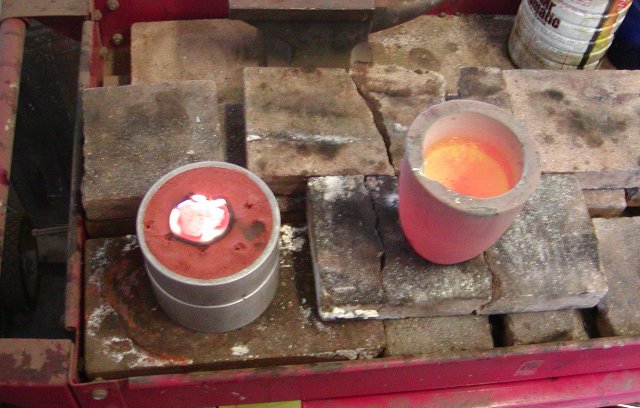
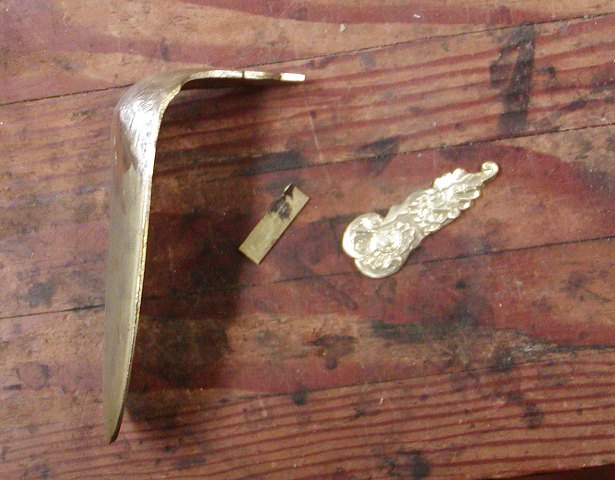
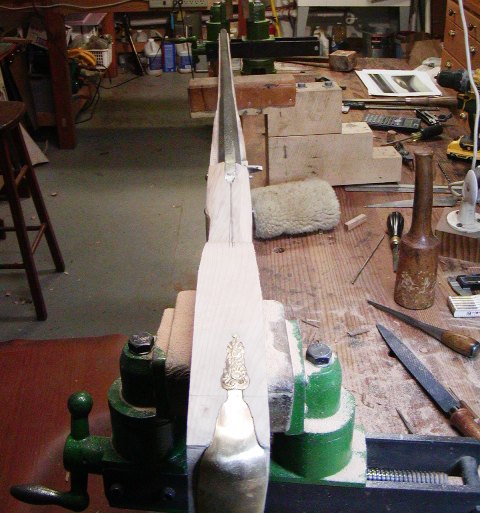
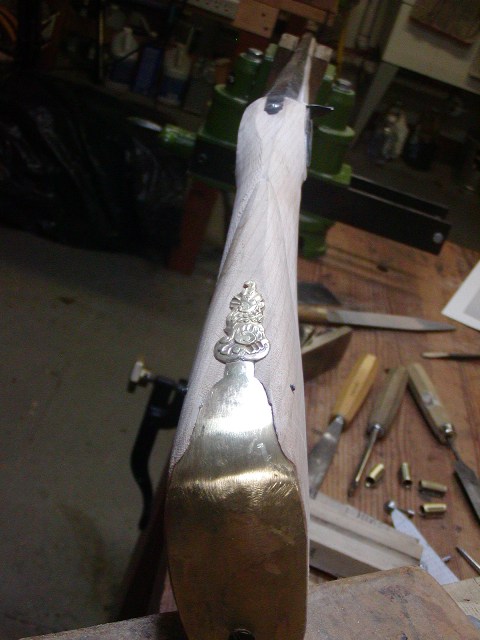
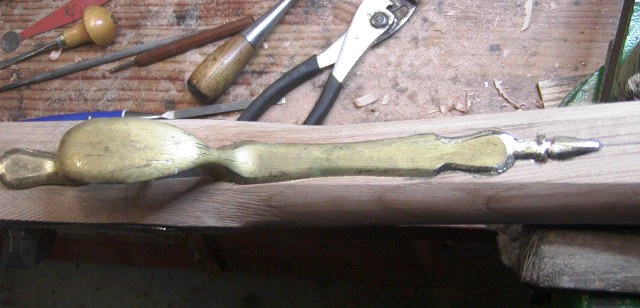
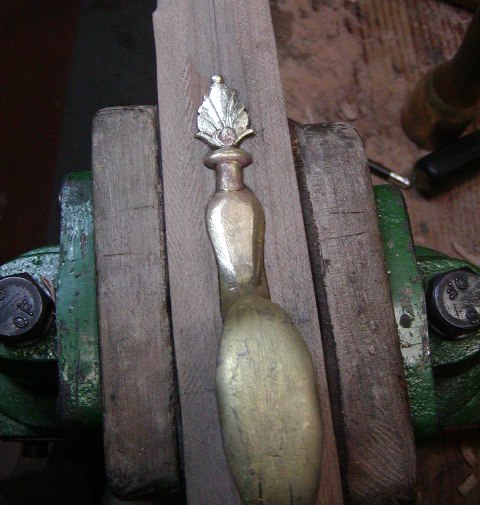
I cut off the handle and trimmed away the excess wood so I could use the carving as my model for casting. I used Delft clay to make a 2-piece mold, melted brass in my oven and poured the casting.


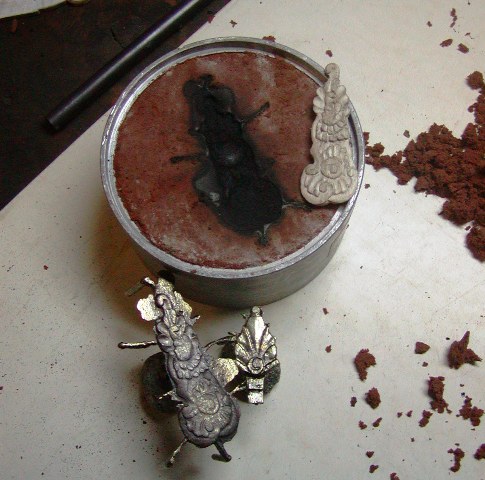
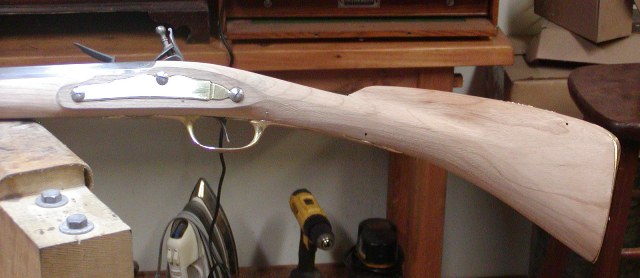
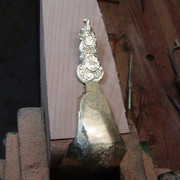
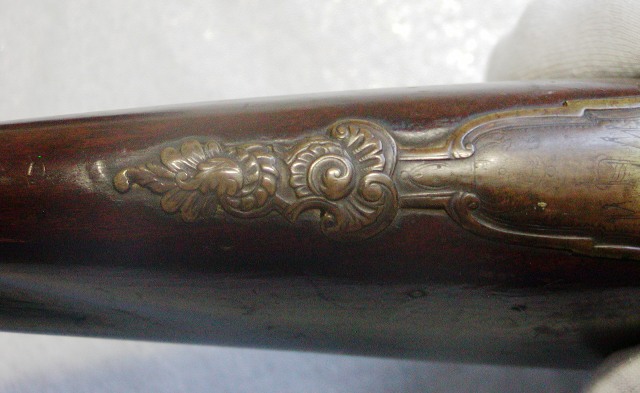
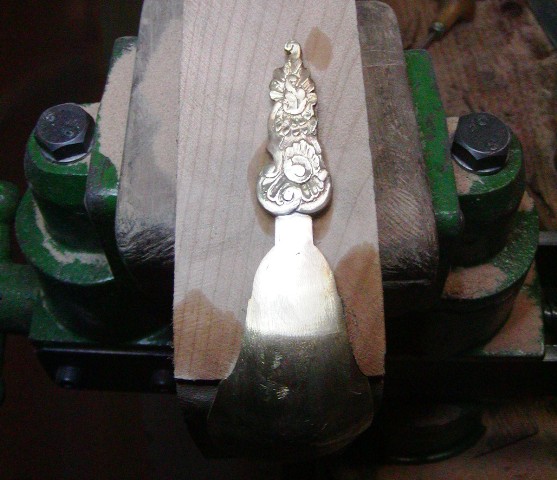
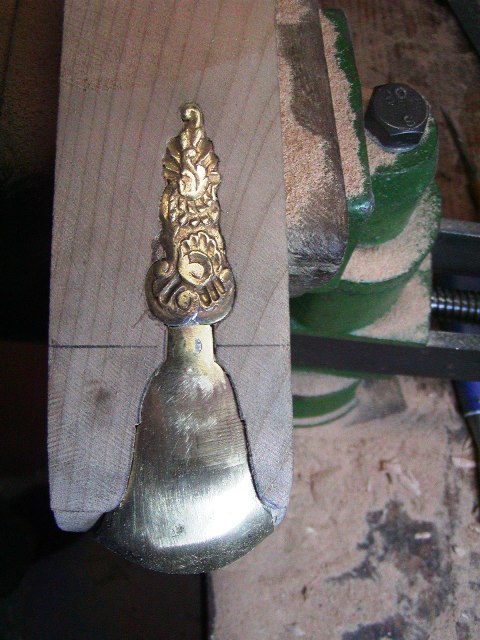
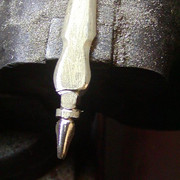
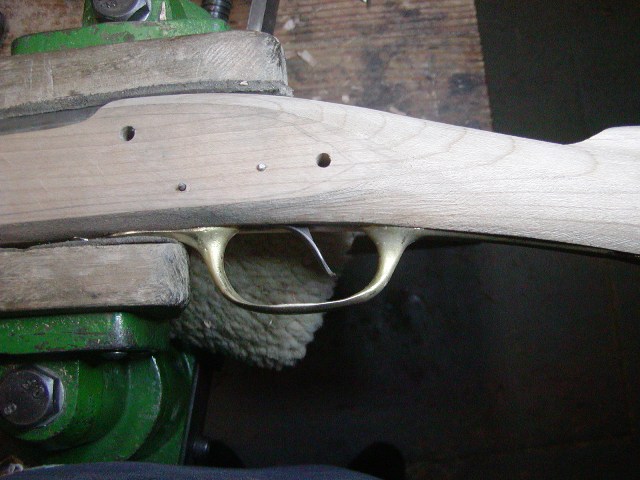
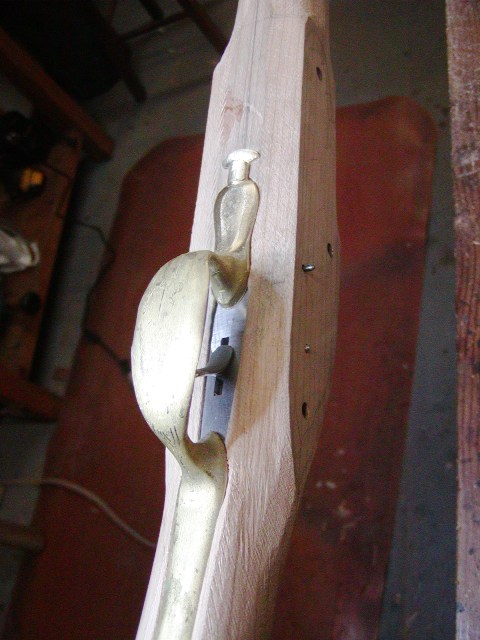
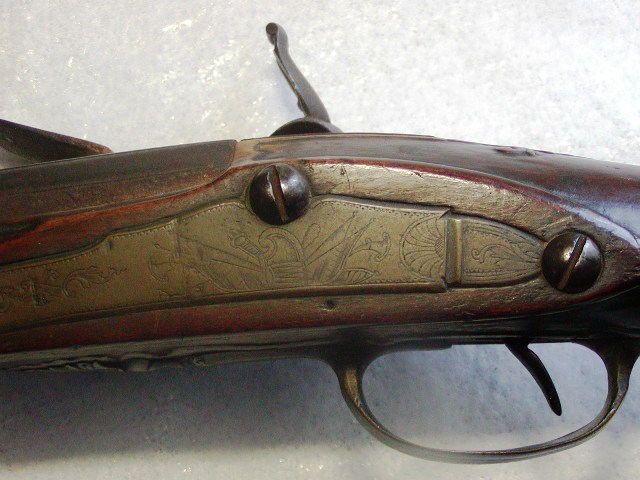
I also cast the front finial for the trigger guard, for which I had an existing suitable model from my previous Hawk fowler.


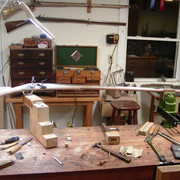
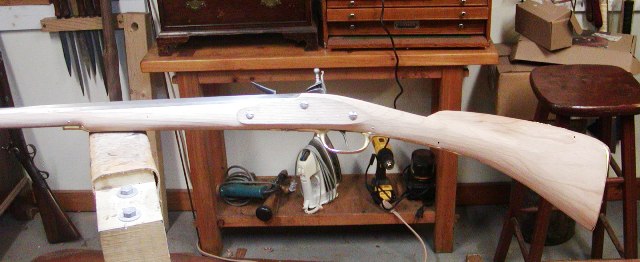
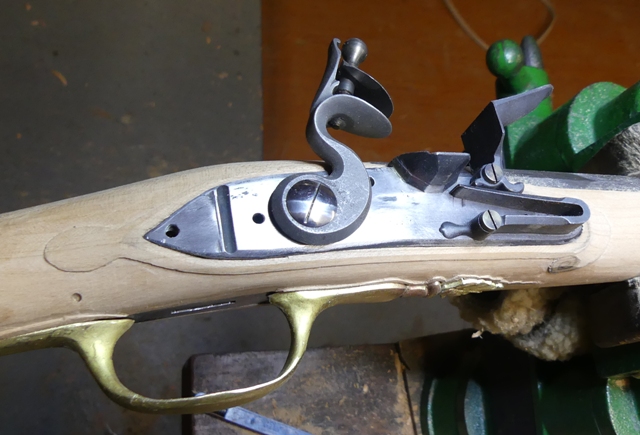
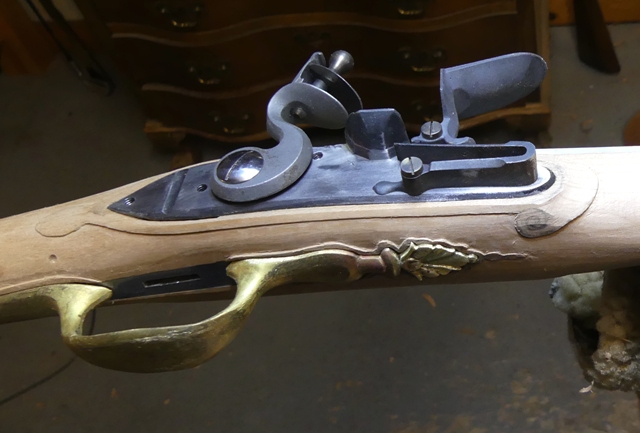
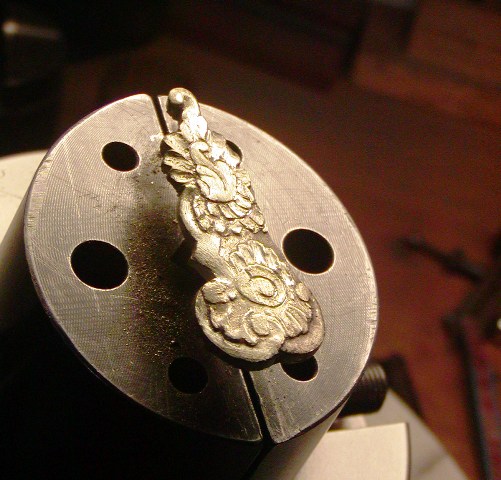
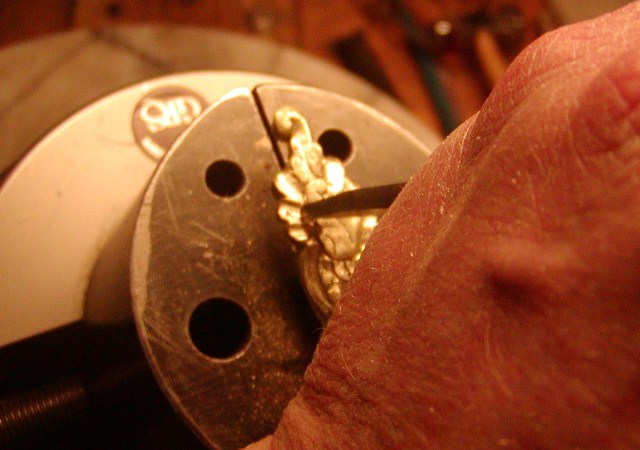
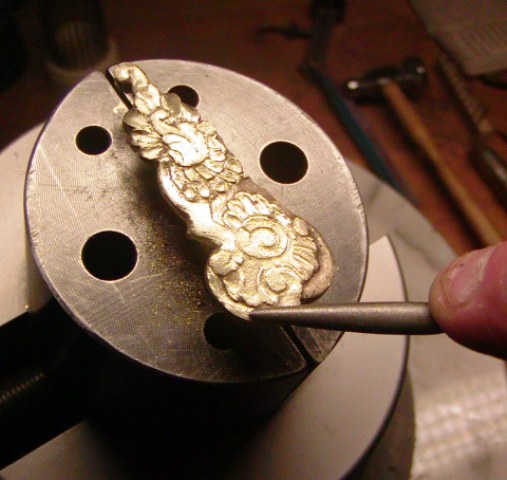
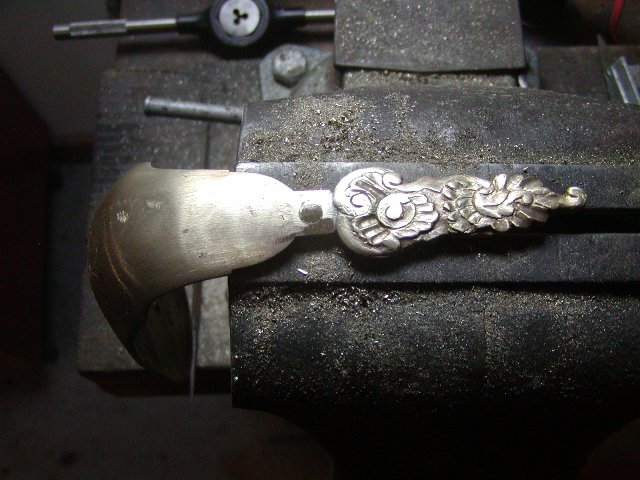
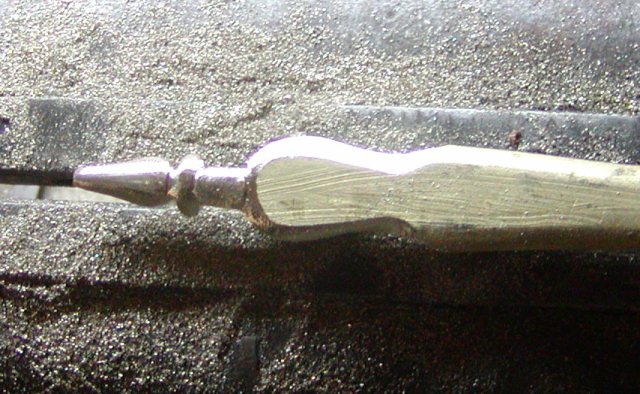
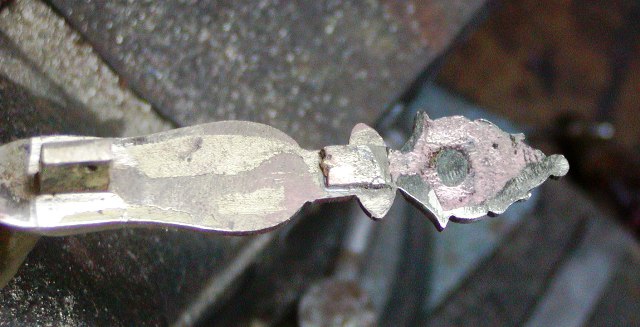
Now I need to trim the castings, glue them to a base, and then chisel the details and polish them. After that, I will show how I construct the parts.

dave
Very happy you're bouncing back.
Thank you for sharing all this with us, I know these posts take a lot of time and effort on top of what you are putting into the guns you are posting about.
 
Hi and thank you all,

I appreciate your comments and encouragement. I love the detail work and casting, chasing and sculpting metal are tasks I love to do. It adds a lot to my scope of creative expression and a feeling of self sufficiency. I had a lot of distractions today that kept me from the project. It is getting near the muzzleloading deer season in Vermont and as usual, I have a string of desperate friends coming over because their muzzleloaders don't work as well as they should and they haven't shot them since last deer season. I love them all dearly but I wish they would prepare for the season better. Anyway, I still managed some work on the Hawk fowler. I leave part of the sprue on the casting because it serves as a useful handle to hold the piece in vises. The first job is trimming the edges using a jeweler's saw, grinder, and files. Once that is done I can start refining the finial.


I use die sinker's chisels to cut and sculpt details.


In addition, I use needle files and rifflers to smooth and shape surfaces.


You can see the detailed relief forming.


I will finish it tomorrow and then take a break to visit family for Thanksgiving. I frequently mention my Vermont family, which includes my neighbors and friends. It is a wide net that includes really great people. Some years ago, two of them visited my shop and this was the conversation. I'll identify them only as "H" and "D".

H and D arrive at my shop for a visit while delivering an upright piano to the Braintree town hall. H gets out of the truck and starts telling me about his morning in a strong New England accent;

H - "I get up at forahh (4) every mawnin' (morning) and go down stayahs (stairs) to make my coffee. I do it every mawnin' and make noise just to !$@! everyone off. So I am drinkin' ma coffee and I look outside, and the cows was chewin' and licken' the baahn (barn) walls! I thought, $@#&^* why was the cows chewin' on the baahn? My son, Kobey comes down stayahs and I told him the cows was chewin' on the barn. He told me I was seeing things and I got mad."

D- "Well H you never know what you are going to see. Remember those guys in Buuurlington selling cans filled with Vermont ayha (air) to the flatlanders?"

H- "Yeaaah, and remember those guys painting moose nuggets and selling them as jewelry? And then there's old Chaahley (Charley)."

D- " Chaahley?"

H- "You remember him! He made really good pine furniture and then beat it with hammers and chains so it looked antique. Then he sold it to tourists at premium prices".

D- "Oh I remember Chaahley. He was smooth as a pane of glass but sharper than a broken shard."


dave
 
Hi Folks,
Not a big post. I went south to PA for the Thanksgiving holiday and got back home during the weekend. During the trip, I spent most of Friday driving to Dave Keck's place to drop off 4 gun projects for him to inlet the barrels and ramrods. I was too tired from driving so much that I got little done on Sunday when I got back and then we were hit with a wet snow storm Sunday night that knocked out power until late Monday. Anyway, I was back at it today. I started inletting the butt plate. This is a very complex and ornate buttplate but my strategy makes it much easier. By making the ornate tang finial separate from the rest of the butt plate, I can inlet the base of the plate easily.


Then I can attach the forward finial and inlet it as a separate process.


That makes the process so much easier. The finial will be attached to the butt plate base with a brass spline soldered underneath. A lug with rivet will then be drilled and peened into the joint creating a lug for the cross pin anchoring the top of the butt plate. Then the finial will be inlet straight down into the stock. On this gun there is no screw anchoring the butt plate at the heel. There is just the cross pin for the tang and a screw in the toe of the butt plate.


dave
It's going to be just beautiful.
 
Hi Folks,
Thank you all for your interest and comments. This is a very complex project and I need my entire tool box of skills and methods to do it.

Winter is here and it is beautiful at the shop!


I finished assembling the parts for the butt plate. First, I inlet the base of the plate.


Next, I made a spline from sheet brass and soldered the finial to the base.


Then I made a lug for the anchoring cross pin with a threaded post, drilled the butt plate and tapped the hole. I countersunk the top of the hole, threaded the lug in place and then peened the excess into the counter sink.


When peening the post, I have to be careful not to damage the cast finial. Consequently, I use a two hammer technique. I hold the ball of a small ball peen hammer on the post and strike it with another hammer. That prevents glancing and rebounding blows damaging the finial. With the lug in place, I am ready to inlet the finial.


dave
 
Hi Folks,
The butt plate is in. I cannot do it any better than this.


As I wrote previously, the plate is anchored by the cross pin under the return and a screw near the toe. Those are sufficient to pull it in nice and tight to the stock. I used a 3/32" pin for a bit of extra strength. Eventually, the decorative portion of the tang (return) will sit very proud of the wood surface. I may file the tops of the edges down to meet the wood. Then I will final finish and detail the finial. Next up is shaping the butt stock. The next time you see this gun it will look very different. You can see the forestock is very slim. Actually, it is still pretty pregnant but I will not slim it further until I am ready to carve the double bead borders along the barrel and ramrod channels. I need to fabricate the trigger guard and side plate. I'll do that soon.


dave
 
Hi Folks,
I had a fun day. I am always excited when I start shaping the butt stock of any gun, turning the rough square lines into pleasing contours. I have a tendency to waste time adjusting and tweaking stock profiles when all is still squared up. It took time for me to learn to trust my plans, drawings, and tracings and put off fussing about the profiles until I actually start 3D shaping the stock. In the process of shaping, it is incredibly helpful if you have the final image of the gun clearly in mind and can see the final gun in your stock blank. That requires a lot of experience and becomes easier if you make the same style guns over and over again. I jump all over the board with styles so I am constantly in learning and SEEING mode. Everyone can look and examine things but not everyone sees them. You can look at a painting that pleases you but seeing it is focusing on the uses of color, brush technique, and how they are integrated that makes the work so appealing. The Hawk fowler is a subtle masterpiece and is as hard to "see" and execute as any Lehigh Valley rifle.


I roughed out the stock contours today. They will be refined greatly as I proceed but you can see the elegance of the gun. Despite the apparent straight wrist, it shoulders very well and should be a very comfortable shooter.

There is no one way to do this initial shaping. I've watched Ian Pratt use a hatchet to precisely carve out a rough butt stock. Others use draw knives and spoke shaves. I use a selection of gouges and shallow sweeps powered by my brass headed mallet to rough out the stock.


Then I use pattern maker's rasps. In the photo below are a coarse sapphire cabinet makers rasp and a gunsmith's rasp by Liogier. Below them is an Auriel medium cut pattern maker's rasp and finally a fine cut Dragon rasp. These are invaluable tools. The long gunsmiths rasp allows easy shaping of the butt stock because it can span the length of the stock without your hand hitting the butt plate.


I also use scrapers and round files.


Here is the original gun so you can see where I am heading.


dave
 
1st of all, this is NOT a criticism. I am way to uneducated in these things to criticize,,, and I'm not even saying I don't like anything here. Just curiosity.
Screenshot_20231202_101743.jpg

Does this arching curve on the bottom of the stock suddenly get "tighter" (increase radious) at the point circled? Or is it an illusion of the pictures?
 
Hi Brokennock,
Don't hesitate to criticize or critique. I am not brittle or prickly. You have a good eye and you will see that the arc is much more smooth in the next set of photos I post. Remember, I wrote previously that I used to fuss about the profile when the gun was still squared up. I don't anymore and I start fussing as I shape the stock contours and can start to really see what the gun is like in 3D. So I am getting to smoothing the lower arc actually today as well as removing more wood at the trigger plate. I keep checking my dimensions with the measurements of the actual gun and am getting close but still have quite a bit more wood to take off. Also, the stock has 1/2" more drop at heel than the original so it fits the owner better and he can obtain a firmer cheek position on the stock.

dave
 
Hi,
Any time you can watch Ian Pratt work, you will be awed and learn a lot. More shaping done. I am converging on the final shape but I do it slowly. You can take wood off but it is hard to put it back. The bottom arc of the butt stock will be smoothed a little more but I will leave it for now.


I started rounding the forestock and you can see how slim and tapered it is. All the components are packed really tightly. There is no extra room.


Now I have to turn this commercial French trigger guard and cast finial


into this:


dave
 
Hi Brokennock,
Don't hesitate to criticize or critique. I am not brittle or prickly. You have a good eye and you will see that the arc is much more smooth in the next set of photos I post. Remember, I wrote previously that I used to fuss about the profile when the gun was still squared up. I don't anymore and I start fussing as I shape the stock contours and can start to really see what the gun is like in 3D. So I am getting to smoothing the lower arc actually today as well as removing more wood at the trigger plate. I keep checking my dimensions with the measurements of the actual gun and am getting close but still have quite a bit more wood to take off. Also, the stock has 1/2" more drop at heel than the original so it fits the owner better and he can obtain a firmer cheek position on the stock.

dave
Thank you.
It does look different in the next set of pictures.
 
Hi,
More done. It seems for this winter, Monday is "power outage day". For the second consecutive weekend, wet snow on Sunday night causes power to go down. Our linemen are terrific but the power infrastructure is decrepit in many places. This is the 12th power outage lasting at least most of a day that we've experienced this year. Ironically, my shop with all its windows is well illuminated during daylight particularly during winter. The low angle sunlight shines in more brightly during winter than in summer. So I got work done even before the power came back on. I did more finishing of the stock including at the rear pipe.


The slimness and elegance of the gun is becoming apparent.


I had a problem. I installed a pin to hold the barrel at the lug nearest the muzzle. Stupid me, the barrel was not fully seated because of a wood chip but I did not notice. The pin would not go in so I figured maybe the wood had moved because of low humidity and colder air. So I tried running a drill through the hole to clear things up and it came out the other side too high because the barrel was not fully seated in the stock. So stupid. Anyway, I filled the misdrilled hole and will show how I hide that kind of mistake in a later post.


You can see there is not much wood on the sides of the stock along the barrel.


Even this will get thinner but after I cut the double beaded moldings along the top of the barrel channel and the ramrod groove. I worked preparing the trigger guard for inletting. There are no commercial guards that match the original so like the butt plate, I employ a strategy of reshaping a commercial product and add cast detail based on the original gun. Here is the what I start with.


And here is my progress modifying it.


I've been skilled with files since I was 10 years old. My Dad taught me.

dave
 
Hi,
I inlet the trigger guard without the front finial. I'll sculpt and polish it and then attach it to the trigger guard but the rest of guard gets inlet first. I also pinned the trigger. INlet the front of the guard first, pin it and then inlet the rear working in stages backward. As the guard settles into the wood there is a tendency for the rear to migrate forward. This guard has swells so it cannot migrate forward or move at all. Consequently, I worked backward and set the guard in slowly.


dave
 
Hi,
Finished constructing and inletting the trigger guard. It will need some surface sculpting and cleaning up but I installed the front finial and then trimmed all the edges so it could be inlet. It came out very well. You can see the tab cast on the finial that serves as the spline connecting the parts. It offers a lot of surface area creating a strong solder joint. I used low temp silver bearing solder (Stay Bright), which is plenty strong for the purpose.


Once soldered, I final shaped and cleaned up the edges, and inlet it.


Next up is making the brass side plate and the silver wrist plate.


dave
 
Hi Folks,
I got a bit done but I have to remake the side plate. I don't have an exact tracing of the original but that would not help because the lock is a little smaller than the original and the lock bolt spacing differs a little. I cut out a design that I thought looked right and used it as a template to saw out sheet brass. But when I shaped the plate and then put it on the stock, it doesn't look right. I have to go back to the drawing board to create something that captures the shape and details of the original but is sized for the lock. I'll get it right and I'll be able to use the side plate I made for something else. Anyway, I refined the stock a little more, shortening the comb and making the wrist longer based on dimensions of the original. It is really starting to look right but I have to get the side plate proportioned just right to look like the original.


dave
 
Hi,
Well I made a second side plate and it looks about right. It is a little tough making it look exactly like the original because the original lock is taller at the bolster and the original barrel is bigger at the breech. Consequently, the spacing of the lock bolts is different. I made the Tulle lock taller by welding on steel but I could not recreate the full height of the original because that would have brought the top of the bolster up almost as high as the top of the fence on the pan. There is only so much I can do to copy the original. Anyway, the plate looks right for the gun and is close to the original.


dave
 
Hi Folks,
What a weather roller coaster again this year. High temps and heavy rain and then a plunge below freezing, snow, and then rising temperatures again. At least this time we didn't lose power. This is the kind of winter weather I left behind in Ketchikan, Alaska.


These are the first pictures with my new camera. I told my brother, Nils, I needed a new digital camera. That was calculated because I knew he would take that on as a mission, do incredible homework, and get me exactly what I needed. He sent me a Panasonic Lumix DMC-FZ300 as an early Xmas present and it is perfect. I have the best brother in the world. Here is my first "portrait" photo of Smart Dog 2 (Willow).


I started carving around the trigger guard and lock panels. The Hawk fowler has a unique carving feature not duplicated on any known New England gun. There are beautiful volutes that terminate the moldings around the front of the lock and side plate on the bottom. There is also a carved molding around the trigger guard. This is not easy to execute in cherry because the moldings are fragile. I would think nothing of it if I was carving sugar maple or English walnut but cherry is not very strong and crisp, delicate edges often crumble. Anyway, the work is going well but I have to be very careful and my tools scary sharp.


dave
 
Back
Top