• Friends, our 2nd Amendment rights are always under attack and the NRA has been a constant for decades in helping fight that fight.

    We have partnered with the NRA to offer you a discount on membership and Muzzleloading Forum gets a small percentage too of each membership, so you are supporting both the NRA and us.

    Use this link to sign up please; https://membership.nra.org/recruiters/join/XR045103

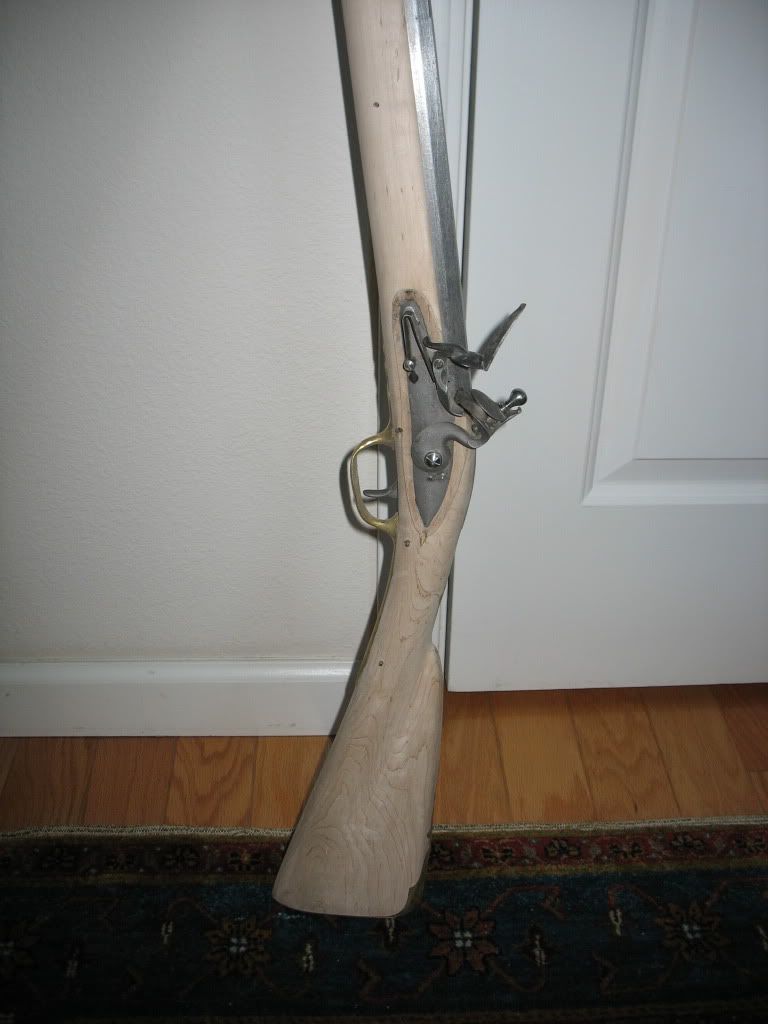
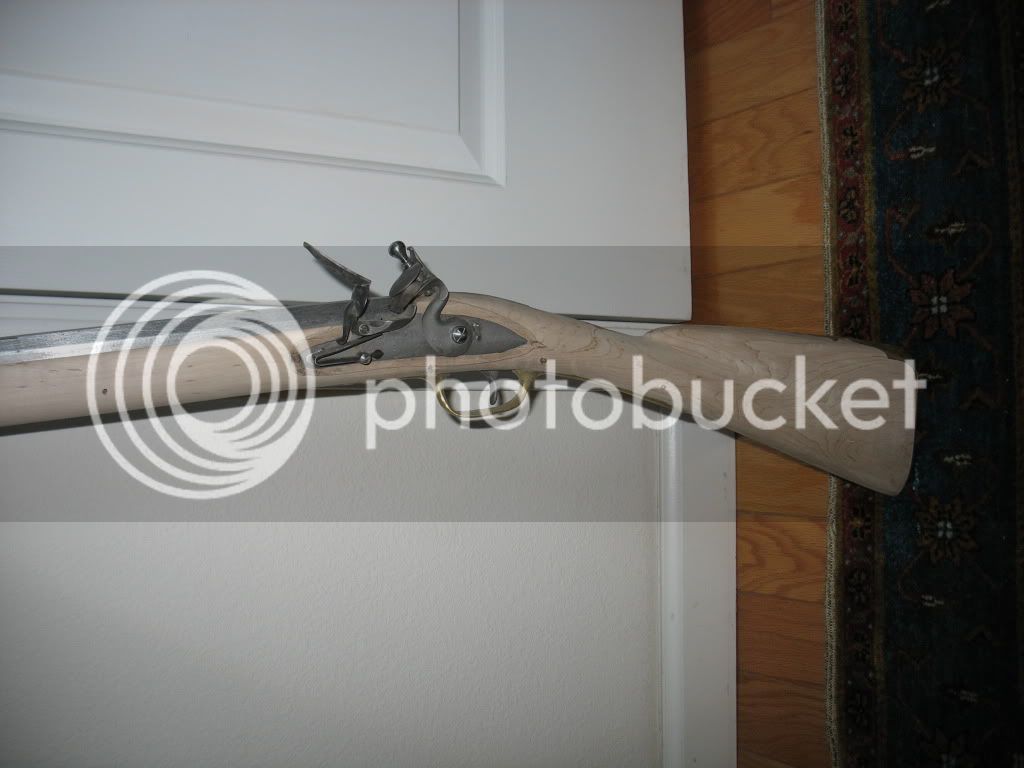
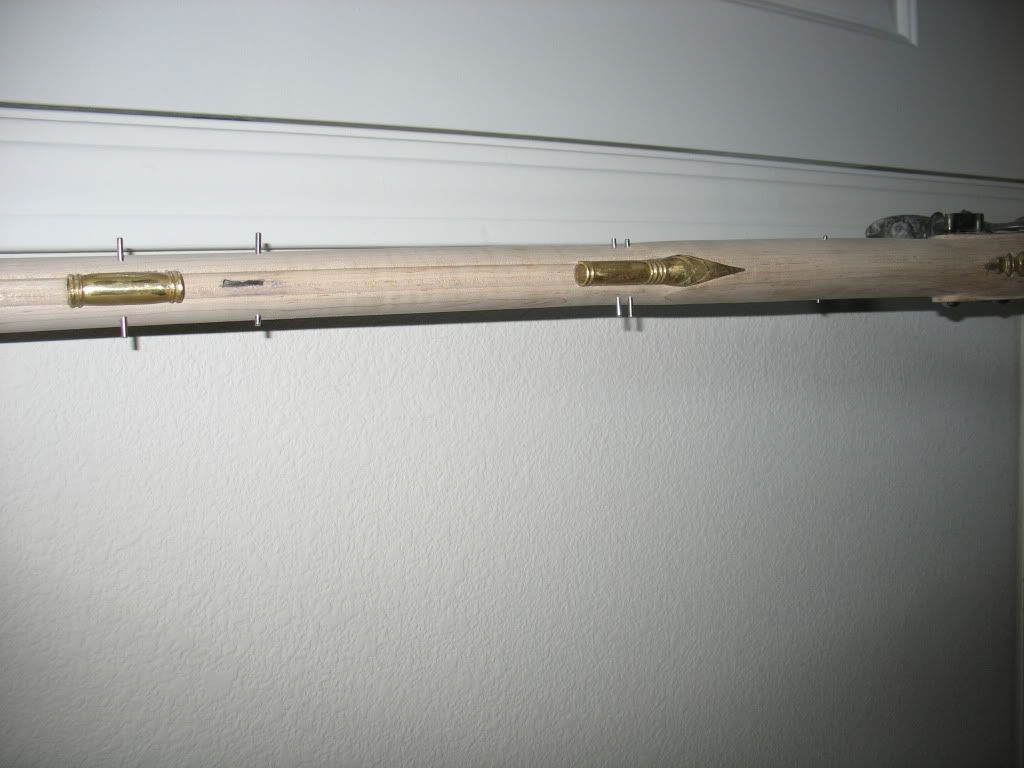
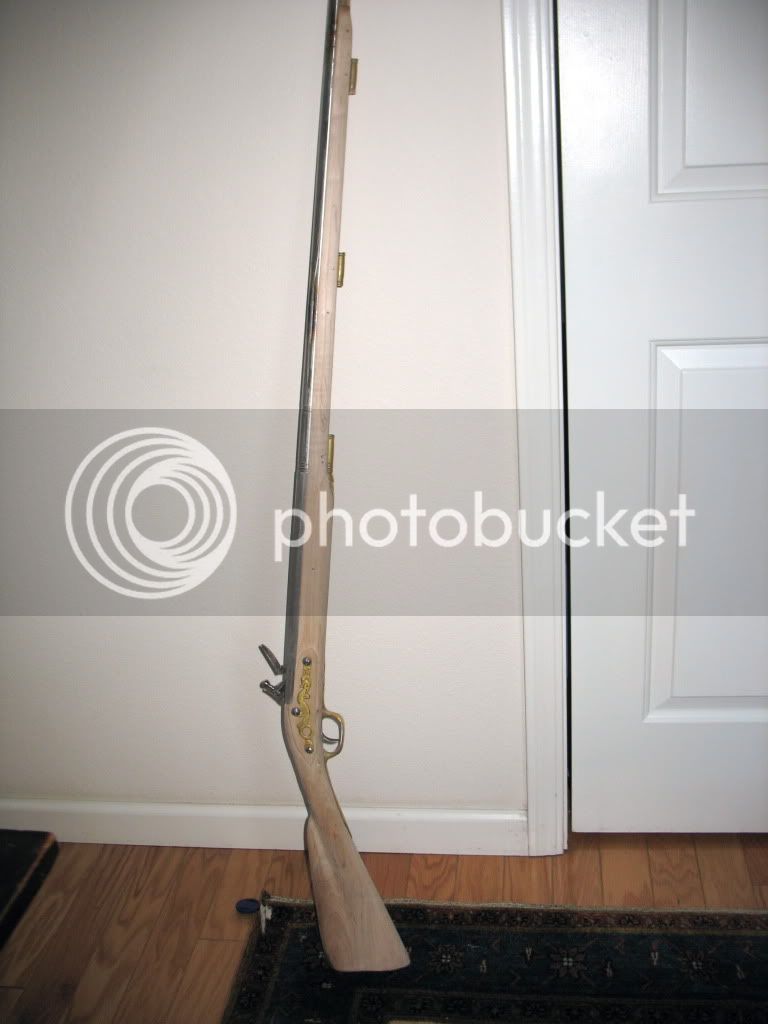
Is this ready to finish?

Muzzleloading Forum

Help Support Muzzleloading Forum:

This site may earn a commission from merchant affiliate links, including eBay, Amazon, and others.

George91946

40 Cal.
Joined
Jan 7, 2010
Messages
159
Reaction score
0
Thanks again everyone for sharing your experience and expertise. I love this forum.

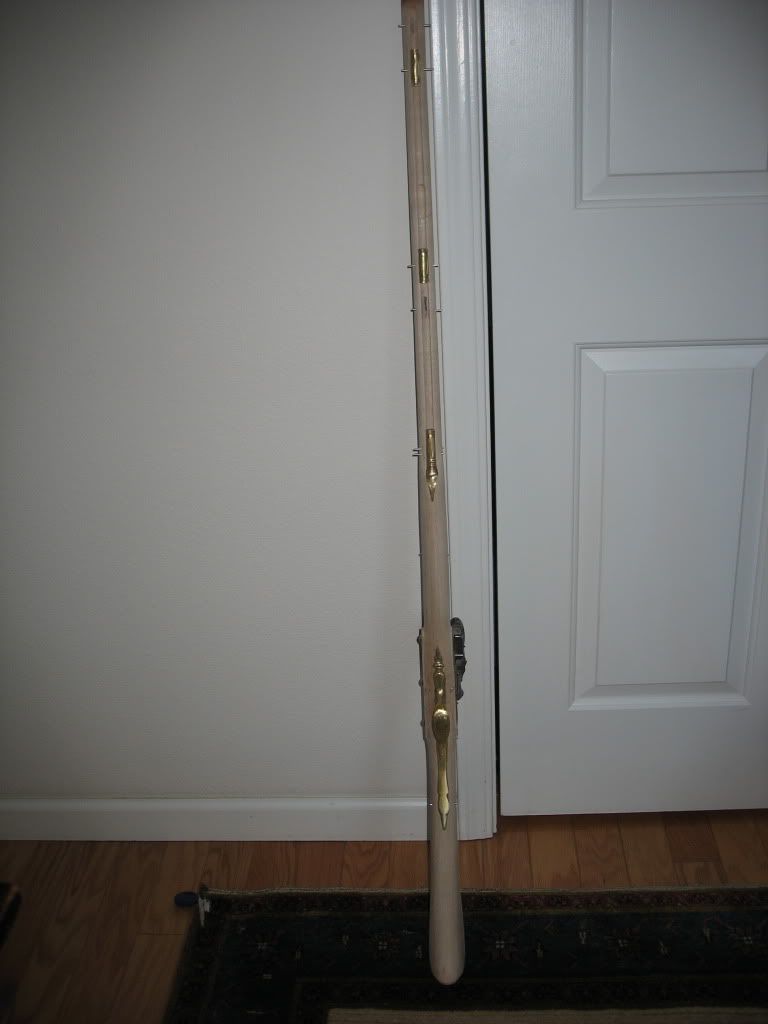
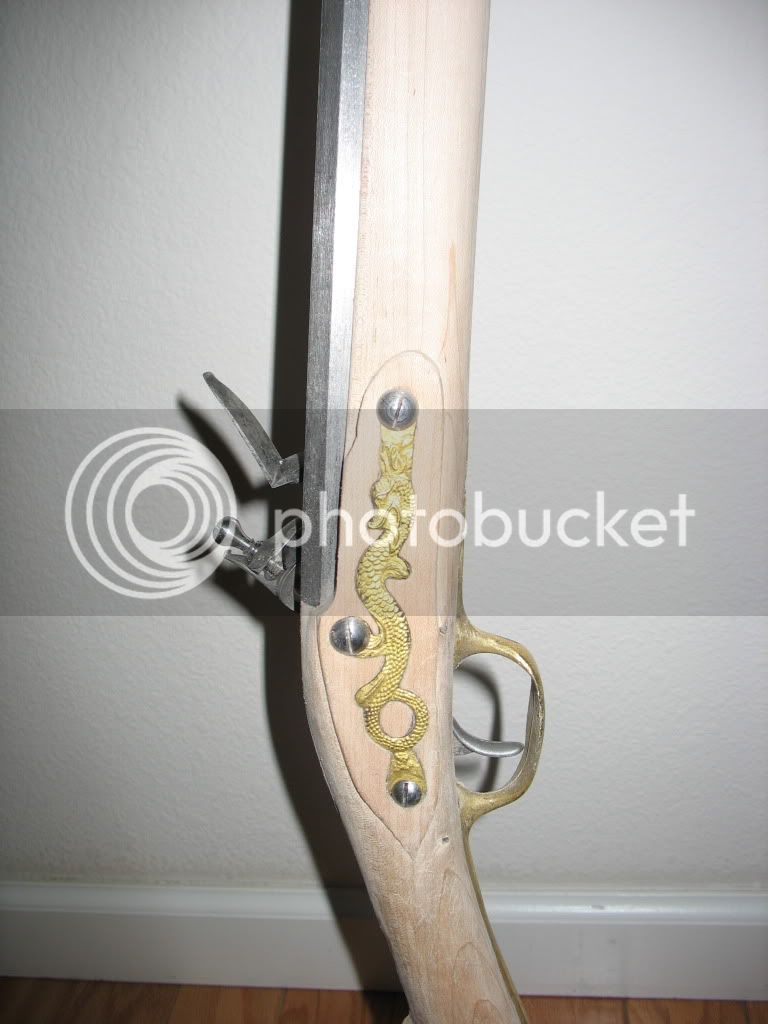
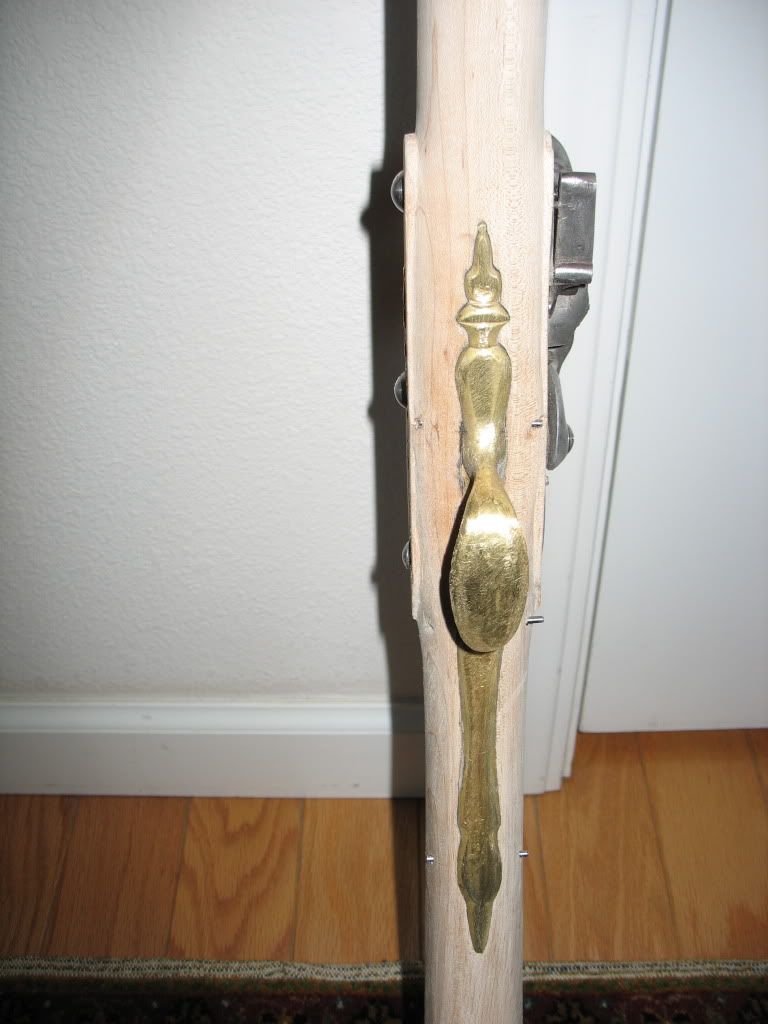
I'm making a hybridized fusil D from some purchased parts and a few scraps left over from other projects. Was going to make most of the hardware myself, but wanted to shoot it before I got old and feeble, so I opted to purchase most of the stuff that I didn't already have. I used a serpent tradegun sideplate here because I had one already, and I wanted to try inletting the complex shape. I had lock parts on hand from other projects that I pieced together. Ordered a frizzen and tempered it (source of a different post topic).

The stock was purchased as a "pre inlet" with no lock mortise cut, But it had a deeply cut pre inlet on the left side panel for a side plate that fit a different lock than the one that I had. So that accounts for the lock slightly forward and the small gap in the nose inletting (it was already there from the preinletting).

Wanted to try a nose piece so I put one on. Sort of like a "frankingun". But the barrel is inletted properly and the lock bolts are secure and square.

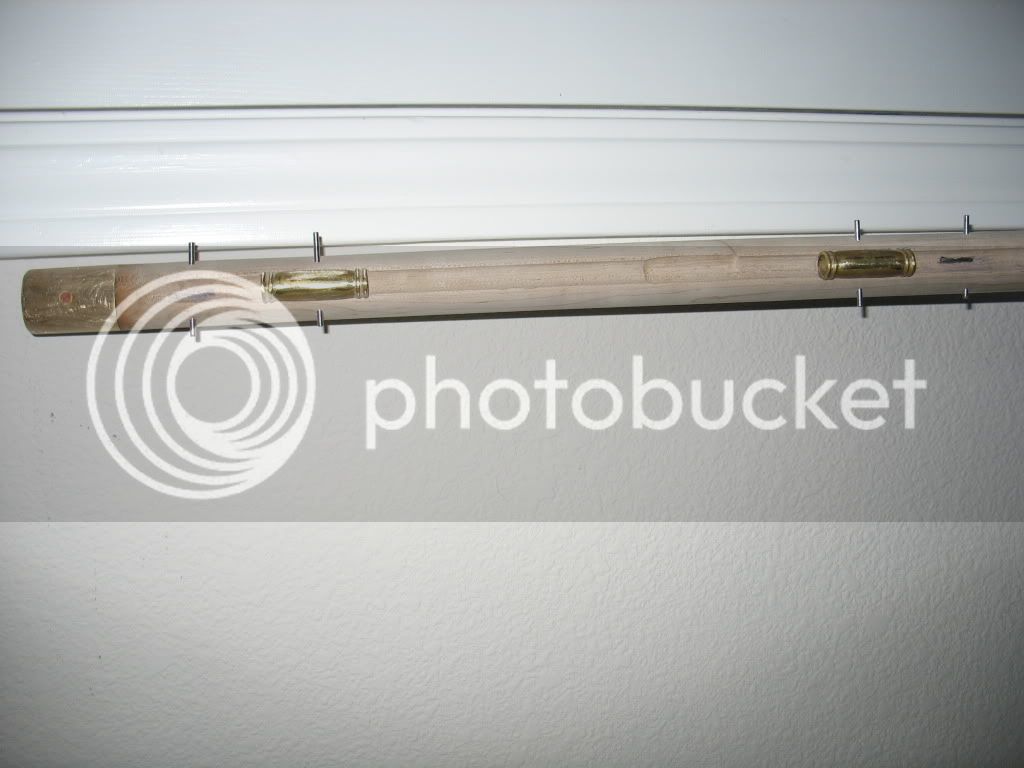
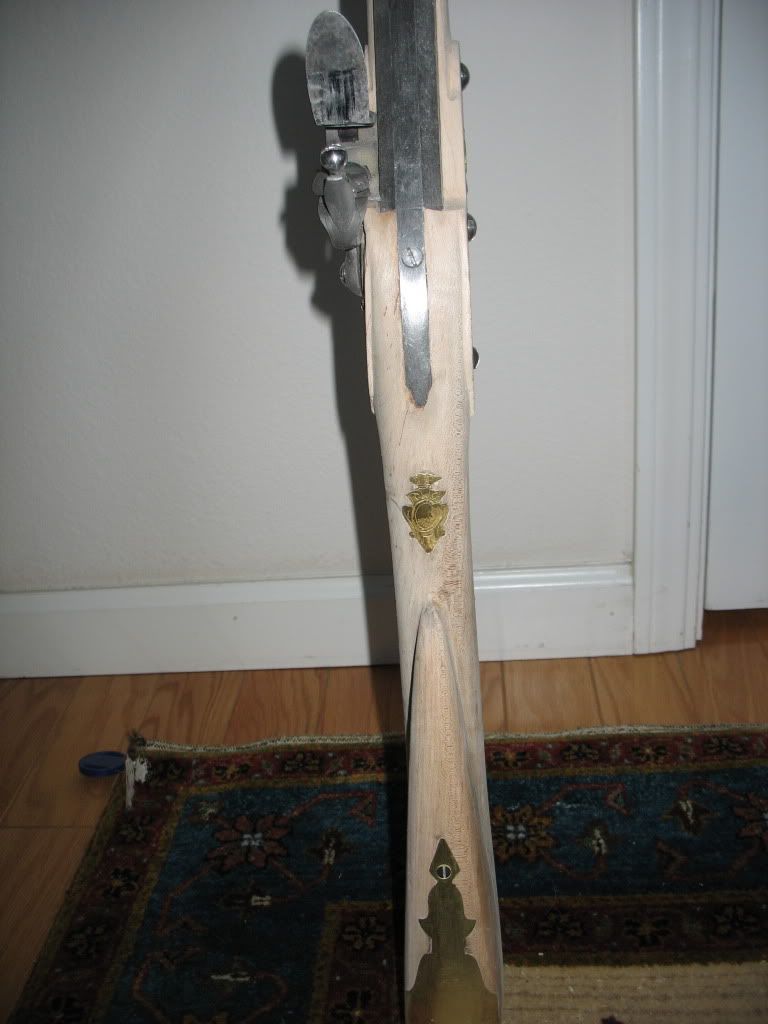
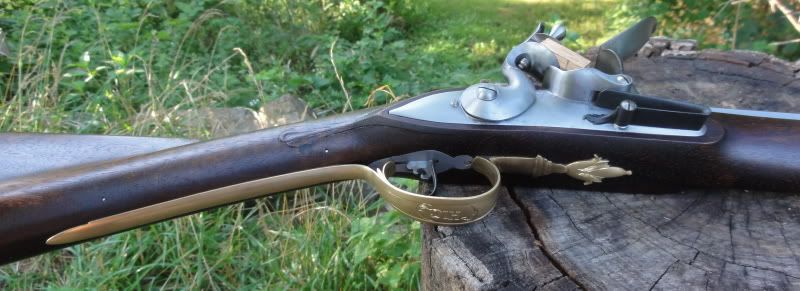
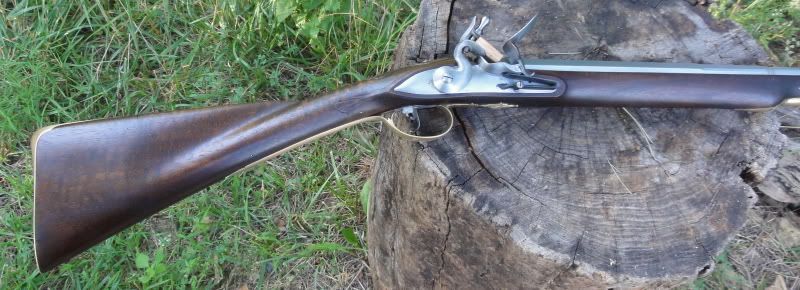
Otherwise I'm hoping that I'm ready for final finish. Could you please look at the photos and tell me if I need to do anything else on the build?

Thanks

Lisle George
smoothie4.jpg
smoothie7.jpg

smoothie6.jpg
Smoothie1.jpg
smoothie3.jpg
smoothie9.jpg
 
Looks good to me. It’s all up to you in the end.
I would maybe polish the trigger guard a little more.
Dewisker it and have a go at a finish.
 
Wash the stock down with some denatured alcohol. It will show any gouges, grooves etc that may need smoothed and will help whisker the stock. It will also wash any inlet black off. Then you can decide. Oh yea make sure you take it outside in daylight, that tends to help see the parts that need more attention.
 
Sir :thumbsup:
I like it and really like the fact that you got the lock on the 'correct' side! I am hoping to have a left handed fowling piece this coming year.
Macon
 
No, you really should work on the lock panels and better define them. Take some time and look over other guns and pay attention at how they look. You don't want to finish this gun with the lock panels the way they are.
 
I agree with Macon, you have the lock on the correct side! Nice job on the gun. When you do get it finished, post some more pics for us to admire!
 
I like it all but for the lock pannels;. Study all the close up pics you can find of this area and you should be able to make them look right.
Good luck Bob
 
Yup, you need to do more sanding around the areas where end grain appears, lock panels, comb of buttstock, places like that. I can see some divets around the lock panels in the pictures and if you can see them in the pics there has to be some the pictures don't show. The biggest mistake for new guys is stopping their sanding too early.
After rasp and file work ( I use files a lot on wood) it's 100 grit, wet stock to raise grain, 120-150 grit, wet stock, 180 grit, wet stock, 220 grit, wet stock and I quit at 320 grit, maybe even 400. When stain or reagent hits those end grains it will muddy the finish, that's why you want them slick
 
Nice job on the sideplate inlet. If it were me, I'd lower the top stock line above that panel so it was a straight line back to the breech. Same on the lock side, but I can't see how that line hits the lock. Could radius the line up to the top of the bolster, but I don't know how the big boys do it.
 
Lisle, I hope you don't think any of us are "piling on" so to speak.I've never been big on critiquing others work, but back when I started out it was the more experienced guys who helped me immensely . Notably by dear friend and mentor Mike Money. Now might I interject one small tip for the future. Smaller pins- barrel, thimbles,guard etc.I save the pin left from pop riveting 1/8 rivets for this.
 
Speaking of thimbles... from the pictures, it appears they are standing proud from the rr channel. Are they inletted down far enough to get the rod through smoothly? It could just be the photos.
 
I'm with them fellows. The line around the lock and side plate panels are too sharp. Finish the lock side first. It needs to be smooth transition from the stock to the panel. Hard to get across with words, maybe this will help.

SIH-3.jpg


Scotts40-02.jpg


The flat part of the panle doesn't have to be very wide to do it's job of holding the lock.

After you got the lock side (lock side always comes first) done to your liking make the side plate side the same.

Another thing I will add is the transition from the comb to the wrist should follow the bottom of the stock. This is also a hard place to get smooth, so give it extra time before you start your finish. Please post more pictures before you move on to color, you have done a good job of inletting and that gun could be realy nice when finished. There a lot small details to deal at this point.

Bruce
 
I forgot the picture of the butt end, this shows what I am talking about. It also will help if you take off some of the hump behind the breech. This will smooth the transition from the barrel through the wrist. Just a little more pleasing to the eye.

SIH-2.jpg
 
If it is the way you like it, it's done. It looks great to me. :grin:
Don't sand too much just 150 is OK.
 

Latest posts

Back
Top