- Joined
- Nov 26, 2005
- Messages
- 5,223
- Reaction score
- 10,881
Hi,
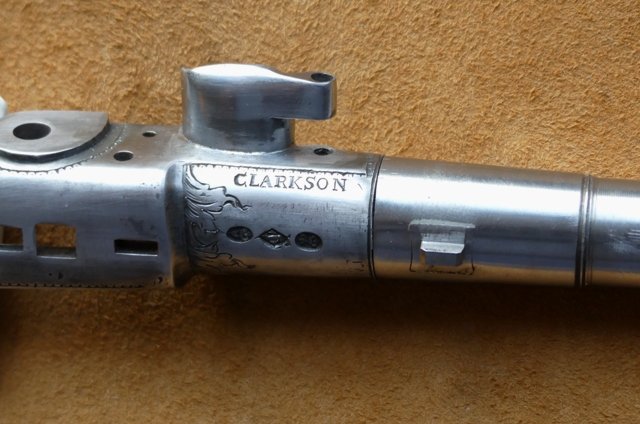
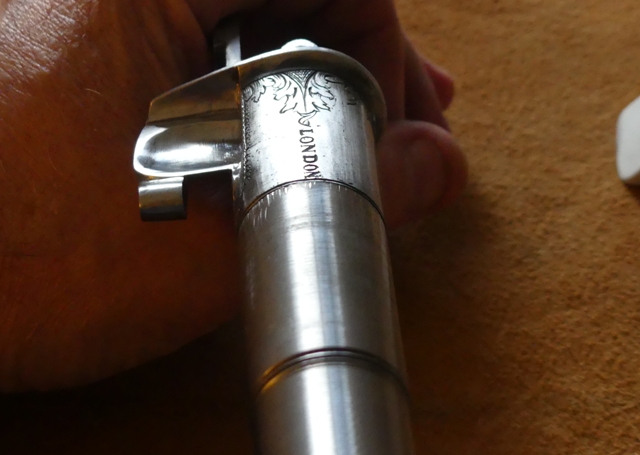
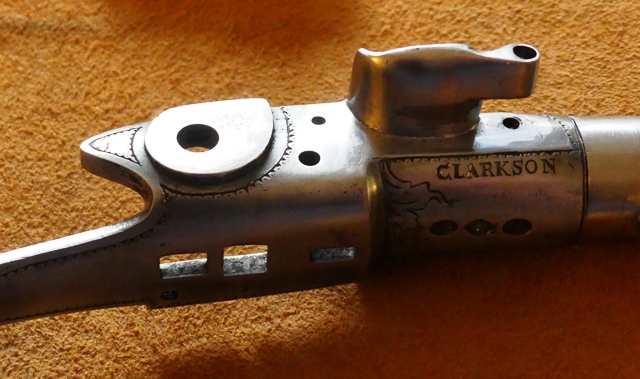
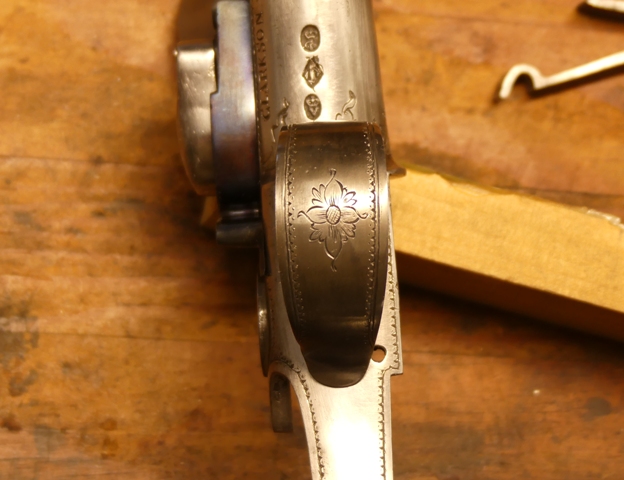
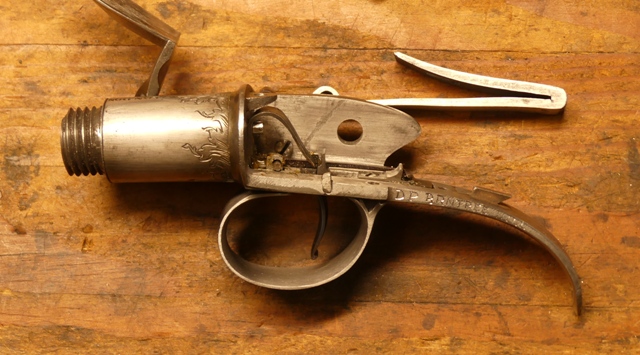
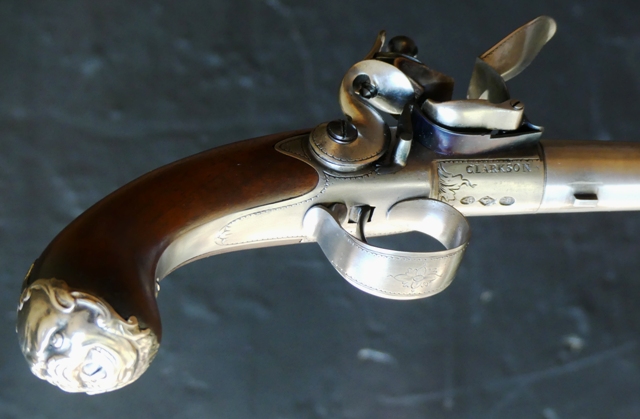
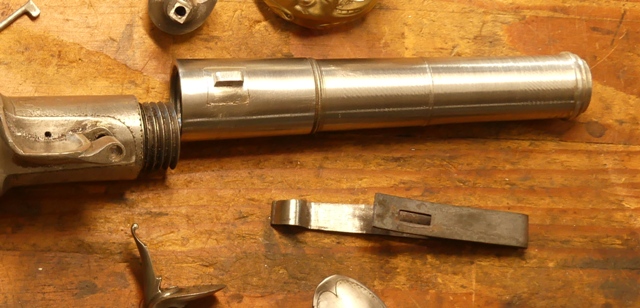
I was asked late last year to make a 1730s English turn-off pistol for the Fort Dobbs museum from TRS parts. I built up the mechanism early last spring but then had to put it aside for several months due to other more pressing work. I got back to it early this month and am nearing completion. These are often called "Queen Anne" pistols but their production and popularity began well before Anne in the 17th century and lasted well after her into the 19th century and even the percussion era. Perhaps they reached their technical and artistic zenith during her reign. They are breech loading side lock pistols, which can also be muzzle loaded when required, though with a smaller ball wrapped in a patch. They are very powerful given the powder charge and quite accurate. The TRS barrels are rifled, which I don't understand. The original pistol by John Harman that they copied was smooth bored. Indeed, probably all of these pistols made in England after 1680 were smooth bored. Anyway, my mission was to make a working pistol for the fort as close to a pair in the museum owned by the fort builder and commander during the 1750s, Hugh Waddell. His pistols were made by Joseph Clarkson Sr during the 1730s or 1740s. They are classic examples of turn off pistols made at the time by a very prolific and fine London gun maker. Unfortunately, the TRS parts cannot be completely altered to copy Waddell's pistols. So I had to make some compromises and adhere as closely as I could to Clarkson's work. So here are the components, fitted and mostly finished.
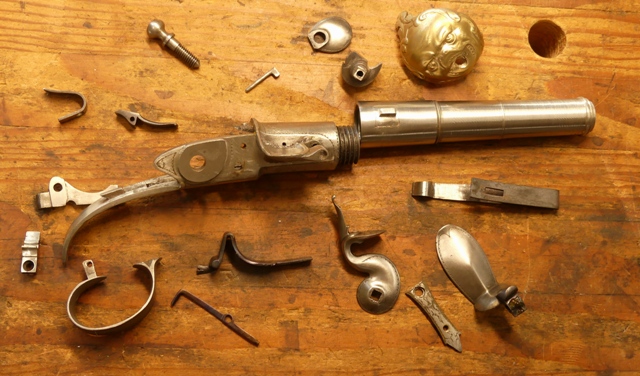
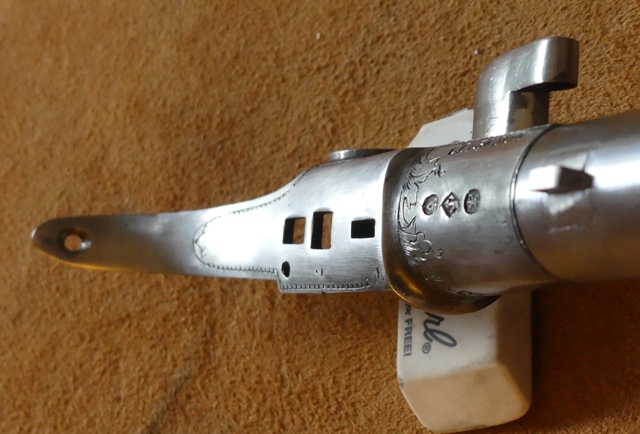
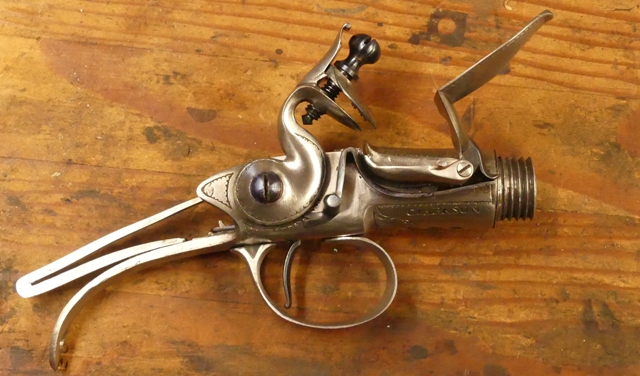
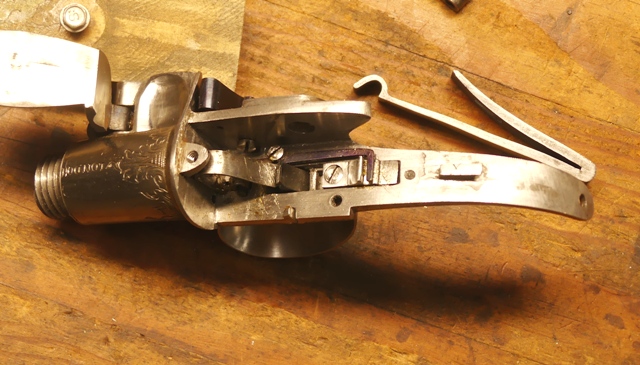
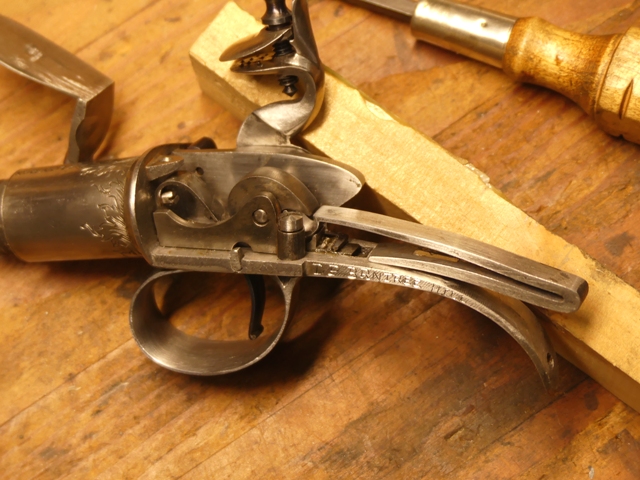
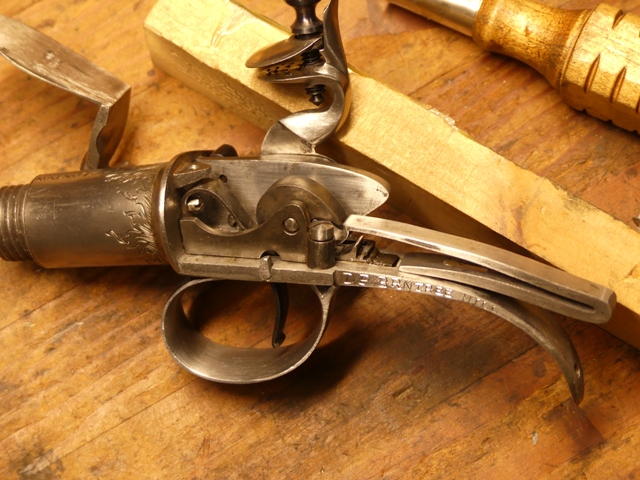
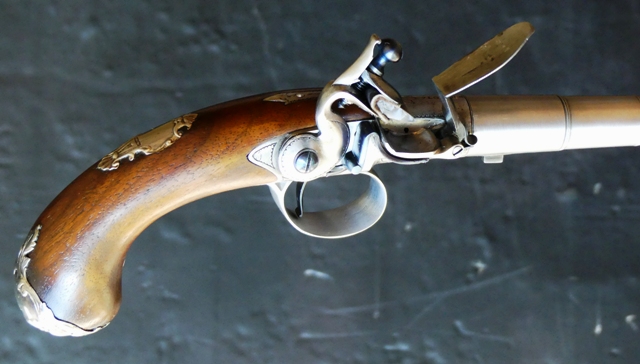
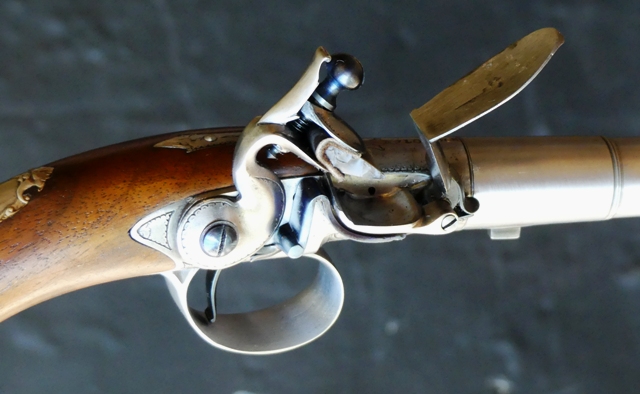
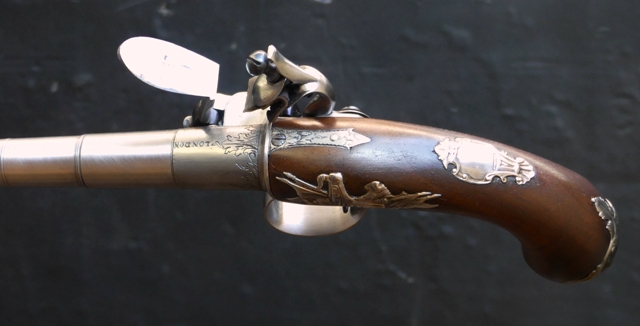
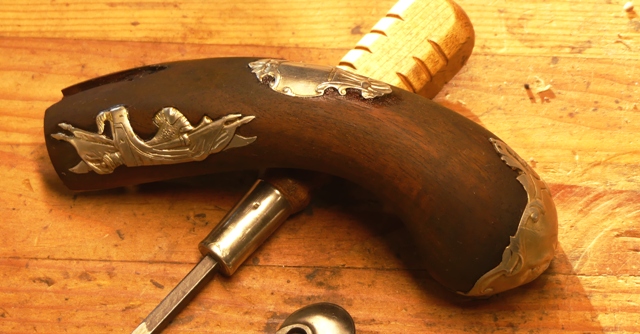
These are very fiddly guns to make and require a high level of precision not only in fitting the tumbler, bridle, sear/trigger and such but also all of the springs. They have to fit just right. I used the TRS cast feather spring, which worked out really well but I forged the sear and mainsprings. I modified everything because the original precision of fitting gets lost in the casting process. The pistol has a sliding safety in which you push the trigger guard forward and that simultaneously locks the tumbler, mainspring, and trigger. Well, you have to make sure all that happens "simultaneously". It is a challenge and I benefitted from having built one before. Here is the stock with the sterling silver mounts.
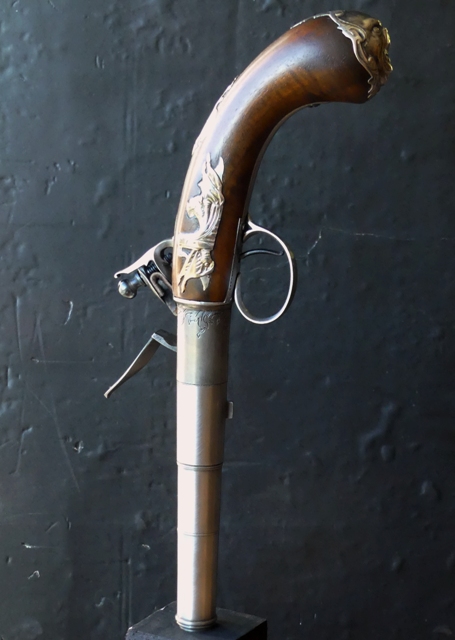
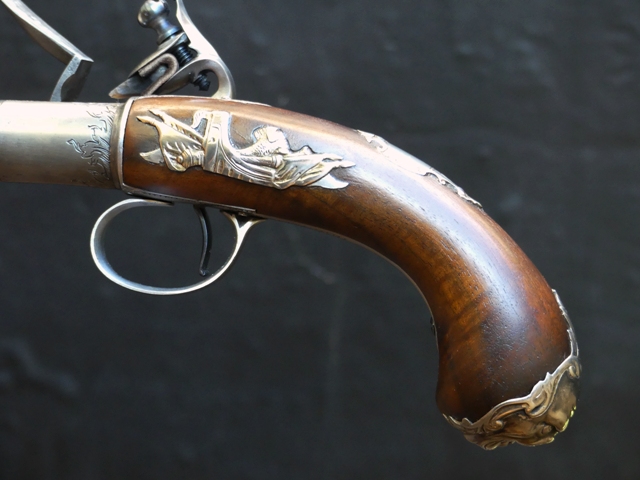
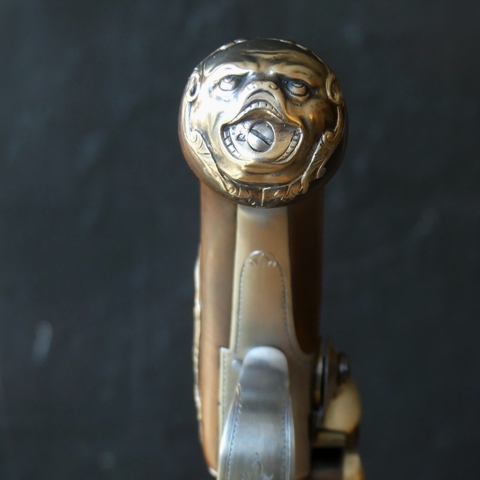
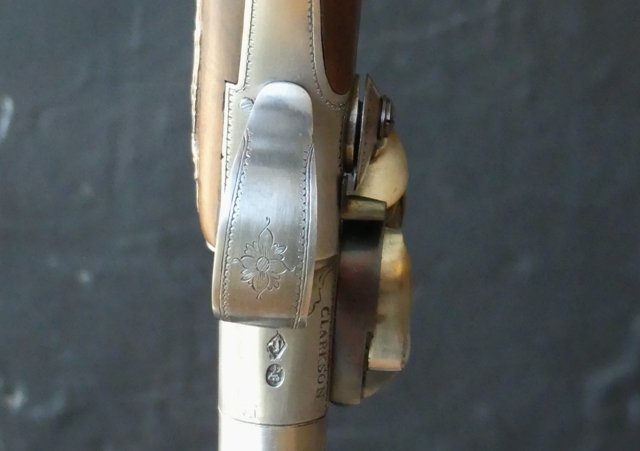
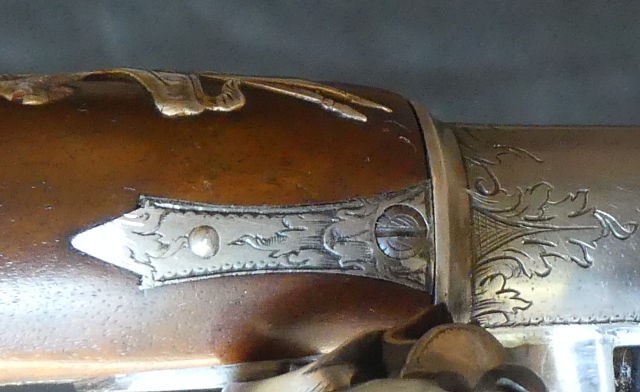
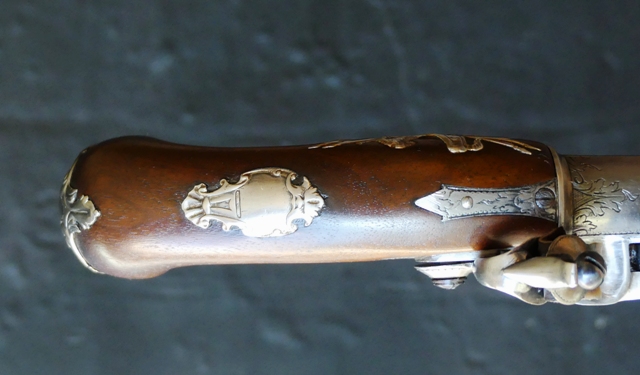
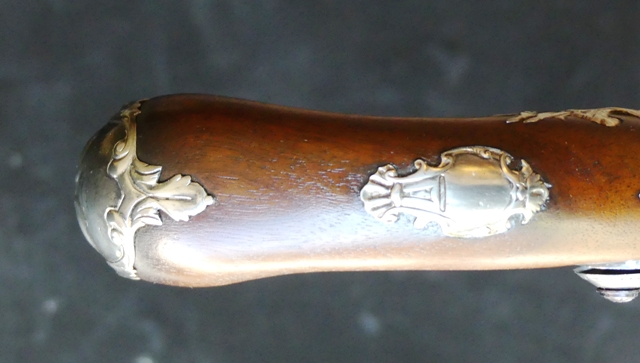
It just has the first sealing coat of finish. Much more to come. The silver butt cap and wrist plate are nice copies of Waddell's pistols. The side plate is not. It is from the same period but different design and it was a challenge to inlet because it curves vertically and horizontally. The yellow tone to the butt cap is because I pickle the silver in acid after annealing, which removes surface scale. The acid tends to bring out the copper in the silver alloy.
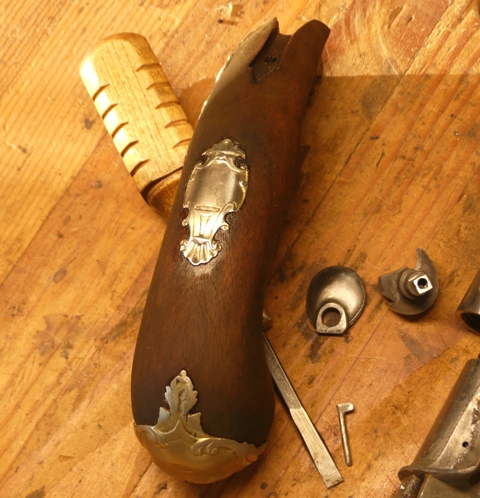

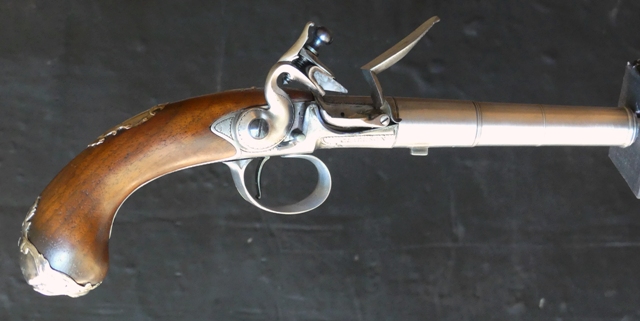
You can see the complex inletting for the action. It is not trivial. The TRS stock has some of that done but I rejected the stock blank because it was dodgy black walnut and had a very poor grain direction. Instead, I used a piece of beautiful red brown English walnut that I saved for decades. It has the perfect grain and color. The stock has the first sealing coat of Sutherland -Welles tung oil wiping varnish thinned with turpentine and tinted with alkanet root. Finally, I shortened the barrel and profiled it to more closely match the Waddell pistols. I cut them back and turned a new profile. I don't have a metal lathe. I did this with a wood lathe and files.
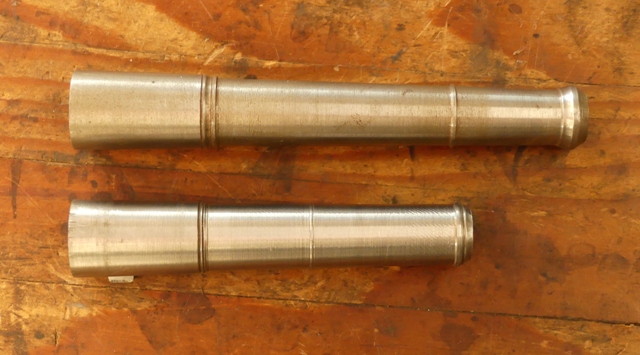
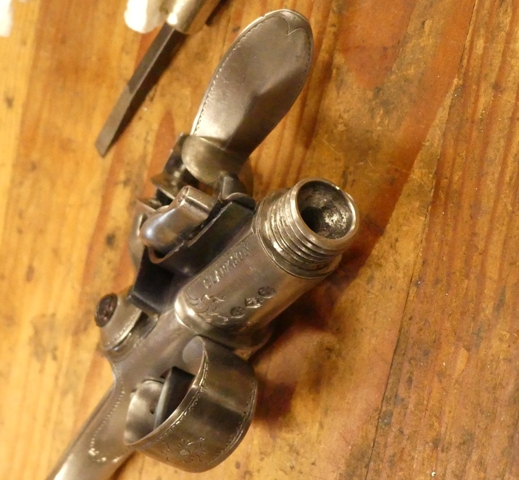
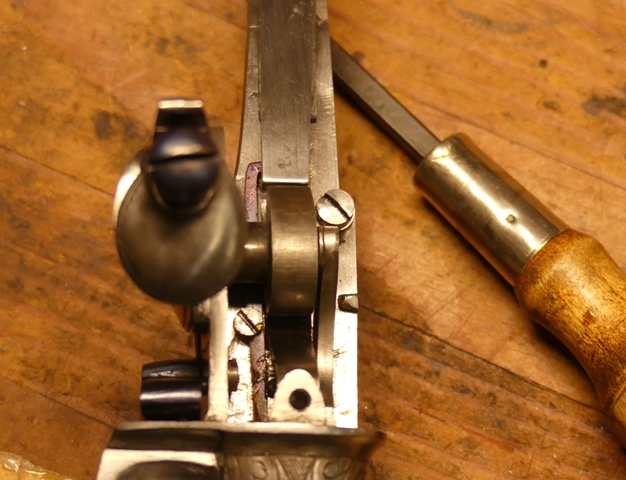
Finally, the screw barrel section has a lug used with a ring shaped barrel wrench to remove it if powder fouling jams the screw breech. That lug was historically either mortised into the barrel and then brazed or dovetailed and either brazed or soldered. I opted to dovetail the lug and silver solder it. The lug base conforms to the round barrel and I need to do a bit more blending but it will be very strong.
dave
I was asked late last year to make a 1730s English turn-off pistol for the Fort Dobbs museum from TRS parts. I built up the mechanism early last spring but then had to put it aside for several months due to other more pressing work. I got back to it early this month and am nearing completion. These are often called "Queen Anne" pistols but their production and popularity began well before Anne in the 17th century and lasted well after her into the 19th century and even the percussion era. Perhaps they reached their technical and artistic zenith during her reign. They are breech loading side lock pistols, which can also be muzzle loaded when required, though with a smaller ball wrapped in a patch. They are very powerful given the powder charge and quite accurate. The TRS barrels are rifled, which I don't understand. The original pistol by John Harman that they copied was smooth bored. Indeed, probably all of these pistols made in England after 1680 were smooth bored. Anyway, my mission was to make a working pistol for the fort as close to a pair in the museum owned by the fort builder and commander during the 1750s, Hugh Waddell. His pistols were made by Joseph Clarkson Sr during the 1730s or 1740s. They are classic examples of turn off pistols made at the time by a very prolific and fine London gun maker. Unfortunately, the TRS parts cannot be completely altered to copy Waddell's pistols. So I had to make some compromises and adhere as closely as I could to Clarkson's work. So here are the components, fitted and mostly finished.
These are very fiddly guns to make and require a high level of precision not only in fitting the tumbler, bridle, sear/trigger and such but also all of the springs. They have to fit just right. I used the TRS cast feather spring, which worked out really well but I forged the sear and mainsprings. I modified everything because the original precision of fitting gets lost in the casting process. The pistol has a sliding safety in which you push the trigger guard forward and that simultaneously locks the tumbler, mainspring, and trigger. Well, you have to make sure all that happens "simultaneously". It is a challenge and I benefitted from having built one before. Here is the stock with the sterling silver mounts.
It just has the first sealing coat of finish. Much more to come. The silver butt cap and wrist plate are nice copies of Waddell's pistols. The side plate is not. It is from the same period but different design and it was a challenge to inlet because it curves vertically and horizontally. The yellow tone to the butt cap is because I pickle the silver in acid after annealing, which removes surface scale. The acid tends to bring out the copper in the silver alloy.
You can see the complex inletting for the action. It is not trivial. The TRS stock has some of that done but I rejected the stock blank because it was dodgy black walnut and had a very poor grain direction. Instead, I used a piece of beautiful red brown English walnut that I saved for decades. It has the perfect grain and color. The stock has the first sealing coat of Sutherland -Welles tung oil wiping varnish thinned with turpentine and tinted with alkanet root. Finally, I shortened the barrel and profiled it to more closely match the Waddell pistols. I cut them back and turned a new profile. I don't have a metal lathe. I did this with a wood lathe and files.
Finally, the screw barrel section has a lug used with a ring shaped barrel wrench to remove it if powder fouling jams the screw breech. That lug was historically either mortised into the barrel and then brazed or dovetailed and either brazed or soldered. I opted to dovetail the lug and silver solder it. The lug base conforms to the round barrel and I need to do a bit more blending but it will be very strong.
dave