Making an English Turn-off Pistol for Fort Dobbs

Muzzleloading Forum

Help Support Muzzleloading Forum:

This site may earn a commission from merchant affiliate links, including eBay, Amazon, and others.
Joined
Nov 26, 2005
Messages
5,240
Reaction score
10,992
Hi,
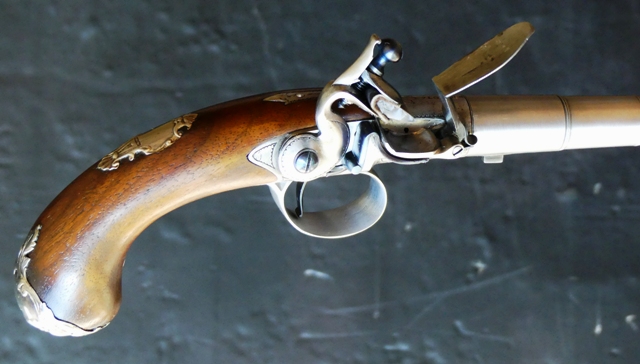
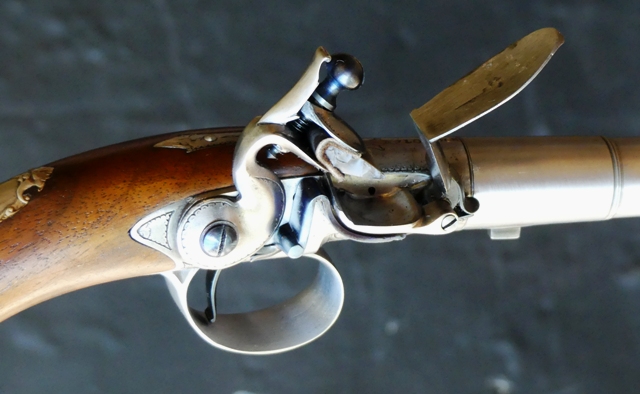
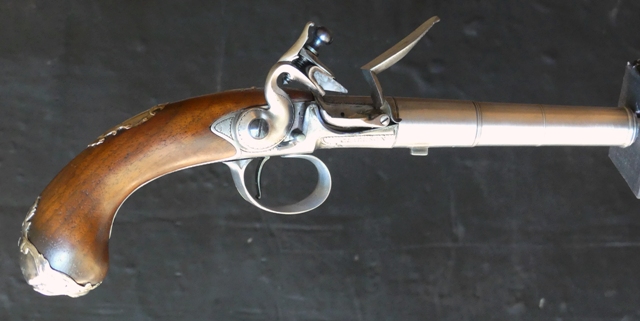
I was asked late last year to make a 1730s English turn-off pistol for the Fort Dobbs museum from TRS parts. I built up the mechanism early last spring but then had to put it aside for several months due to other more pressing work. I got back to it early this month and am nearing completion. These are often called "Queen Anne" pistols but their production and popularity began well before Anne in the 17th century and lasted well after her into the 19th century and even the percussion era. Perhaps they reached their technical and artistic zenith during her reign. They are breech loading side lock pistols, which can also be muzzle loaded when required, though with a smaller ball wrapped in a patch. They are very powerful given the powder charge and quite accurate. The TRS barrels are rifled, which I don't understand. The original pistol by John Harman that they copied was smooth bored. Indeed, probably all of these pistols made in England after 1680 were smooth bored. Anyway, my mission was to make a working pistol for the fort as close to a pair in the museum owned by the fort builder and commander during the 1750s, Hugh Waddell. His pistols were made by Joseph Clarkson Sr during the 1730s or 1740s. They are classic examples of turn off pistols made at the time by a very prolific and fine London gun maker. Unfortunately, the TRS parts cannot be completely altered to copy Waddell's pistols. So I had to make some compromises and adhere as closely as I could to Clarkson's work. So here are the components, fitted and mostly finished.
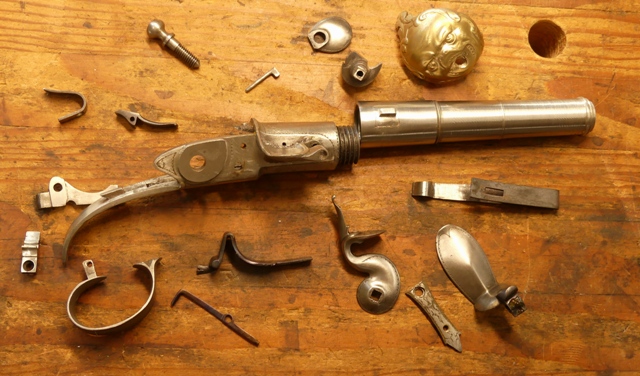


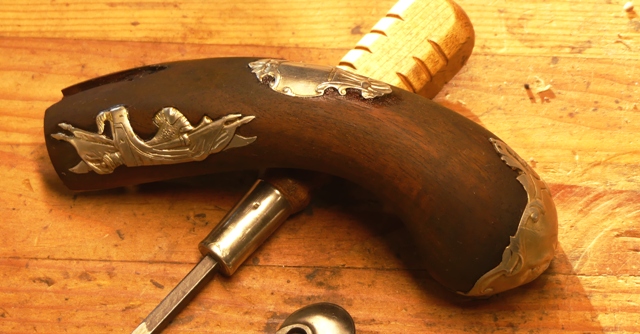
These are very fiddly guns to make and require a high level of precision not only in fitting the tumbler, bridle, sear/trigger and such but also all of the springs. They have to fit just right. I used the TRS cast feather spring, which worked out really well but I forged the sear and mainsprings. I modified everything because the original precision of fitting gets lost in the casting process. The pistol has a sliding safety in which you push the trigger guard forward and that simultaneously locks the tumbler, mainspring, and trigger. Well, you have to make sure all that happens "simultaneously". It is a challenge and I benefitted from having built one before. Here is the stock with the sterling silver mounts.

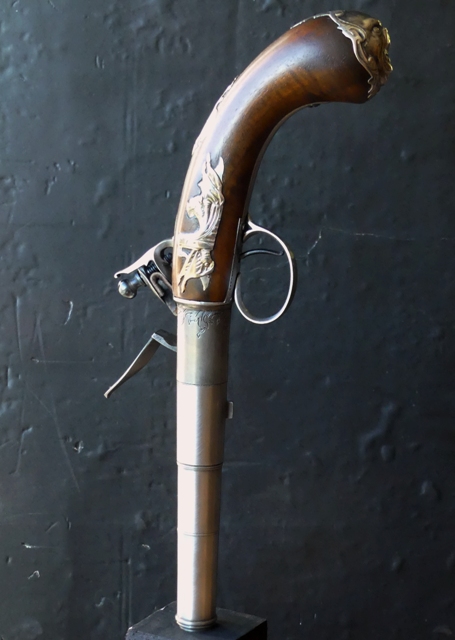
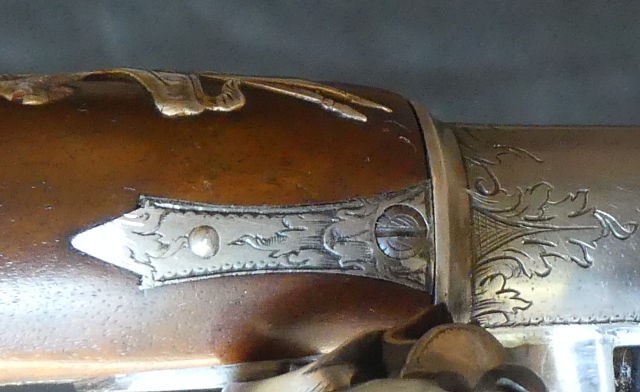
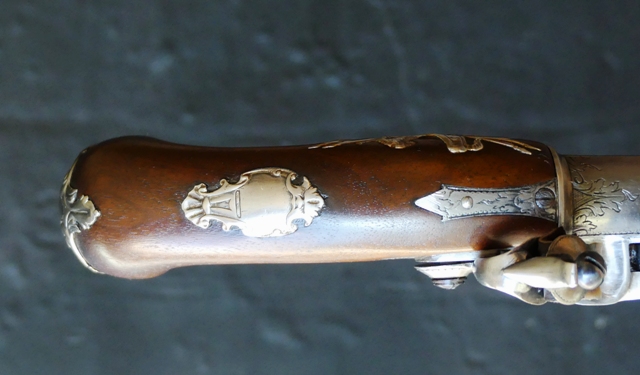
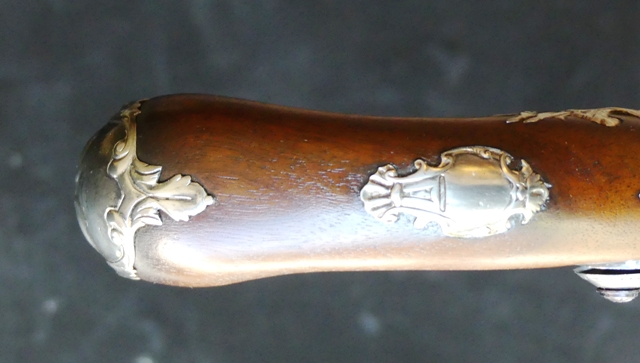
It just has the first sealing coat of finish. Much more to come. The silver butt cap and wrist plate are nice copies of Waddell's pistols. The side plate is not. It is from the same period but different design and it was a challenge to inlet because it curves vertically and horizontally. The yellow tone to the butt cap is because I pickle the silver in acid after annealing, which removes surface scale. The acid tends to bring out the copper in the silver alloy.
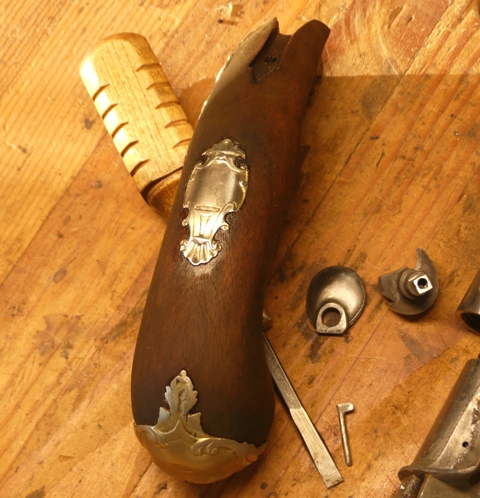
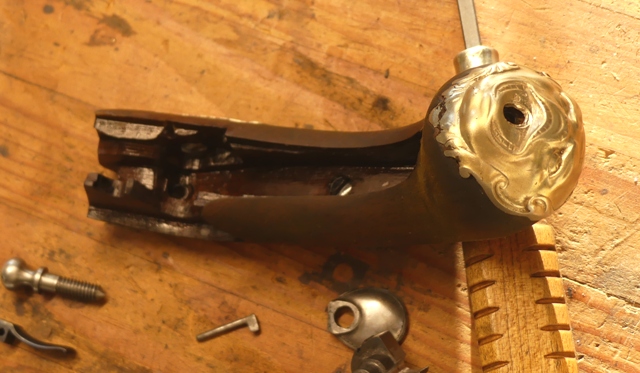


You can see the complex inletting for the action. It is not trivial. The TRS stock has some of that done but I rejected the stock blank because it was dodgy black walnut and had a very poor grain direction. Instead, I used a piece of beautiful red brown English walnut that I saved for decades. It has the perfect grain and color. The stock has the first sealing coat of Sutherland -Welles tung oil wiping varnish thinned with turpentine and tinted with alkanet root. Finally, I shortened the barrel and profiled it to more closely match the Waddell pistols. I cut them back and turned a new profile. I don't have a metal lathe. I did this with a wood lathe and files.
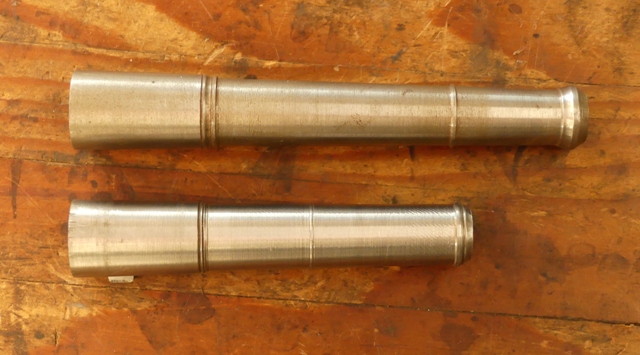


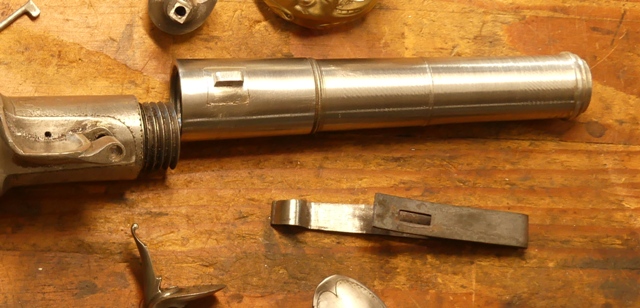
Finally, the screw barrel section has a lug used with a ring shaped barrel wrench to remove it if powder fouling jams the screw breech. That lug was historically either mortised into the barrel and then brazed or dovetailed and either brazed or soldered. I opted to dovetail the lug and silver solder it. The lug base conforms to the round barrel and I need to do a bit more blending but it will be very strong.


dave
 
Hi,
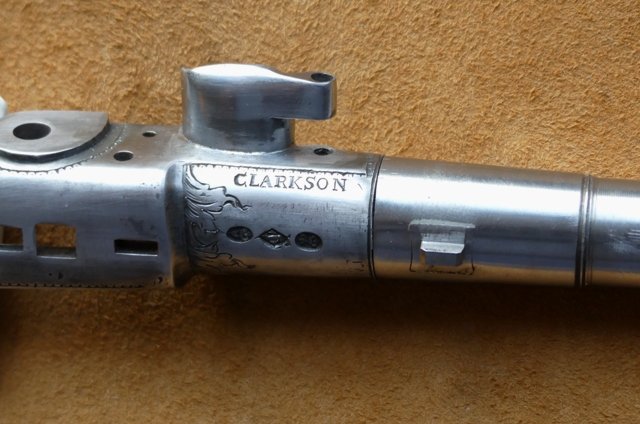
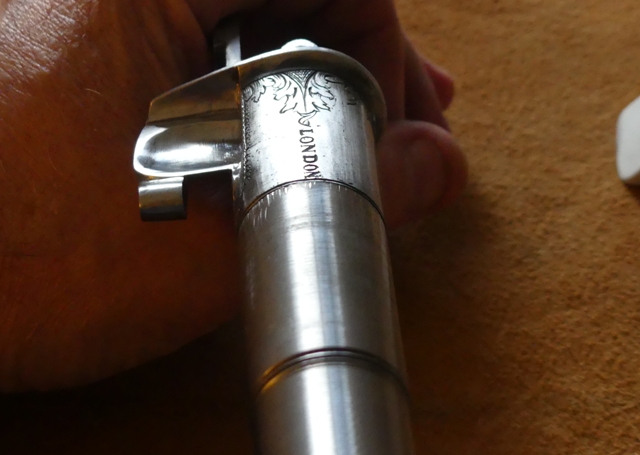
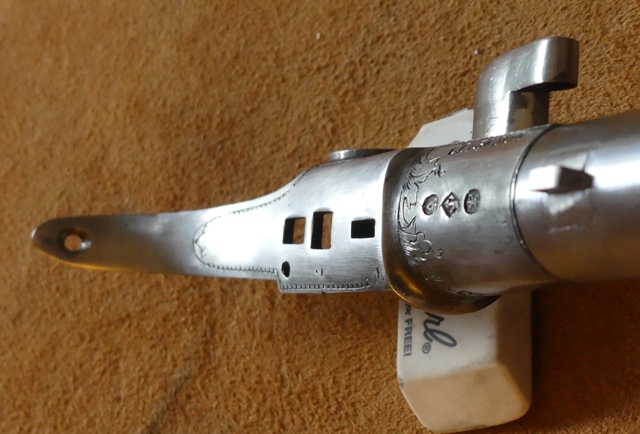
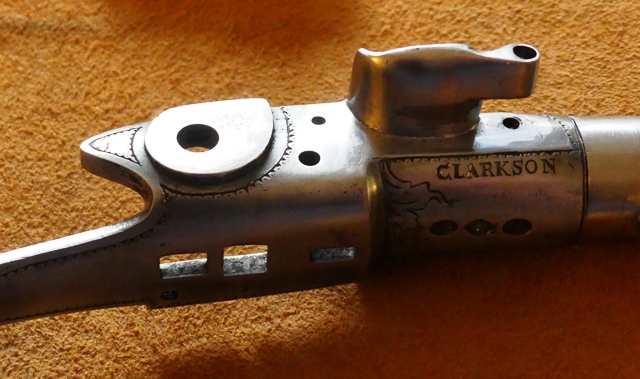
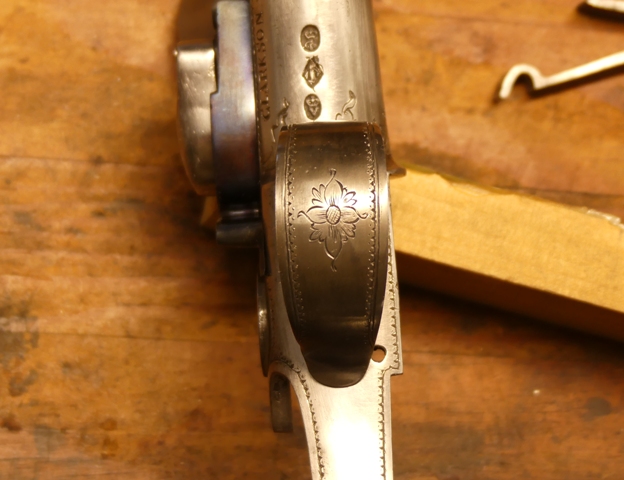
Thanks for looking and commenting. Got most of the engraving done. It is not ideal because I cannot get rid of all the cast in engraving. It is too deep and too much metal would have to be removed. So I have to reduce it as much as I can then use it as a guide for new engraving. It works out Ok but often there are several sections that just compromise the precision of any new engraving. I could weld over it but I would be welding over many spots. Anyway, on this pistol, I just worked with what I had and modified it as far as I could go to make it a Joseph Clarkson gun rather that the John Harman gun copied, including the engraving, by TRS. Lots of nick and dots but some are rough because of the cast in lines. I wiped out "John Harman" and replaced it with "Clarkson" and I also removed Harman's stamp and the engraved a diamond and stamped "I C" within it. The original "London" engraving is cramped at the last letters to fit the space. I could not wipe it out entirely so I lived with the unequal spacing as per the original gun. It all came out well but I wish TRS offered parts sets with no cast in engraving. It usually does not look right.


dave
 
Thanks for looking everyone,

Bob, it is 50 caliber and rifled. I wish it was not rifled and more like 56 caliber. I suppose I could send the barrel out to someone like Bob Hoyt to get it reamed but the museum has not asked that I do that. I finished all the engraving including engraving "DP BRNTREE HILL" on the side of the handle strap. The trigger guard was the last item to engrave.


Then I hardened and temper blued all of the external screw heads that likely will see wear and polished the action.


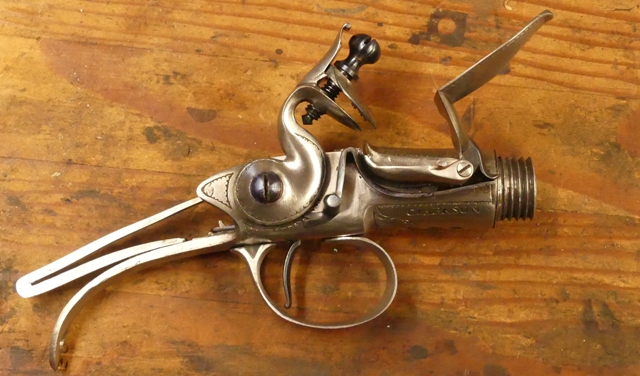
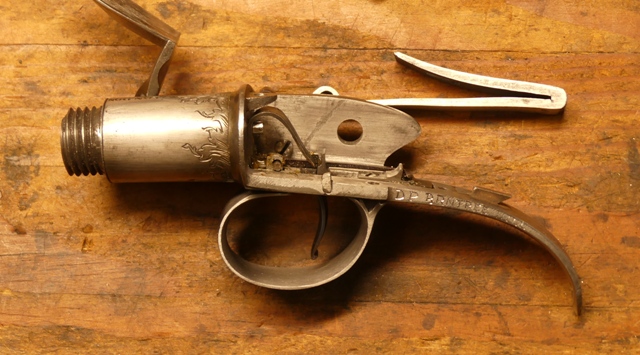
I thought I'd show the internal mechanism. The first 2 photos show the inside without the tumbler, bridle, and main spring. It shows the forged "U" shaped sear spring, the sliding lug for the trigger guard safety, and the safety spring. That lug has a raised ridge that blocks the mainspring at half cock when the trigger guard is pushed forward.


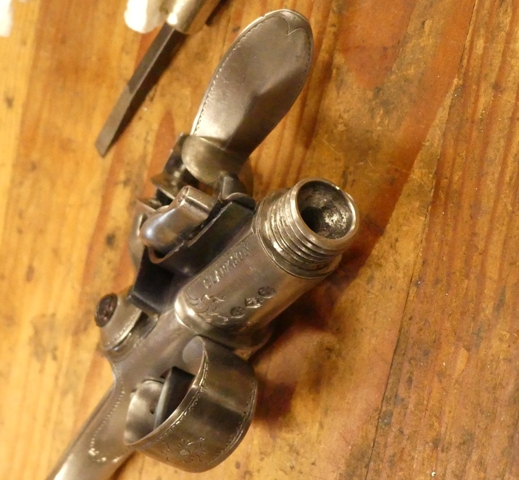
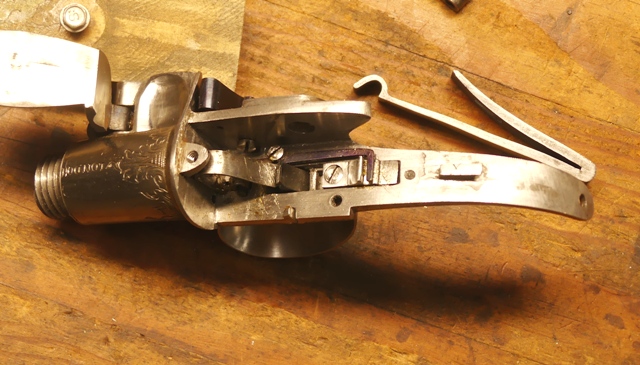
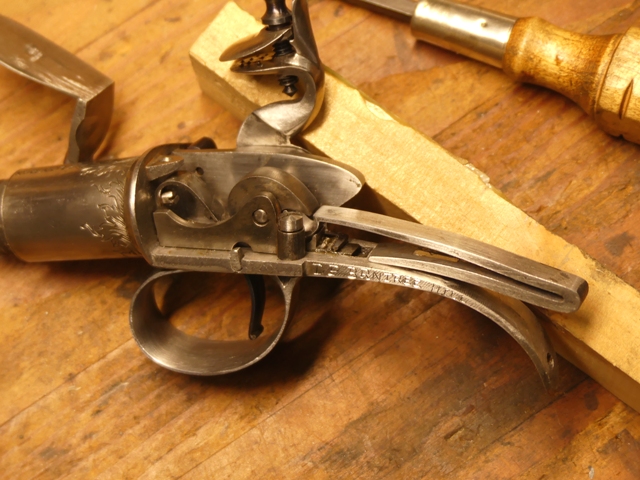
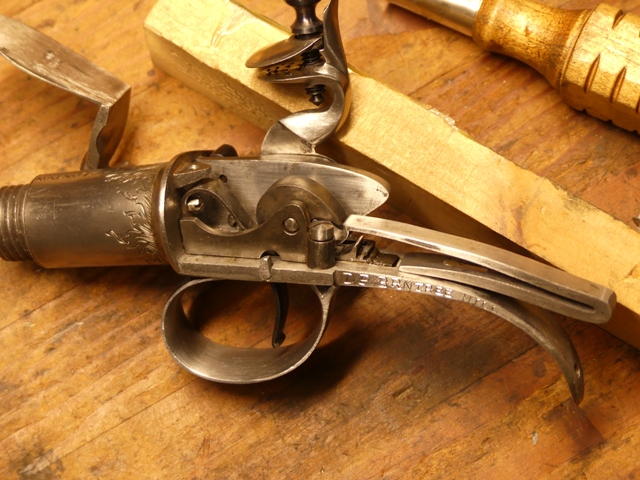
Now I add the tumbler, bridle, flint cock, and mainspring. At half cock, you can see how the safety lug blocks the hook of the main spring. Then when slid back, allows the pistol to be cocked.


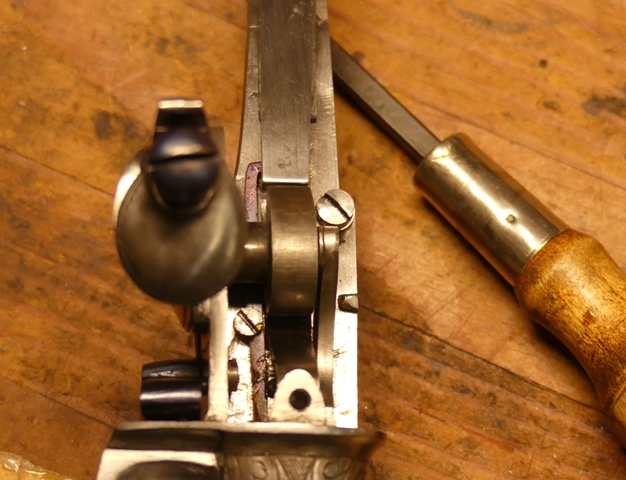
The downward view shows how precise everything must fit.


These pistols are marvelous examples of 17th and 18th century design and workmanship. They are a challenge for us today.

dave
 
Hi,
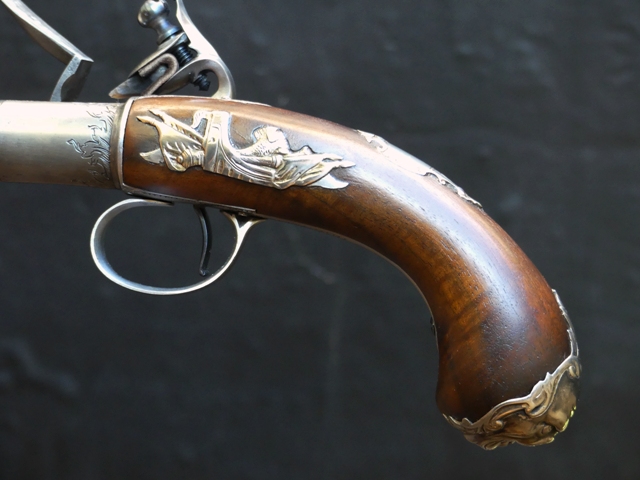
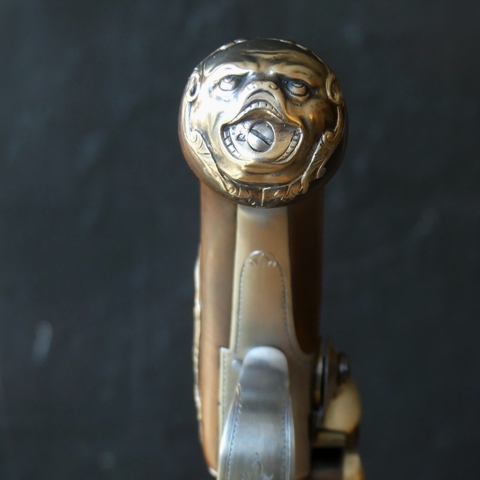
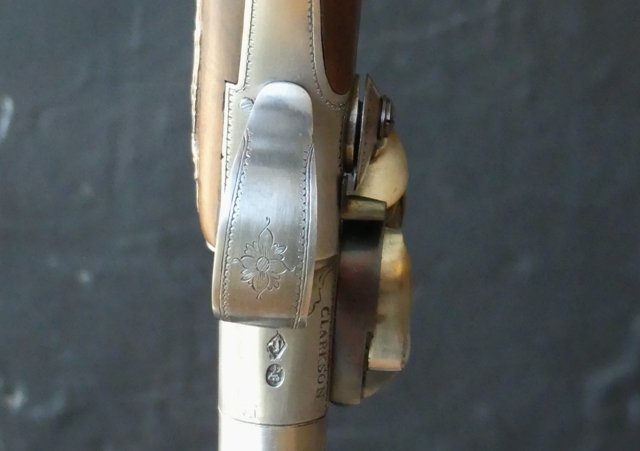
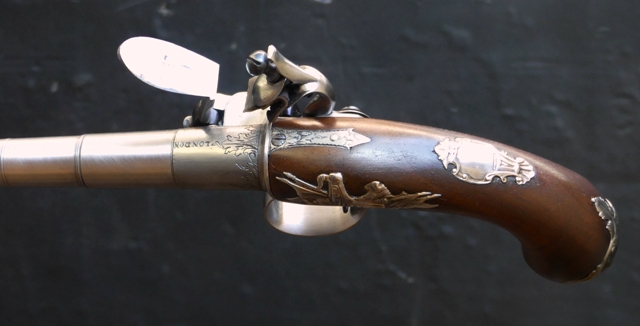
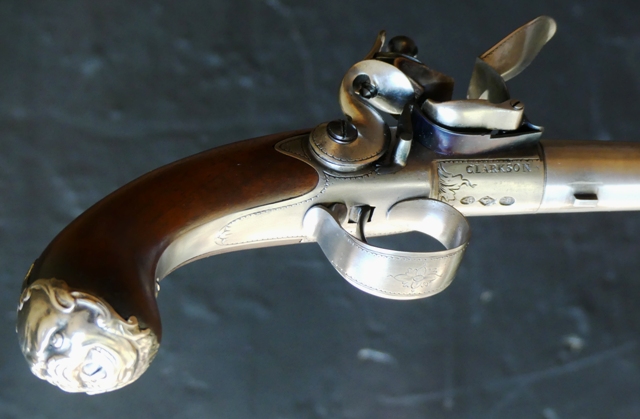
Done. I just have to make the barrel wrench. I am pretty happy with it. It is the second turn-off pistol I've built from TRS castings and that first experience really helped, primarily with constructing the lock mechanism. The barrel is 50 caliber and rifled. I did almost all the engraving incorporating some of the residual cast in engraving but mostly cutting everything again. Clarkson usually engraved his name on the top of the breech but the cast in design and "LONDON" was too deep to completely remove. So I engraved Clarkson's name under the breech where he usually engraved "LONDON". I wiped out the old John Harman name and his barrel stamp and replaced it with Clarkson and his diamond stamp. I polished and then tarnished all the steel. I chiseled and engraved all of the sterling silver mounts. They all needed defining and refining. So many of these modern made silver mounts look too rounded, over polished, and ill defined compared with the originals. The stock is beautiful English or black walnut that I have saved for decades. I actually logged the standing dead tree in 1979. It is so wonderfully colored and dense that I suspect it is English walnut but I am not sure. It was pure pleasure to work and I stained it with alkanet root after whiskering it using yellow aniline dye dissolved in water. The finish is Sutherland-Welles tung oil wiping varnish, which mixes polymerized tung oil with polyurethane varnish. It is a wonderful mix. So here it is. Enjoy.


I test fired it today at distances from 10 to 25 yards. I shot at an 8" gong using 0.495 balls and 15 gr of 3F powder (the max the chamber can hold). I fired 15 rounds without a misfire and the flint looks like new at the end. Ignition was surprisingly fast despite a fairly long vent hole. The first 2 shots at 10 yards completely missed the gong. That is when I realized you have to aim it really low. I use the end of the tang screw as a rear guide and I lift the barrel to just where I can see the top of the cannon muzzle over that rounded end of the tang screw. With that sight picture, I have to aim over 12" below my intended point of impact. There may be other sight pictures that work better but using the one I adopted, I hit the gong with every shot back to 25 yards. With practice, I could become deadly with this pistol up to 30 yards. With 15 grains of 3F it has all the power you would ever need. At 25 yards, it will knock an 8" steel gong right off its chain.

dave
 
i Es Muy Fabuloso !
Wow that’s beautiful and I’m sure it will own a place of honor at the museum. It appears that this was an enjoyable build for you. I bet it’s so much fun to shoot and easy to load. I do enjoy flintlock pistol shooting too.
Thanks for this tutorial 🙂
 
That is just outstanding. Every time I’m down at TRS I am severely tempted to get a set of those parts. I then start thinking like a machinist and wondering how I would hold the frame in my lathe jaws to turn the bore and decide against it.
 
Dave you are truly a talented Individual. I could not comprehend where to start with such a build.

SUSS
Hi Suss,
Thanks for the comment. I always start by doing research. Then I devise a plan and jump in. I learn this stuff by studying but also by just going ahead and doing it. Sometimes that doesn't work out too well but I always learn something useful.

dave
 
Last edited:
That is just outstanding. Every time I’m down at TRS I am severely tempted to get a set of those parts. I then start thinking like a machinist and wondering how I would hold the frame in my lathe jaws to turn the bore and decide against it.
Ah Clark,
You need to stop thinking like a machinist and more like an 18th century gun maker. Just kidding my friend! They are a challenge for sure. Fortunately, the flat side with the flint cock can be laid flat on a surface if you can clear the pan. That allows it to be held in position using a drill press. The critical holes are the tumbler spindle hole in the bridle and the tumbler post hole in the frame. I mounted the bridle, the clamped the frame flat on a surface and drilled a small hole through the bridle and frame in one go. I used the witness mark on the bridle to position the hole. That was the only mark I used building the rest of the gun. Then I just drill the holes as large as required using the small initial hole as a guide. For the powder chamber and bullet cup, I used the barrel as a guide. It is 1/2" inside diameter, so I chose a 7/16" drill and wrapped the sides of the drill in masking tape to loosely fill out the bore. Then I screwed the barrel in place and drilled down the barrel, which then centered the hole in the breech. The frame was held in a vise and I used a hand drill. I drill as deep as I need for the cup. Then I used the bottom of the hole to catch and center a 1/4" drill for the powder chamber. I just used a hand drill for that carefully lining things up by eye. Once that was done, I used a 1/2" round grinding stone in a drill to shape the ball cup.

dave
 
Not to hijack your topic, but I fail to see how a turn-off design is an improvement over regular muzzle loading. Is accuracy or velocity better?
Hi,
Yes. The ball can be bigger than the bore so when fired , it expands fully into the barrel with or without rifling making a perfect gas seal much like a modern bullet and better than a patched ball loaded from the muzzle. Second, you simply fill the powder chamber so you always load the same charge every time. No need for any powder measure. For a given powder charge, these pistols are more powerful and accurate than muzzle loaded pistols from the same era. That said, they typically have no sights and were meant to be used point blank so the accuracy feature tends to be irrelevant.

There is a story about Prince Rupert of the Rheine during the English civil war. He had a pair of turn off pistols by Harman Barnes, which were rifled. During the 17th century turn-off pistols were frequently rifled. Rupert shot at and hit a weathervane on top of a church steeple from 60 paces away from the church. King Charles I teased him about his lucky hit, so Rupert proceeded to take his second pistol and hit the weathervane again. For whatever reason, rifling virtually disappeared from the barrels of these pistols by 1700. The design is well suited for rifling because of the perfect gas seal but I guess the consumer did not feel the need for it if the guns were used for personal protection at very close ranges.

dave
 
Hi,
Done. I just have to make the barrel wrench. I am pretty happy with it. It is the second turn-off pistol I've built from TRS castings and that first experience really helped, primarily with constructing the lock mechanism. The barrel is 50 caliber and rifled. I did almost all the engraving incorporating some of the residual cast in engraving but mostly cutting everything again. Clarkson usually engraved his name on the top of the breech but the cast in design and "LONDON" was too deep to completely remove. So I engraved Clarkson's name under the breech where he usually engraved "LONDON". I wiped out the old John Harman name and his barrel stamp and replaced it with Clarkson and his diamond stamp. I polished and then tarnished all the steel. I chiseled and engraved all of the sterling silver mounts. They all needed defining and refining. So many of these modern made silver mounts look too rounded, over polished, and ill defined compared with the originals. The stock is beautiful English or black walnut that I have saved for decades. I actually logged the standing dead tree in 1979. It is so wonderfully colored and dense that I suspect it is English walnut but I am not sure. It was pure pleasure to work and I stained it with alkanet root after whiskering it using yellow aniline dye dissolved in water. The finish is Sutherland-Welles tung oil wiping varnish, which mixes polymerized tung oil with polyurethane varnish. It is a wonderful mix. So here it is. Enjoy.


I test fired it today at distances from 10 to 25 yards. I shot at an 8" gong using 0.495 balls and 15 gr of 3F powder (the max the chamber can hold). I fired 15 rounds without a misfire and the flint looks like new at the end. Ignition was surprisingly fast despite a fairly long vent hole. The first 2 shots at 10 yards completely missed the gong. That is when I realized you have to aim it really low. I use the end of the tang screw as a rear guide and I lift the barrel to just where I can see the top of the cannon muzzle over that rounded end of the tang screw. With that sight picture, I have to aim over 12" below my intended point of impact. There may be other sight pictures that work better but using the one I adopted, I hit the gong with every shot back to 25 yards. With practice, I could become deadly with this pistol up to 30 yards. With 15 grains of 3F it has all the power you would ever need. At 25 yards, it will knock an 8" steel gong right off its chain.

dave

Great job Dave, really nice work as always.
 

Latest posts

Back
Top