My Apprentice and Her English Fowler

Muzzleloading Forum

Help Support Muzzleloading Forum:

This site may earn a commission from merchant affiliate links, including eBay, Amazon, and others.
Hi Guys,
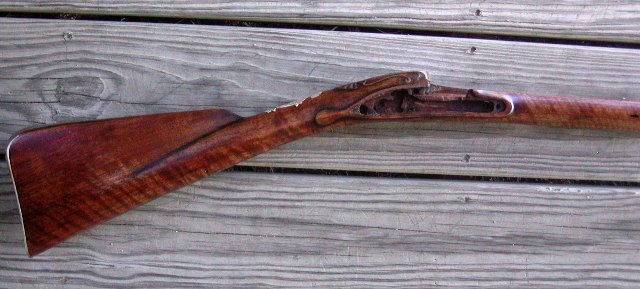
We are getting close to being done and Maria's fowler is turning out very well. She does the lion's share of the work. I only step in to offer a course correction once in a while and to show her how to refine the tasks she completed when needed. I will do most of the engraving although I hope to get Maria cutting at least simple borders before we are done. At least for the duration of this coming summer, she will be busy in the shop making a bunch of bespoke Brown Besses. We will start almost immediately on a pattern 1769 short land Bess to be made from a rough blank. I have other work that I have to get on with so Maria will be largely responsible for the muskets. This should be a good plan because doing the muskets, which are relatively simple but require attention to historical details, will further cement the basic procedures and skills she has already learned such that by summer's end, they will be rote. She will also learn to build locks in the process. From there, well who knows what the future holds while she is in college.

dave
Many of us seek to make and leave the world a better place… no question about that here on your account or Maria’s. Gunmakers like yourselves are artists and observing the beginnings of Maria’s journey has been a treat. Thank you both for including us.
 
I believe Maria also has a "not yet completed" gun from her time in Ohio with Ian and Ken. As previously mentioned, there is a picture in the May/June issue of Muzzleloader Magazine.

I'm still on edge just waiting to see the final product from this thread. I know it's going to be an amazing piece! :thumb:

Maria...I know you are and will remain busy, but I surely hope you find time over the ensuing years to post on The Forum from time to time. You mentioned that getting near the end is bittersweet. I'm sure my fellow enthusiasts here would agree that not continuing to hear from you would be a tragedy!
 
Hi,
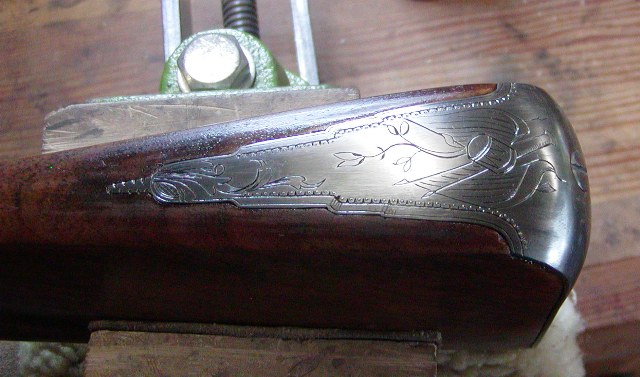
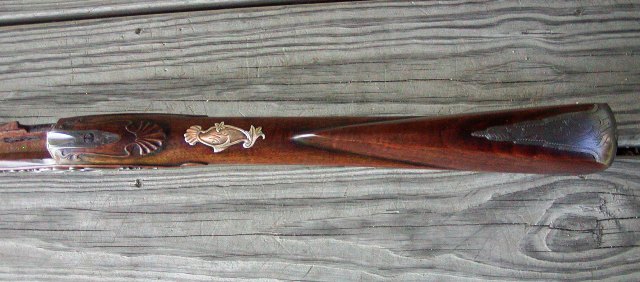
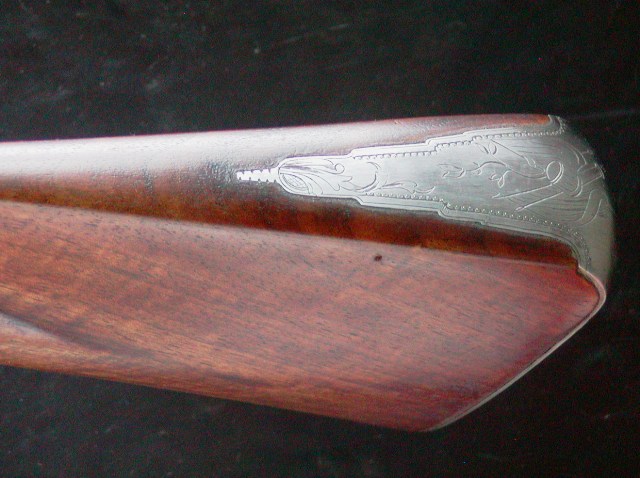
Thank you all for supporting Maria and our work! Well today, we got a lot done. The weather is perfect for drying finish so the first task was to get more finish on the fowler. I sanded off the crust of filler yesterday and put on more finish because we had to take advantage of the weather and time. The fowler has to be completed within 2 weeks to meet her school obligations, so we have to move. Maria will do a separate post on the stock finish. I am going to cover other tasks such as engraving and barrel finishing. Maria began this project last November. In a little over 6 months working no more than 2 days a week she has gone from never having touched a stock blank to what you see right now. It is a remarkable result, however, I cannot expect her to master engraving at the same time so I am doing most of that detail work. Nonetheless, as you will see, she is beginning her training in engraving. Although most of us make what we want regardless of historical detail, the objective of this gun was an historically correct fowler of good but not exceptional quality that might be imported to colonial America. To that end, the engraving and decoration has to suit. I think we accomplished that goal. Here is the butt plate with engraving copied almost exactly from one of my original fowlers. It is perfect for this gun.


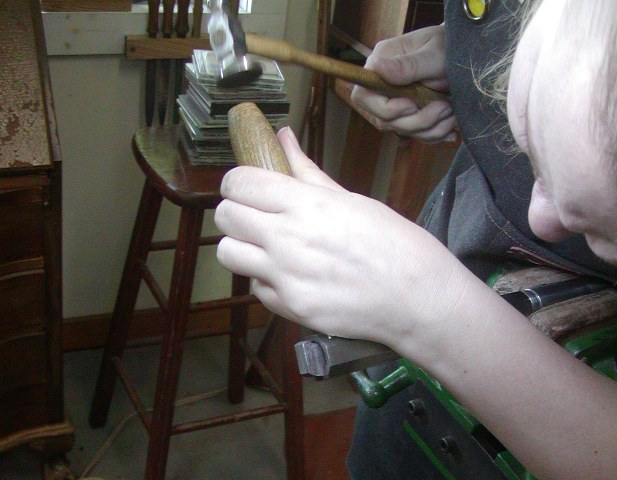
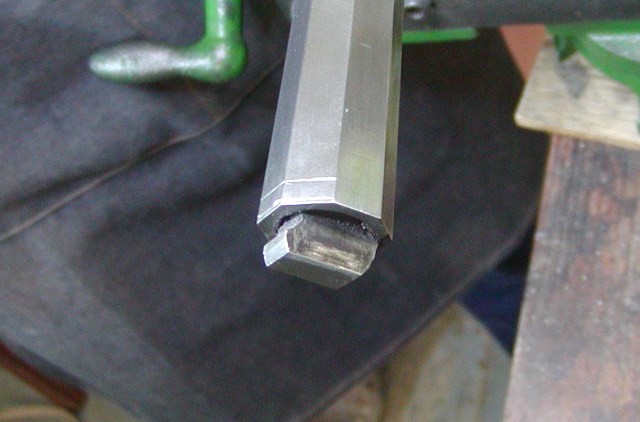
Next, we want some decoration on the breech of the barrel. We decided on a simple fluted band with borders. To cut those borders I had Maria cut several guide lines with the AirGraver, then do the same with a hammer and chisel. We were going to widen and deepen the borders with a triangular file anyway so the cuts with gravers was good practice that could be repaired if needed. Maria did very well with the gravers.


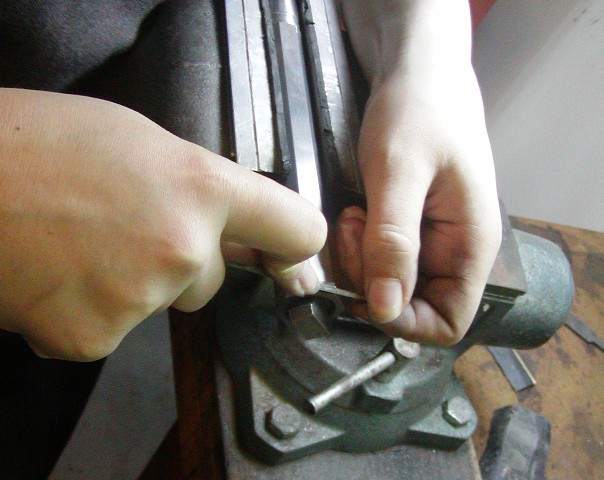
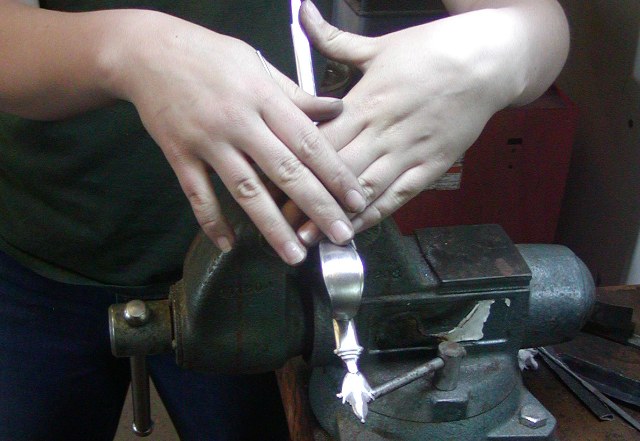
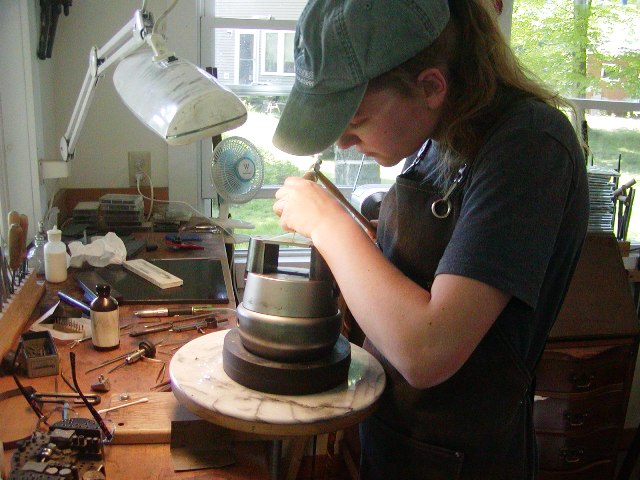
The we moved to the metal working bench and she filed the borders deeper with a triangular file and the fluting with a round file.


In the process she wanted to stop and make a demo photo for her future career as a hand model. I Photoshop brushed out the black dirt, bloody cuts, and greasy film on her hands so she can submit the photo in her resume.


Hi,
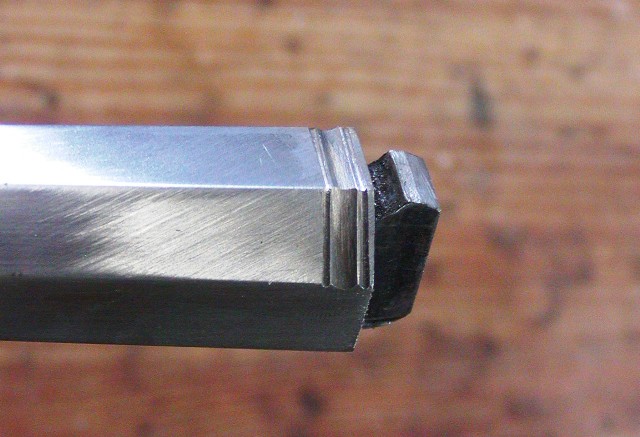
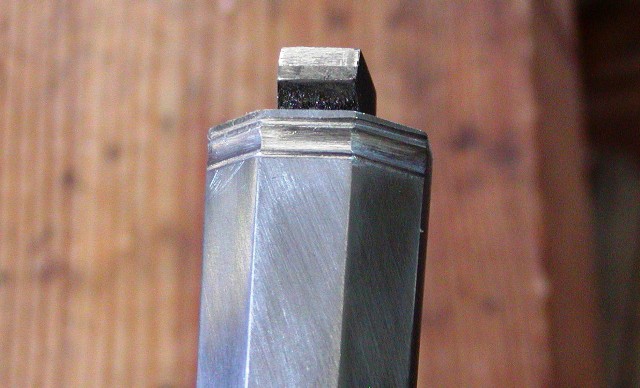
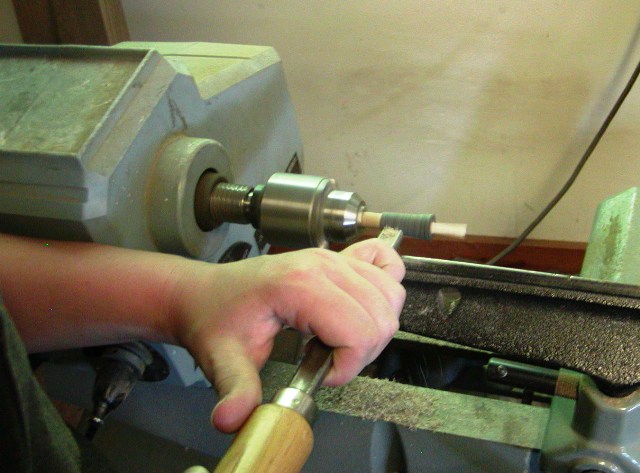
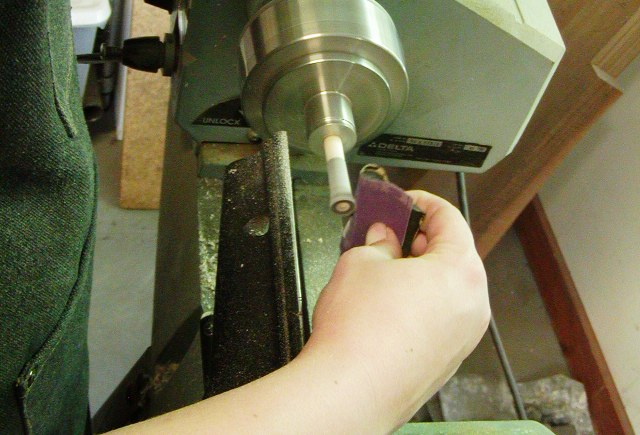
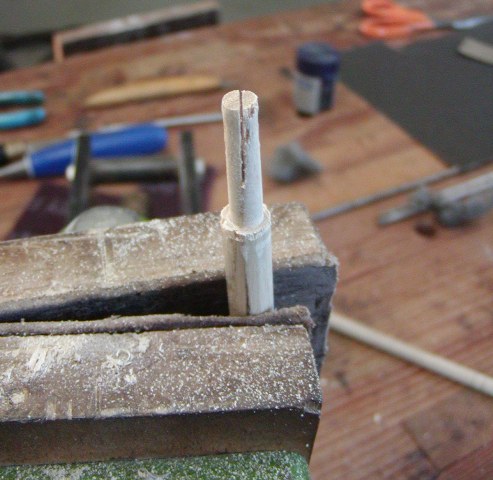
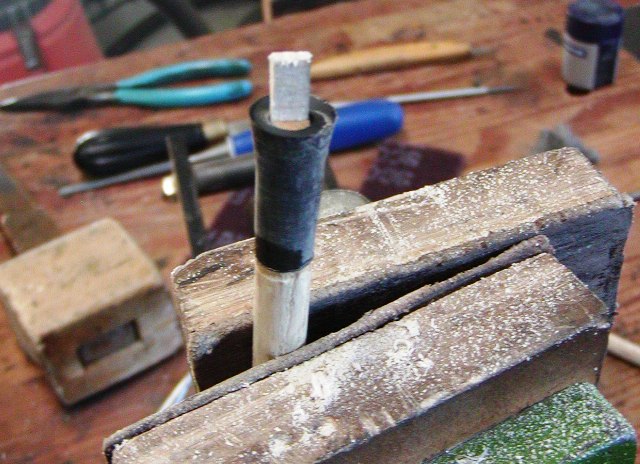
Maria promised to post photos of the staining process. I am going to update things with the latest work. We started making the ramrod. It has a bison horn tip so we had to turn that. I cut off a horn tip, drilled it for about a 9/32" hole, and mounted it on a piece of dowel. The end of the dowel is slotted for a wedge that holds the tip tightly on the dowel. I trimmed off most of the asymmetric mass of the tip and then let Maria have at it. She never turned anything before.


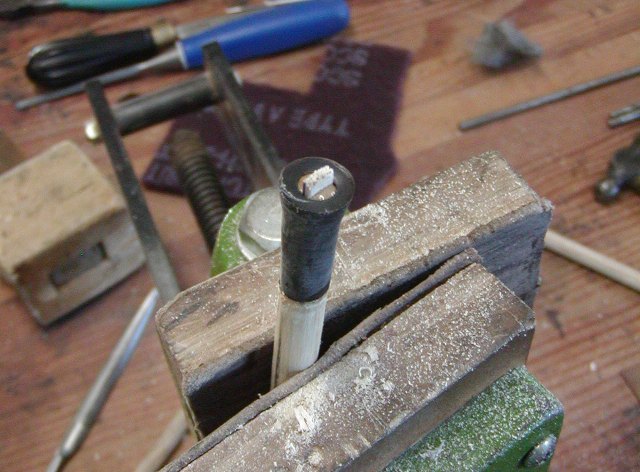
Next she hit it with sand paper, broke off the excess wedge and turned the end a little concave.


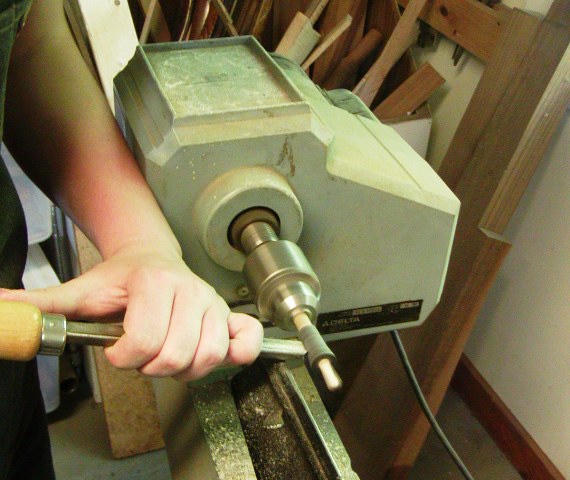
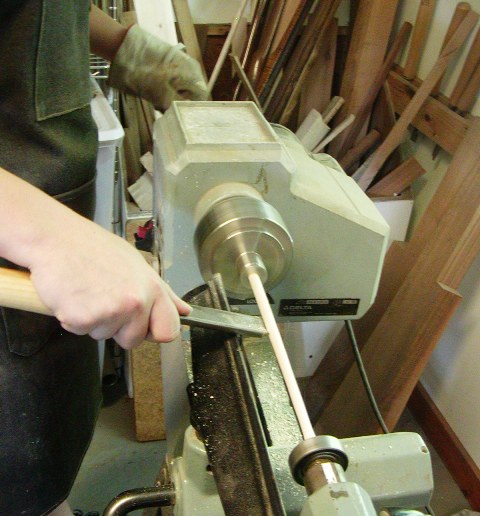
The ash ramrod has to be tapered a lot so we began that process. My method is a little wonky but it works efficiently. The arbor of my wood lathe is hollow so the long rod can stick through it. On the end to be turned, we drill a shallow centered hole to fit the point of a live center. Then we mount the rod in the lathe exposing only short sections for turning. The rest of the long rod sticks through the headstock but it has to be controlled or it will wobble and break. So the left hand controls the wobble and the right holds down the turning tool. It works well but requires a bit of right hand strength.


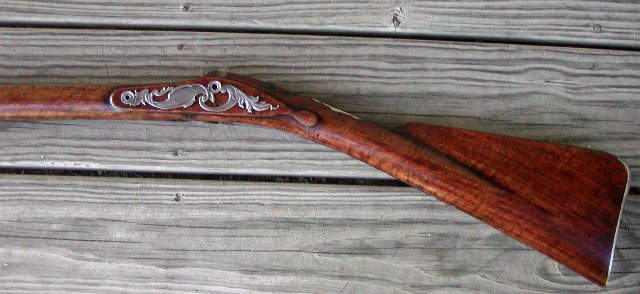
After turning 4-5 inches, we move more of the rod out. We did not finish this task or making the tip because we need the stock to fit the rod. The stock is still being finished. When done, we will complete the rod. Here is the mostly finished stock. It needs more finish and some blackened areas rubbed out a little more.


dave
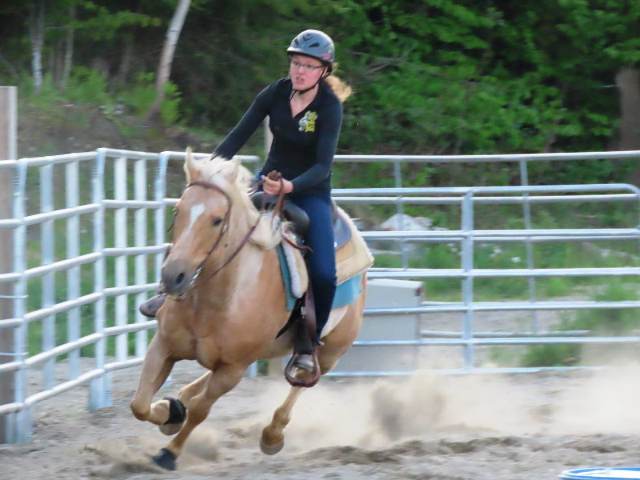
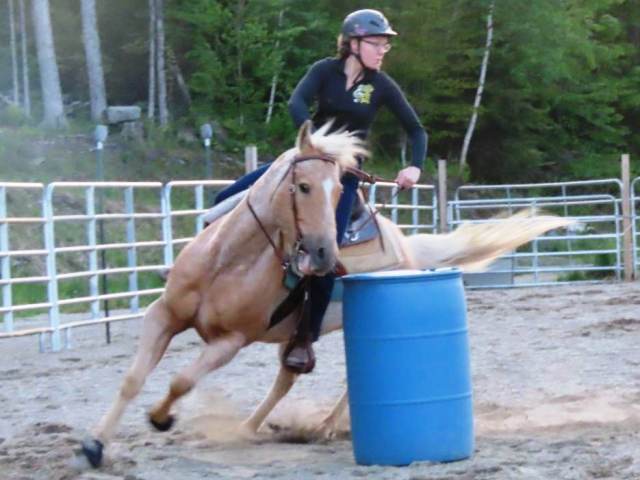
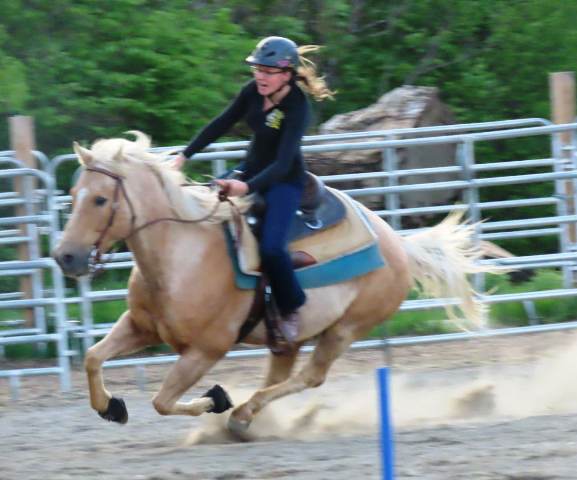
Maria barrel racing:


Last edited:
Hi,
Thank you all for supporting Maria. We are a hair's breath from being done. The stock is finished, everything to be engraved is engraved, the barrel is polished and tarnished, the lock is tuned and heat treated, and the ramrod is finished. This post shows a few final house keeping tasks that you may not see very often.

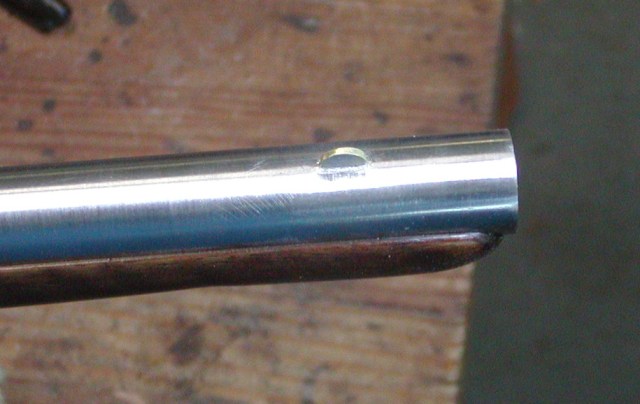
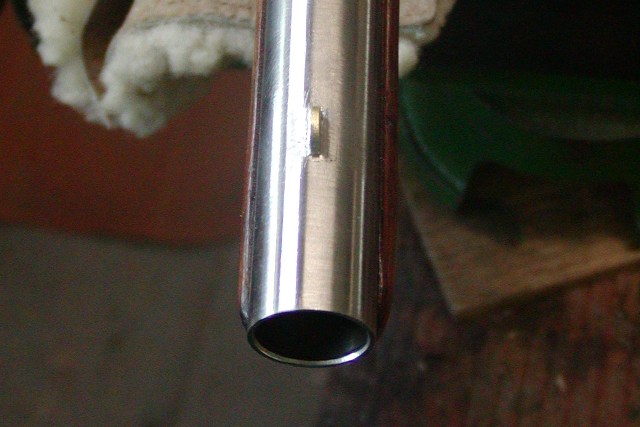
We fitted a brass front sight by mortising the barrel using gravers. We located the center of the barrel near the muzzle by laying the barrel upside down on a flat surface, used the top octagon flat to keep the barrel flat on the surface, then inserted a thin flat needle file under the barrel where the sight would go, and drew it out. That marked the exact center.


We just cut a flat bottomed mortise and then undercut the sides. The 4140 steel is very tough and it took some work to cut the mortise. Next we cut a brass sight from sheet and filed a fine dove tail all the way around the bottom. The idea is to insert the sight in the mortise and then peen the barrel into the dove tail, locking the sight in place. We did not know how well the 4140 steel would peen so I put flux in the mortise and then the sight, gave it a tap on top to make it stick, then sweated solder into the mortise. After cleaning up the exces solder, I peened the barrel around the sight with a punch. That seemed to work pretty well. I shaped the sight and left it a bit high.


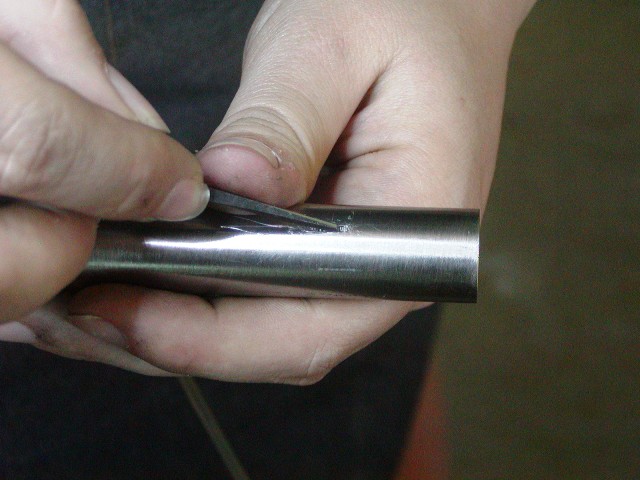
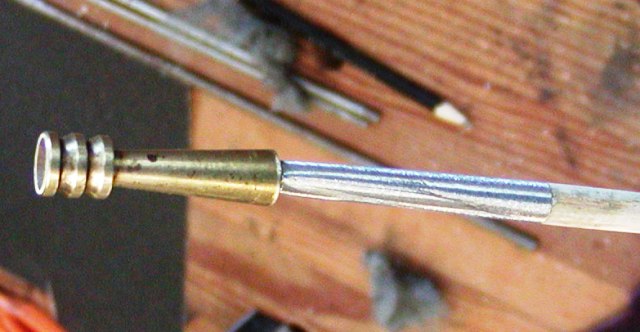
We finished the ramrod. I had to make a ferrule for the thin end of the rod. I made one the traditional way, rolling thin sheet steel (0.032" thick) on a tapered form. I thinned the steel where the seam overlaps, fluxed the seam and soldered the edges together. It came out slightly cock-eyed but it will work fine. I then threaded the end for a cleaning jag (we will make another rod with a worm). I fitted and glued it to the rod and then pinned it.


We then installed the horn tip. We used glue but also a wedge like an axe handle.


After the glue dried, we cleaned up the end, then sanded, stained, and finished the rod.

Since November, 2022, Maria has worked with me on her gun usually 2 days a week. We covered an incredible amount of ground and array of skills. She did phenomenally well and I expect she will grow into a remarkable gun maker if she chooses to continue. Of course life is what actually happens despite our plans and she has a lot of life to go and choices to make along the way. I hoped to get her engraving by this summer. She has practiced a bit with both hammer and chisel and Lindsay Airgraver.


However, no rational person could expect her to master engraving with all the other skills in the time frame we had. She has made some strides and will get there in time but I decided to do the engraving on her fowler. We wanted a gun representative of actual English work at the time and we copied engraving from several original guns in my possession. It came out well and you will see it when we post the final photos, probably this weekend. The fowler had to be finished this week so she could have it for her final presentation to the school June 9.

dave

PS I am not supposed to reveal this to Ken Gahagan and Ian Pratt but Maria engraved a smiley face on the inside of the butt plate Ian forged. ;)
 
Remarkable accomplishments - And done on schedule!
The thought crossed my mind while reading and viewing these updates of how Maria will be using this gun in her re- enactments. I shuddered to imagine what could occur in some scenarios that I’ve experienced in the field of battle ( and elsewhere).
Again, thanks for these wonderful photo-visits to your workshop and the fantastic tutorials.
 
Hi,
I posted this for Maria.

Hello All,

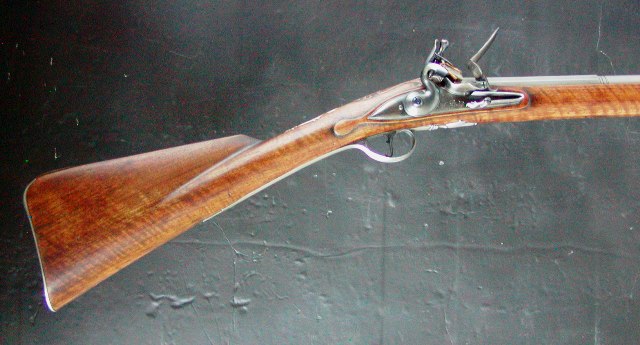
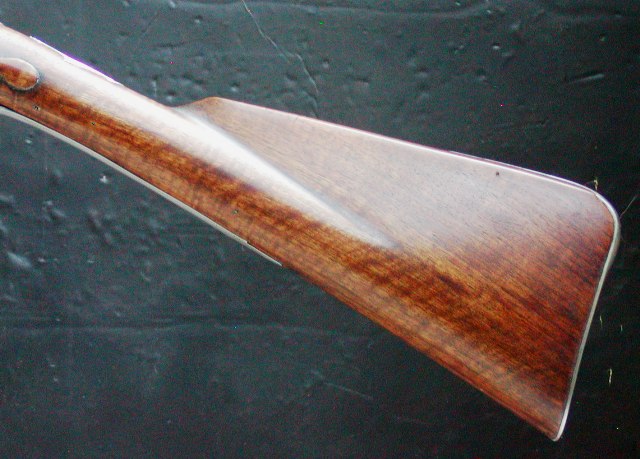
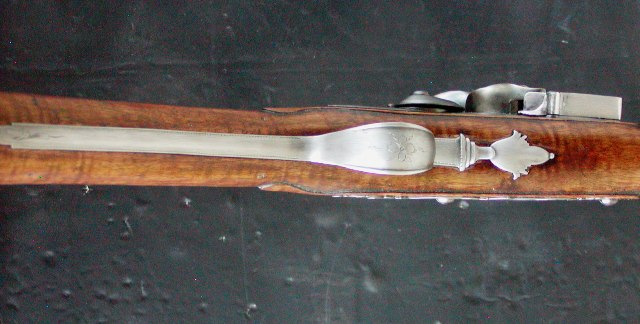
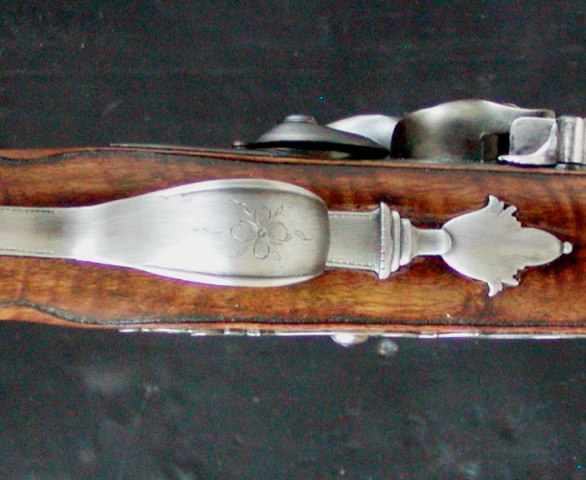
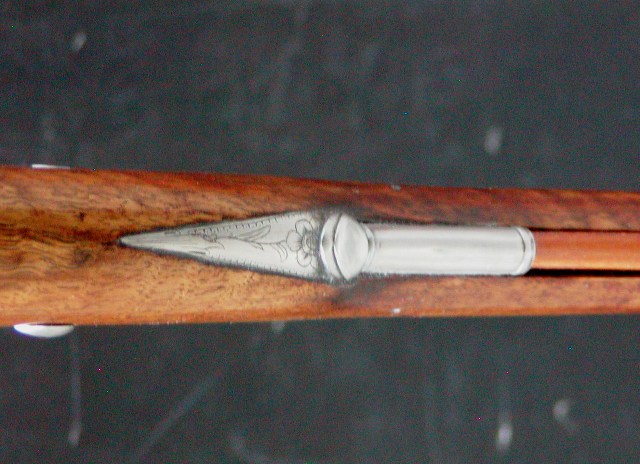
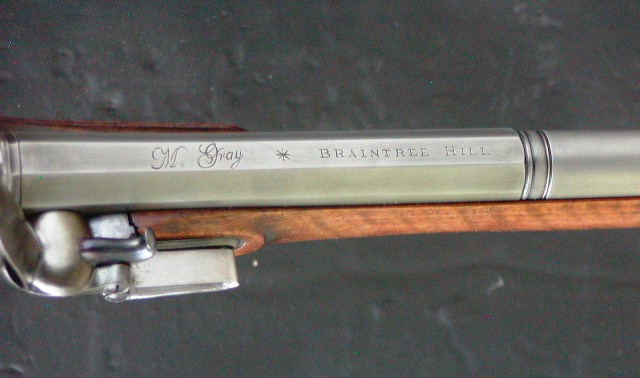
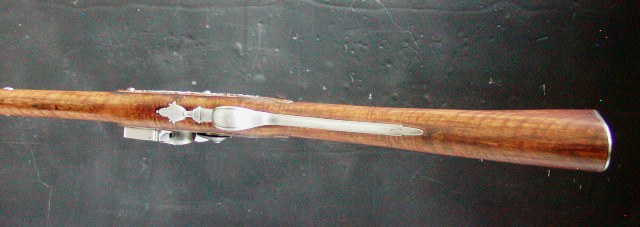
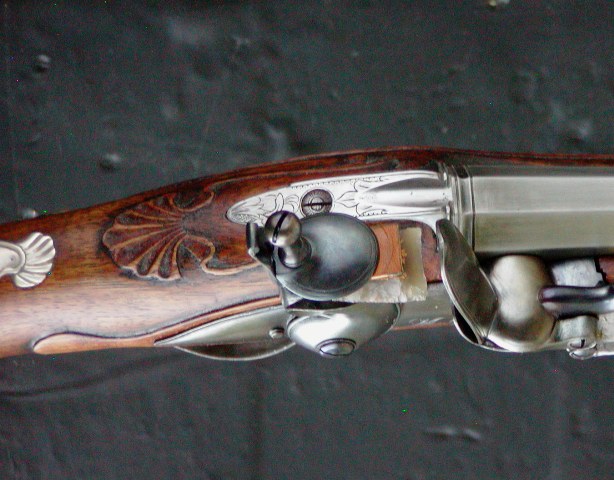
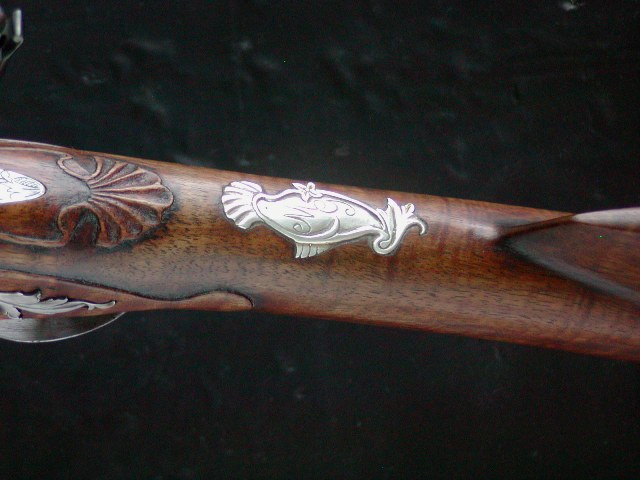
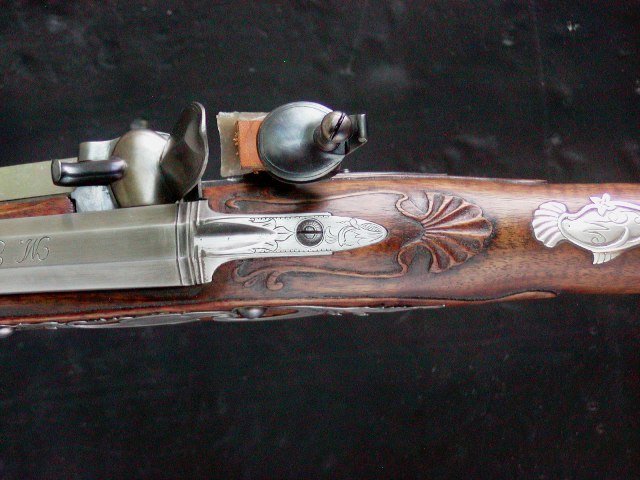
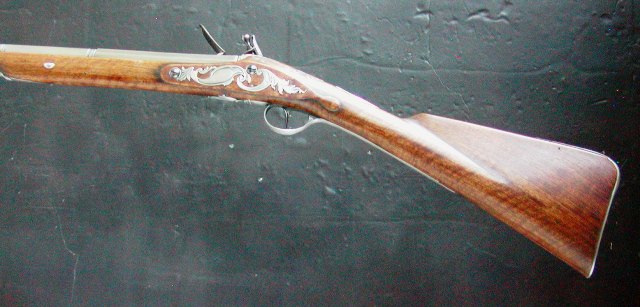
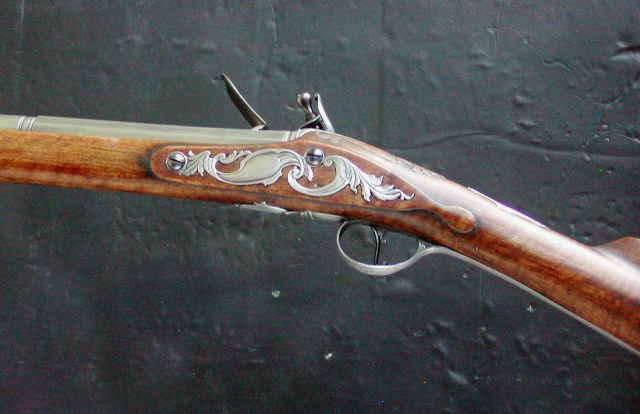
Well here's what everyone has been waiting for... The final pictures.


Man has it been a journey. Sometimes I have to pinch myself and ask if this is real. The best part? It is! There are a few little things I'd fix and change or wish I had done differently, but overall I'm definitely proud of myself. I couldn't of done this without having such an incredible teacher and mentor in Dave.
All the engraving is done by him, as that was a skill I did not have time to master with the deadline I had to work with.

I'm definitely NOT going to stop building although college will shorten the amount of time I have free. Already there are four orders in for this summer I will be building for folks (two Short Land Pattern Brown Besses, one Long Land, and one Eliot Carbine). The goal by the end of the summer is to be able to build a historically correct musket by myself without any guidance. I will be following in Dave's footsteps and posting updates throughout the summer on those builds so everyone who has followed this project has something to look forward to.

I would also like to say a huge thank you to everyone who has followed and supported this project. Your endless support and encouragement has never failed to bring a smile to my face. Thank you all for following along.

-Maria
 
Remarkable accomplishments - And done on schedule!
The thought crossed my mind while reading and viewing these updates of how Maria will be using this gun in her re- enactments. I shuddered to imagine what could occur in some scenarios that I’ve experienced in the field of battle ( and elsewhere).
Again, thanks for these wonderful photo-visits to your workshop and the fantastic tutorials.
I will baby this at events as much as I can within the bounds of historical accuracy. Of course, the whole point is to use it! It will not be a wall hanger so it will be well used and well loved.
 
Hi,
Thank you all for supporting Maria and our work! Well today, we got a lot done. The weather is perfect for drying finish so the first task was to get more finish on the fowler. I sanded off the crust of filler yesterday and put on more finish because we had to take advantage of the weather and time. The fowler has to be completed within 2 weeks to meet her school obligations, so we have to move. Maria will do a separate post on the stock finish. I am going to cover other tasks such as engraving and barrel finishing. Maria began this project last November. In a little over 6 months working no more than 2 days a week she has gone from never having touched a stock blank to what you see right now. It is a remarkable result, however, I cannot expect her to master engraving at the same time so I am doing most of that detail work. Nonetheless, as you will see, she is beginning her training in engraving. Although most of us make what we want regardless of historical detail, the objective of this gun was an historically correct fowler of good but not exceptional quality that might be imported to colonial America. To that end, the engraving and decoration has to suit. I think we accomplished that goal. Here is the butt plate with engraving copied almost exactly from one of my original fowlers. It is perfect for this gun.


Next, we want some decoration on the breech of the barrel. We decided on a simple fluted band with borders. To cut those borders I had Maria cut several guide lines with the AirGraver, then do the same with a hammer and chisel. We were going to widen and deepen the borders with a triangular file anyway so the cuts with gravers was good practice that could be repaired if needed. Maria did very well with the gravers.


The we moved to the metal working bench and she filed the borders deeper with a triangular file and the fluting with a round file.


In the process she wanted to stop and make a demo photo for her future career as a hand model. I Photoshop brushed out the black dirt, bloody cuts, and greasy film on her hands so she can submit the photo in her resume.


Lovely! Simply a stunning pair of mitts there Maria! Your future is assured In the world of haute couture hand fashions…
 
The pictures are the perfect ending to this fabulous story. We are all proud of you Maria for having the patience to complete the project. You have an amazing skill set (and teacher) to complete such a beautiful fowler. In my mind, there is nothing more satisfying than creating anything for pieces and parts and being able to say "I built that!" Unfortunately, in this modern fast paced world, hand crafting doesn't appeal to the masses. I've never met you but I'm certain that you will be able to handle most anything that life throws at you. Congrats on this milestone.
 
Hi,
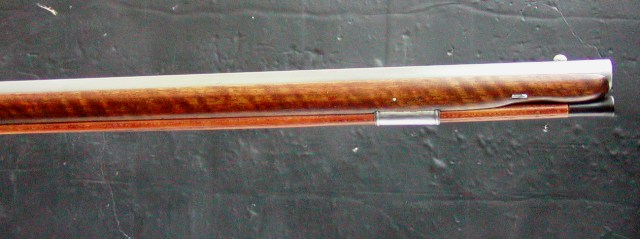
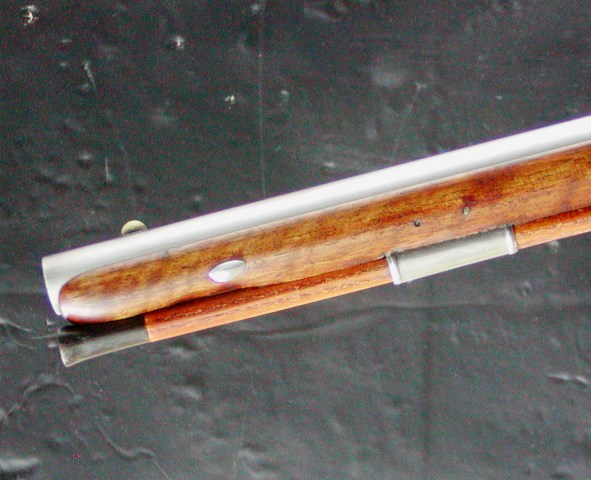
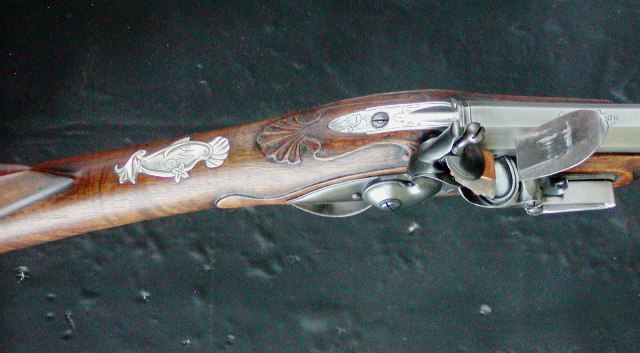
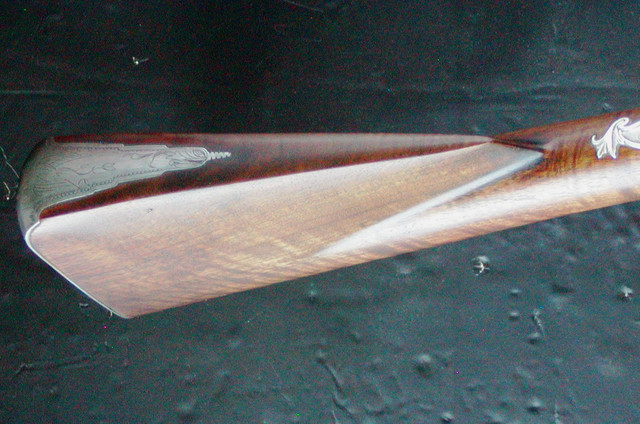
Thanks everyone for your support and encouragement for Maria and me. She did an outstanding job and will be hard at it this summer making muskets. I must admit, the fowler looks better in the hand than in photos. Somehow the pictures don't capture the elegance and craftsmanship that well. We shot the gun yesterday for the first time. It functions very well and it may already be close to zeroed in at 30-40 yards. Soon, we will bench it at 50 yards and see how it goes. Maria's objective was to build a plausible mid-18th century English fowler of good quality that might have been exported to the American colonies. Despite the extra costs of shipping, these guns were very affordable despite the quality because of the extreme division of labor in the English gun trade. Therein lies a big challenge for any modern maker of these guns. The level of workmanship must be high and there is little room for error in getting the architecture right. These are not good gun first guns to build. However, that did not intimidate Maria, and she even went further down the rabbit hole of difficulty by selecting steel and iron furniture. Brass is so much easier to work, shape, and polish. It also was a challenge to keep the proper architecture but still fit Maria who needed considerable drop at heel but a relatively high comb. Added to that are the limitations imposed because few commercially made locks and parts fit the need very closely. With careful instruction, she managed to pull it off with aplomb. It also helped to have original guns on hand to examine while working at the bench. There is probably no better example of the value, importance, and advantage of examining original guns than this project.

dave
 
Congratulations to you both, Maria and Dave for this accomplishment. You have built a beautiful firearm and can be very proud of your work. As a former reenactor please be careful with your new gun, I know some out there won't be as careful as you with their guns and may possibly get too " friendly" near yours! In any case good luck to you Maria and continue with your education. both in school and in the gun making journey.
 
Hi,
I posted this for Maria.

Hello All,

Well here's what everyone has been waiting for... The final pictures.


Man has it been a journey. Sometimes I have to pinch myself and ask if this is real. The best part? It is! There are a few little things I'd fix and change or wish I had done differently, but overall I'm definitely proud of myself. I couldn't of done this without having such an incredible teacher and mentor in Dave.
All the engraving is done by him, as that was a skill I did not have time to master with the deadline I had to work with.

I'm definitely NOT going to stop building although college will shorten the amount of time I have free. Already there are four orders in for this summer I will be building for folks (two Short Land Pattern Brown Besses, one Long Land, and one Eliot Carbine). The goal by the end of the summer is to be able to build a historically correct musket by myself without any guidance. I will be following in Dave's footsteps and posting updates throughout the summer on those builds so everyone who has followed this project has something to look forward to.

I would also like to say a huge thank you to everyone who has followed and supported this project. Your endless support and encouragement has never failed to bring a smile to my face. Thank you all for following along.

-Maria
Hopefully you can still find plenty of time. Gunsmithing is certainly a much more interesting college job than the mail room or bartending!
 
Back
Top