• Friends, our 2nd Amendment rights are always under attack and the NRA has been a constant for decades in helping fight that fight.

    We have partnered with the NRA to offer you a discount on membership and Muzzleloading Forum gets a small percentage too of each membership, so you are supporting both the NRA and us.

    Use this link to sign up please; https://membership.nra.org/recruiters/join/XR045103

New flint kit

Muzzleloading Forum

Help Support Muzzleloading Forum:

This site may earn a commission from merchant affiliate links, including eBay, Amazon, and others.
Joined
Dec 25, 2011
Messages
9,335
Reaction score
4,514
Well I just pulled the trigger on a new rifle kit from TOTW. Got the Classic Tennessee rifle with iron furniture, Chambers deluxe lock and fancy maple stock.
I went with my preferred Green mountain barrel in 13/16s diameter in .45 cal (1-60 twist) which is one of my favorite ball shooting target bores.
Been wanting to build a flinter full stock for some time but didn't have the funds. Should keep me busy for the rest of the winter.
 
I had the good sense to order a set of plans for this build as it is my first long flint gun. I've built plenty of center fire single shot and bolt guns but never a full stock flint rifle. Been thinking about it for several years but after our monthly match yesterday I shot a friends .50 flint gun and decide it was time to make my own. I'll post some pictures along the way.
 
Good luck with your build, and I second the request for photos. Building a new rifle is a great way to spend a winter, and a set of plans is a wise decision. Don't ask me why I know!
 
I've got some ideas on breeching that I would like to try out on this gun if practical that I posted on the liner thread. I'll take some pictures and post them. Perhaps we can all learn some stuff of what to try and even what not to try.
 
One of the things I am looking at is cutting down the depth of the breech plug to allow more room for the vent liner diameter from the back of the breech. Green mountain barrel steel (1137) is stronger in tensile and impact strength than is most of the muzzle loading barrels made of leaded steel and will handle the thread count reduction with ease.
The plug that comes will either be 16 or 18 pitch which means each turn will either draw up .5555 per turn or .0625. That will allow 8 threads in the 16 pitch and 9 in 18 pitch. The first three threads in compression fit threads bear 70 percent of the load and as the bore is .45 cal a .500 deep breech plug will be more than adequately strong in depth of material and thread count allowing lots of room to position the full liner diameter ahead in the barrel wall.
Once the liner is positioned and threaded in place the barrel ahead of the breech plug face can be reamed or lathe bored to groove diameter thus making the vent liner interior match the reamed out barrel to the rifling depth, from the breech face to just ahead of the liner. The reamed/bored section will be tapered into the rifling at the end of the parallel for a smooth transition. I believe this will make for a very good powder chamber that will be much easier to clean with no corners from the liner or rifling to trap fouling.
 
Last edited:
Hi,
Your breech idea may work well but is nothing new. The radius of the breech will concentrate the force of powder more efficiently than a flat plug making the gun shoot harder for a given powder charge. Hugh Toenjes builds his rifles exactly the same way and has good performance to show for it. However, the rifle in the photo below is a tack driver out to 120 yards and has not had a single misfire or hang fire in over 600 rounds.
H9rfAIq.jpg

It has a flat plug and white lightning vent liner drilled out to 1/16". The second photo shows a rifle with a true chambered breech (i.e., a powder chamber much deeper than your plan) with the bottom of the breech radiused and smoothed exactly as you intend. It should be a great shooter.
jqb6QQZ.jpg

A straight 13/16" diameter barrel may be your choice but it is very difficult to build a gun with one that doesn't look like a 2X4 with rounded corners because the breech dimensions are so skinny. It can be done but the end result is too dainty for most inexperienced builders.

dave
 
Thanks Dave, I'll need all the tips I can use as there will be much for me to learn in this aspect of gun building.The first thing I will do when the kit shows up is sit down,read the build instructions then pencil out a plan of breech, liner alteration and build sequence. Best time I ever spend in any rifle build. Saves a lot of head aches later!
Yeah, the only barrel width offered with this kit was 13/16s.
 
A question: I think the breeched barrel is inletted before the lock in most instances but in a kit gun the lock mortise is already established. My question is then what would be wrong with getting the lock started into it's roughed out mortise( for positioning to the vent but not to final depth) and then inlet the breeched and lined barrel to fit the pan center. I can easily make a new breech plug if needed or weld in a tang extension. I am guessing I would have more flexibility to fit things up on center in this manor, No?
 
Maybe this will help. It is first in a series of You Tube videos building a Tennessee rifle. It is not finished yet, but so far there are 14 videos posted with more to come. This one is built from a plank with a swamped barrel and cast off and toe out on the stock. All little different than what you will be dealing with. Everything that you will have to do on your kit is covered in some detail on the videos.

 
Once the liner is positioned and threaded in place the barrel ahead of the breech plug face can be reamed or lathe bored to groove diameter thus making the vent liner interior match the reamed out barrel to the rifling depth, from the breech face to just ahead of the liner. The reamed/bored section will be tapered into the rifling at the end of the parallel for a smooth transition. I believe this will make for a very good powder chamber that will be much easier to clean with no corners from the liner or rifling to trap fouling.

If I understand your description above correctly, you are planning on having a section of the barrel from the face of the breech plug to just ahead of the vent liner that has an ID that is equal to the groove diameter. You plan on tapering this enlarged "powder chamber" to the land diameter.

Seems to me you run the risk of having a patch come off the jag once it enters this enlarged section. If the patch doesn't come of the jag, you run the risk of it bunching up on the jag and causing it to become stuck as you try to pull the patch and jag back up the barrel.

As a general rule, you do not want any "powder chamber" to be any larger than the land-to-land ID.

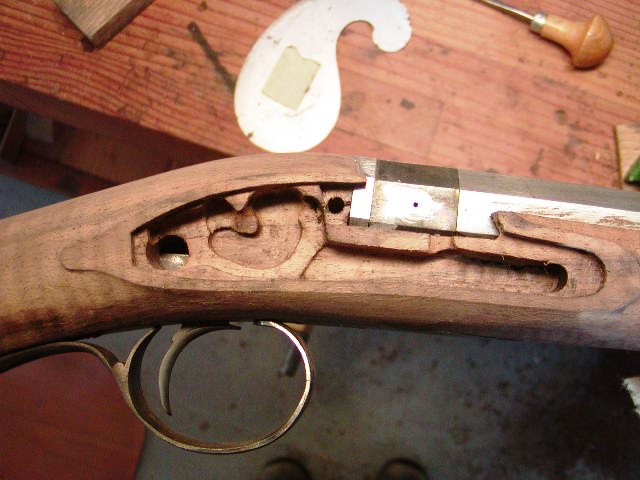
My question is then what would be wrong with getting the lock started into it's roughed out mortise( for positioning to the vent but not to final depth) and then inlet the breeched and lined barrel to fit the pan center.

Getting the lock plate partially inlet before inletting the barrel, breech, and tang on a stock that is 95% pre-inlet is a good idea. It is generally easier to move the barrel forward or backward a small mount than it is to reposition the lock plate in a pre-inlet stock.
 
If I understand your description above correctly, you are planning on having a section of the barrel from the face of the breech plug to just ahead of the vent liner that has an ID that is equal to the groove diameter. You plan on tapering this enlarged "powder chamber" to the land diameter.

Seems to me you run the risk of having a patch come off the jag once it enters this enlarged section. If the patch doesn't come of the jag, you run the risk of it bunching up on the jag and causing it to become stuck as you try to pull the patch and jag back up the barrel.

As a general rule, you do not want any "powder chamber" to be any larger than the land-to-land ID.


Getting the lock plate partially inlet before inletting the barrel, breech, and tang on a stock that is 95% pre-inlet is a good idea. It is generally easier to move the barrel forward or backward a small mount than it is to reposition the lock plate in a pre-inlet stock.
I will simply make a longer jag of brass that keeps part of the patch in the rifling ahead of the groove diameter chamber when the forward part bottoms out on the breech face or make worm/jag combo or make a slotted jag. With nothing to catch on in a groove diameter chamber to just ahead of the vent liner and a tapered lead to the top of the lands I think the patch will clean the chamber and come out with ease.
We're only talking of a chamber perhaps 3/8s to a 1/2 inch long to just clear the vent diameter of 5/16 of an inch ahead of the breech face.
 
Last edited:
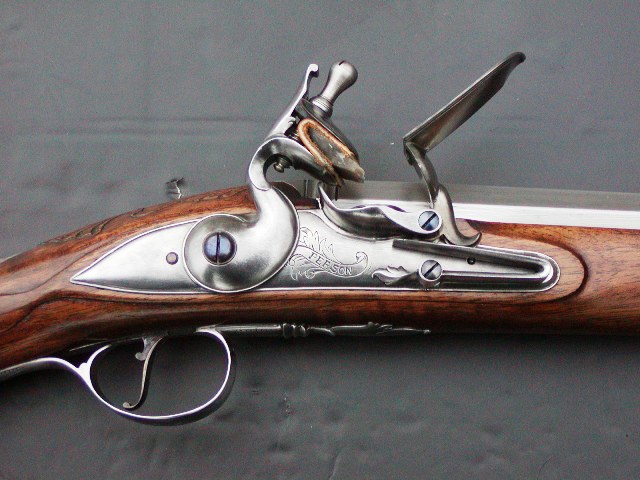
I built this rifle from the Track plans using a GM 13/16" barrel. I shortened the breech and plug to line fence up with the back of the breech and put the liner slightly in front of the breech plug. I ordered this precarve with no lock inletting.

squirrel rifle done 009.JPG


squirrel rifle done 008.JPG


If I could give any recommendation on ordering a precarve it would be to NOT let them inlet the lock mortise or internals. I would wait for another precarve from their supplier before I would go with a inletted lock precarve after my last experience.

How is this for being off as far as a lock inlet goes, a real mess I haven't straightened out completely yet.

lock panel fix 4.JPG
 
I built this rifle from the Track plans using a GM 13/16" barrel. I shortened the breech and plug to line fence up with the back of the breech and put the liner slightly in front of the breech plug. I ordered this precarve with no lock inletting.

View attachment 2136

View attachment 2141


If I could give any recommendation on ordering a precarve it would be to NOT let them inlet the lock mortise or internals. I would wait for another precarve from their supplier before I would go with a inletted lock precarve after my last experience.

How is this for being off as far as a lock inlet goes, a real mess I haven't straightened out completely yet.

View attachment 2137
Nice looking rifle,just the look I'm after. I didn't know that option was available and have been worried about the pre-inletted lock mortise, hence the question. I want the rifles lines, wood (fancy maple) and metal fitting and finish, to be the only adornment.
Kind of figured I may have to turn a new breech plug and or alter the tang to make things line up and look right. Just hope no additional wood will need to be added to fill in any factory made pre-carve holes or my mistakes.
 
Back
Top