• Friends, our 2nd Amendment rights are always under attack and the NRA has been a constant for decades in helping fight that fight.

    We have partnered with the NRA to offer you a discount on membership and Muzzleloading Forum gets a small percentage too of each membership, so you are supporting both the NRA and us.

    Use this link to sign up please; https://membership.nra.org/recruiters/join/XR045103

Rebuilding a Mendi Wheellock

Muzzleloading Forum

Help Support Muzzleloading Forum:

This site may earn a commission from merchant affiliate links, including eBay, Amazon, and others.
Griz44Mag said:
I am just in total awe. Fantastic results.

Well thanks Grizz, but you shouldn't be in awe of me - it's mostly dumb luck & making thing over 2 or 3 times.

I'm in awe of the hardening because I expected just mottled gray colors. I read lots of posts about hardening and all the special charcoals (wood, bone, leather) people use and using rain water & aeration & putting oil on top to the water or nitrate in the water - and in the end I used pulverized oak charcoal & activated charcoal used in aquariums, the water is just city fluoride H2O in a used bucket with latex paint stuck to the bottom. (I filter the city water to drink it because it tastes like it came out of a swimming pool)

This project has taken a long time because - 1. I only work on the project 3 or 4 days a week for 3 to 5 hour max. (it's only a hobby!); 2. I haven't done this before; 3. I don't know what the heck I'm doing - no plans per se, but using the Mendi lock as a "go by" and looking at the Lauber wheellock plans & a German plan for reference; 4. I do a lot of reference of others who have done this type of work; 5. Rome wasn't built in a day and neither was this wheellock.

Mike
 
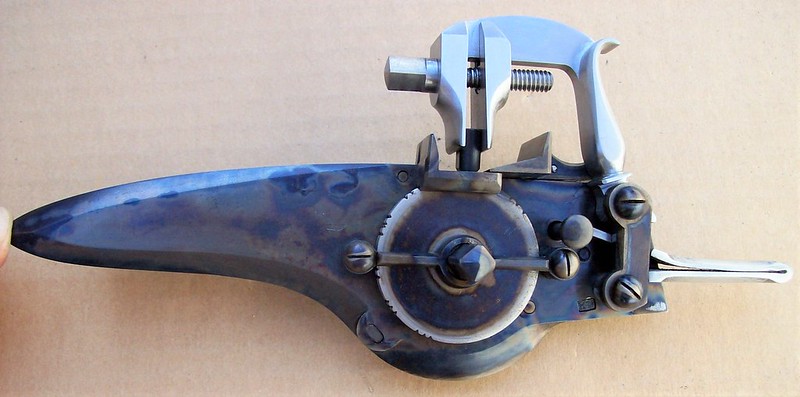
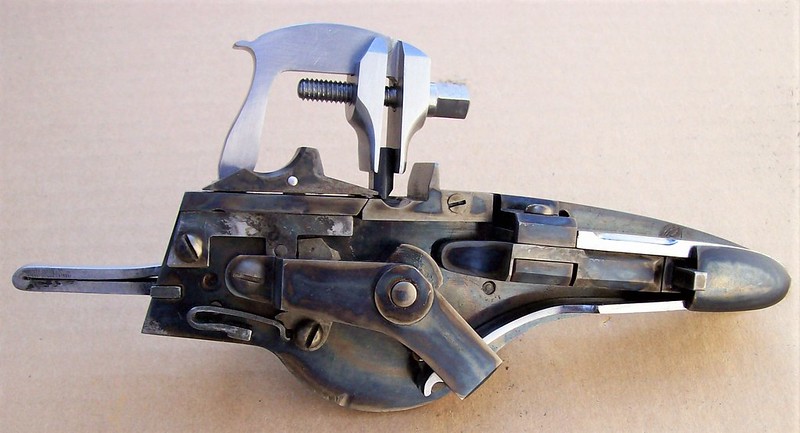
I annealed the harden parts in the oven this morning after one of the 10-24 screws broke off in the lock plate (it snapped like a thin potato chip). I put the parts in a heavy metal pan at 390°F for 1 hour and let them cool down in the oven - no more problems after the one broken screw. The colors did get darker but they seem very fragile. Here's 2 photos of the completed wheellock:
https://flic.kr/p/NB2X5h

https://flic.kr/p/2aEgEAq

I'm using a 5/16" dia. ferro rod in lieu of pyrite but it doesn't produce many sparks - will have to tinker some more it seems. Mike
 
Really impressiv build!! I hope you will post Your Experiments With trying to get it to get it to spark. We are Learning alot from you. Hope some day to build a wheellock from the Lauber plans.


Best regards
Rolf
 
I use even a smaller 'fire stick' and get plenty
sparks. I also rotate the 'fire stick' for each shot.

Wulf
 
I'm using a 5/16" dia. ferro rod in lieu of pyrite but it doesn't produce many sparks - will have to tinker some more it seems. Mike

Perhaps, if you add more serrations to the outside of the wheel it will increase the amount of sparks?

I notice the serrations are in sets of three with a rather long distance between them.
 
I guess I'll follow the suggestions & cut more teeth into the wheel. I have a suspicion that the wheel isn't hard enough but I'll find out tomorrow.

Thanks everyone, Mike
 
Took the lock apart this morning and the wheel is NOT hard! So I need to get some other locks apart and ready them for hardening and do them & the wheel again.

I think the fire never got hot enough to cook the parts in the upper part of the container. When I poured the parts into the water the charcoal was not red like I've seen in other photos, but it was just black soot-like looking.

So maybe another week or so until I can get back to hardening again.
 
If you are going to use "fire sticks" you need the
wheel to be hard...

Wulf
 
Back
Top