Reworking a Pedersoli Brown Bess Musket

Muzzleloading Forum

Help Support Muzzleloading Forum:

This site may earn a commission from merchant affiliate links, including eBay, Amazon, and others.
Thanks for all the tips and photos Dave. I have been gathering parts over the years, and have a second hand but serviceable barrel, and a Pedersoli Bess lock, along with a Dunlap Woodcraft after market stock..., I call it my Frankenbess. Since I'm installing the parts, I might as well do the wood in a more correct manner while I'm at it. Thanks again.

LD
 
I'm late to comment, though I've been watching this thread carefully. Thanks for all the detail and background behind your choices. I have an "elderly" Pedersoli Bess carbine that's always nagged at me. It's finished in an almost purple plum brown and the stock just lacks the fine detail you've worked into yours. Come a long cold night some winter, you've encouraged me to quit complaining and start fixing. Thanks! :hatsoff:
 
Dave,
Have to admit I was initially puzzled when you wrote about taking wood off the fore arm prior to your most recent post. Wow, taking that wood off the bottom is something I don’t think I ever noticed or heard of before. Once again, it shows you have a remarkable eye for stock details.

I pulled out my Pedersoli Bess made in the late 90’s and while it also has the noticeable “step down” up front, the front rammer pipe is already inletted such that half or maybe more height of that pipe. So I pulled out three of Bailey’s Books and “The Brown Bess” by Goldstein and Mowbray and looked at a LOT of period muskets to see how far down the front rammer pipe stood proud of the wood. A few of them it seems like the rammer pipe was barely inletted at all, so much of the rammer pipe extends from the stock.

While you are filing down both sides of the wood around the rammer, do you check it for flatness with a Carpenter’s Square or maybe something like a long Aluminum ruler? Never having done this before, I don’t trust my eyes to do it the first time.

You mentioned you used a triangle file, I think, to cut the two lines on the front of the trigger guard. Did you switch to a small round file after you got the beginning of the lines filed into the trigger guard or did you stay with the triangle file?

Wow, these are some great details to make a Pedersoli Bess more accurate and I really do appreciate you posting the pics and telling us about how you do it.

Gus

P.S. Got some interesting info on the 1769 Dublin Castle SLP’s I will be writing next and adding to the other thread as soon as I get it typed.
 
Hi Gus and thank you,
It helps to have had a number of original Besses in my hands and to actually have disassembled several. Most of those were India pattern guns but one was a pattern 1777 SLP. I have also examined a lot of museum guns and taken many notes and photos where I can. I have a sense of what a real Bess should look like, although being hand made, there was a lot of variation in details. A carpenter's square or a simple cardboard template that you hold against the side of the fore stock as you shave it down would be helpful. Calipers would also work. I keep the bottom even and straight by holding the file almost parallel with the ramrod channel and stroking forward keeping as much of the file in contact with the wood as possible. This enables the flat side of the file to work for me keeping the filed surface flat and even.I just do so many of those tasks by eye and after veiwing a lot of originals, I am not too worried about everything being perfectly even and symmetrical. I think it was Howard Blackmore who wrote ordnance stockers would turn out a scraped finish stock from a sawed blank in 10 hours! That was not the work of one man but a team with specialty skills. Still, it is pretty amazing and they did not waste a lot of time evening things up. I cut the lines on the trigger guard finial with a engraving chisel and hammer and then used a triangular needle file to remove metal along the front edge of each line so the line actually becomes a little step. It just requires a few strokes of the file.

dave
 
Hi,
Just a quick note on the "beaver" tails carved at the back of the lock and sideplate panels. If you visited the website I mentioned above, you will see a reproduction SLP Bess with massive beaver tails and very wide moldings. I have never seen an original SLP Brown Bess looking that way, ever. There is a lot of variation in how those features were shaped. Some were narrow and well formed, like the Bess I am working on. Some were very indifferently formed and often appeared as thinning spear points rather than beaver tails, and on some muskets there are no tails at all. The lock molding just comes to a point behind the lock. On originals, there is always a lot of wear which rounds down the carving so it is hard to know how nicely they were made in the workshop. I suspect most were formed quickly with gouges and round files and then left.

dave
 
Hi,
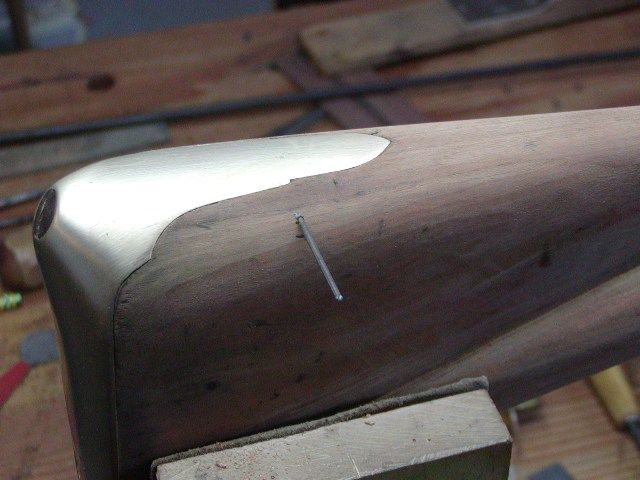
Before moving on to metal work, I wanted take care of the missing butt plate tang pin. Original Besses have a lug cast into the underside of the butt plate tang through which a pin is inserted. The location is always where the final shoulder is on the tang. On real Besses, the pin secured the top of the butt plate. On the Pedersoli, it cannot serve that purpose because there is no lug, however, the pin shows on originals so why not just add a pin to the Pedersoli. I simply drill a 1/16” hole through the butt and tap in a 1/16” pin trimmed to the width of the stock minus a little so the ends are sunken in the wood a tiny bit.
Franks%20Bess%2035_zpseg7dovyq.jpg


Oh boy, now to clean up the barrel. I think I’ll let my minion, Kenny, do this job.
my%20minnion_zpsaqskha6k.jpg


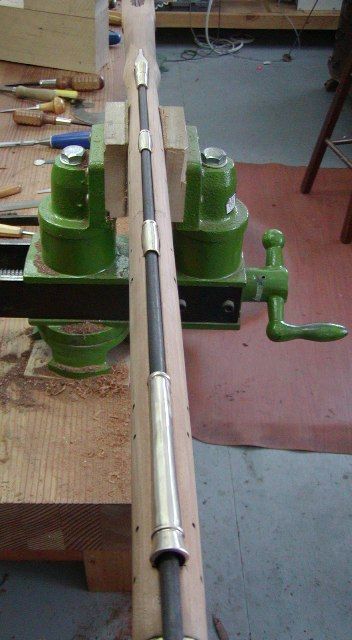
After cleaning the bore with oil, patches, and steel wool to get out pitting, I began taking off the browning. I scrubbed the barrel with comet and a green Scotch-Brite pad, which cleans up the gunk and rubs away much of the brown. Then I use a 60 grit (yellow) 3-M bristle burr mounted on my Dremel to clean off the rest of the brown and polish the barrel. I wear a face mask when I do this because the burr kicks up a lot of very fine powder containing the browning. The little bristle burrs do a great job and work fast. I then rub the barrel with medium and fine Scotch-Brite pads dipped in water to polish the barrel a bit more. I’ll leave it at that for now.
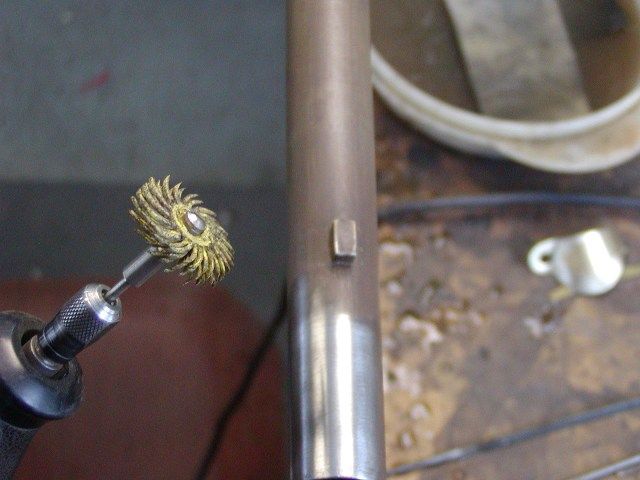
Franks%20Bess%2036_zps9trlzcnj.jpg


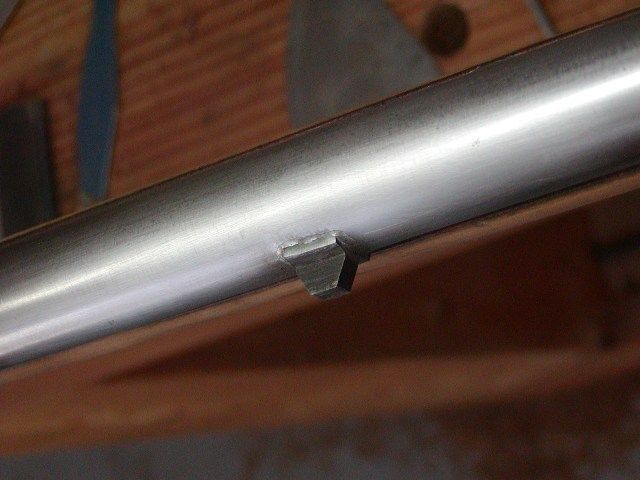
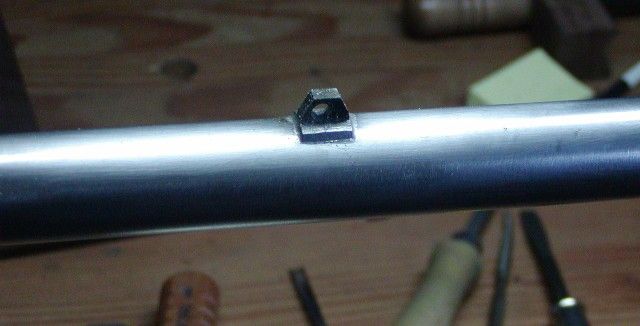
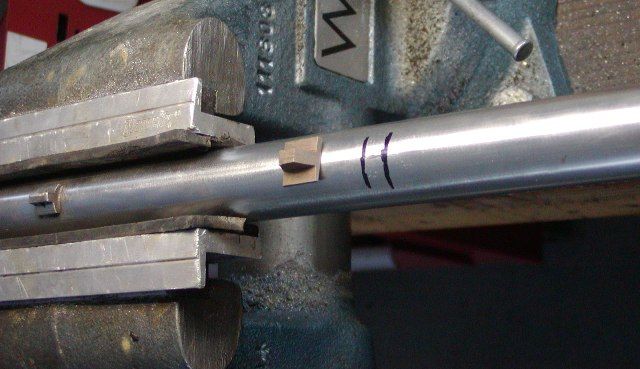
Original Besses have a lug brazed on the barrel through which the screw for the foreward slig swivel passes. This provides support for the swivel so that it is not entirely bearing on the wood. Pedersolis do not have the lug, which is a weakness. I will add a lug. I mark the location on the barrel and make a small lug with concave bottom from some mild steel scrap. It should be about 1/2”-5/8” long, about 7/16” wide, and 1/4” high. I basically make it using a hacksaw and some files. Making sure it fits nicely on the curve of the barrel, I solder it in place using Brownell’s Hi-Force 44 low temp silver bearing solder. This stuff is very strong but you have to make sure the surfaces to be soldered are very clean or the solder will not flow.
Franks%20Bess%2037_zpsykrliioc.jpg

Franks%20Bess%2038_zpsivkmmzay.jpg


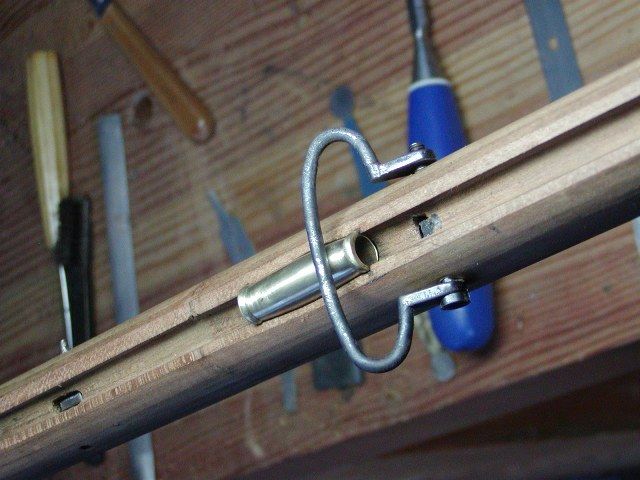
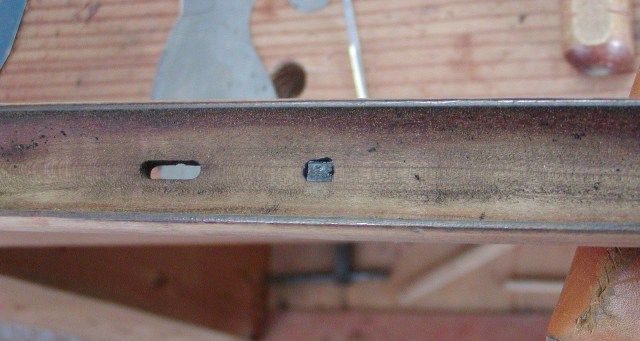
Once the lug is soldered in place, I coat the top with some inletting black and press the barrel into the barrel channel to mark the location for inletting the lug. Using 1/4” and 1/8” flat chsiels and a small #3 sweep gouge, I inlet the lug and its base. It is easy to do and don’t worry if it breaks into the ramrod channel because it is about 1/4” high, which is about the thickness of the web of wood between the barrel and ramrod. After inletting the lug, put the barrel in the stock and put the barrel pins in and tang bolt screwed into the trigger plate to set the barrel tightly in place. Then using a drill about half the diameter of the swivel screw, drill in the swivel hole from one side into the lug but don’t go completely through the lug. Then drill from the other side until through the lug. The holes should meet pretty closely. Then use a drill the diameter of the screw or a tiny bit larger, and repeat the drilling from both sides. If you are careful, it will all line up just fine. After mounting the swivel on the gun, I check to make sure it overlaps the ramrod thimble behind it. It must do that, or the swivel will block the ramrod going back down the channel during loading. Original swivels were welded rod. This one is cast and the loop is too neatly compressed such that it barely overlaps the thimble. I heat it and bend it to open it up so the overlap increases. In doing that, the swivel loop also looks a lot more authentic.
Franks%20Bess%2039_zpssolpsti7.jpg

Franks%20Bess%2040_zpsvgphy4bx.jpg

Franks%20Bess%2041_zpsm8sngiu4.jpg


dave
 
Dave,

A “blind” pin to cover that the Pedersoli Buttplate does not have a tang? Brilliant.

Never having cut a dovetail in what I consider a very thin walled barrel, how deep do you normally cut the dovetail for the sling swivel lug? Oh, I noticed you angled the fore and aft edges of the barrel lug more than I’ve seen on a couple of original muskets. Looks like it would make inletting them easier?

On both my circa Mid 1970’s Pedersoli Brown Bess Carbine and my late 1990’s Full Length Pedersoli Musket, the sling swivels that came on both of them were/are insanely too wide for period slings. I fixed that by replacing the sling swivels on my old Carbine, but have not done that yet on my full length Musket. I wonder, do you replace the factory swivels or perhaps cut out a piece from the middle of each swivel and weld or solder it back together, using the screw to align both halves?

Gus
 
Dave,

WOW, just 10 hours to turn a rough blank into a finished stock in the period? Even considering they used different workers who were best at doing things to the stocks, that is almost warp speed. I admire the guys who inletted the locks and buttplates.

Before you wrote this post on the beaver tails behind the lock, I had noticed you did not make very large ones and often seem to use a sort of flat point on yours. While looking at the forearms on a bunch of stocks on originals in three of Bailey’s books and “The Brown Bess,” I looked carefully at the beaver tails on those stocks. Have to say I never really noticed how much they differed, due to the different workmen who carved them.

I have greatly admired the beavertails and wrap around “Aprons,” as Bailey mentioned they were described in the period, that went from the panels to the bottom of the stock near the sides of the trigger guard on the Pattern 1730 Muskets to some Pattern 1740 Muskets. Bailey mentioned these were not only for esthetics, but also to reinforce the stock at those points. However, it must have been way to expensive as the carving was greatly simplified from the Pattern 1742 Muskets and beyond.

One would think the workmen at the Tower who stocked the muskets and assembled them, would have been paid fairly well for the times, but Bailey mentions they were pretty poorly paid, no matter what they did. Bailey gives examples of one guy who was brought to court for taking scrap brass and worn out lock parts to sell on the side. Another workman got caught taking a couple of broken/unserviceable bayonets and his defense was he was going to make some tools out of the metal. Though that defense was pretty crafty, they threw the book at him as well.

Gus
 
Hi Gus,
I am going to swap out the swivels for proper smaller ones for the Bess. Track of the Wolf sells the right size, however, the owner has a pretty wide sling and I am giving him the option of the new narrower swivels or keeping the old ones. The swivel loops that came with the gun are way too wide. I don't cut a dovetail in the barrel for the lug. I simply solder it on. The angled shape does make it easier to inlet and to remove less wood. Most originals were round but I disassembled one (India pattern Bess) that was angled. I like the big beaver tails on the earlier muskets and wish they continued them. They really are not hard to cut and can be done very quickly but they certainly require more time than the indifferent tails cut on the pattern 1742s and later. I feel for the poor workmen of that day. Some were salaried "day" workers and others were "piece" workers who were paid by the unit manufactured. The authorities really exploited the piece workers.

dave
 
Dave,

My apology. Yes, you are definitely correct the barrel lugs on many originals were half round. That is what I was thinking and instead wrote square or rectangular. :doh:

I appreciate you mentioning you solder the swivel lug on.

BTW, got a real kick out of your description of the original "indifferent tails." :haha:

Gus
 
Hi,
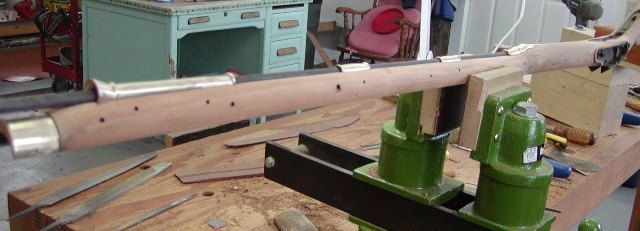
Well, I’ve done some metal work on the barrel but still have to work over the lock. However, I wanted to finish up the woodwork so I can get the stock stained and finished. While finish is drying, I can do the lock. I thinned the forestock with files and scrapers. The photos show how much ramrod is exposed as well as the thimbles.
Franks%20Bess%2042_zpswobhdett.jpg

Franks%20Bess%2043_zpss2qjnv8o.jpg


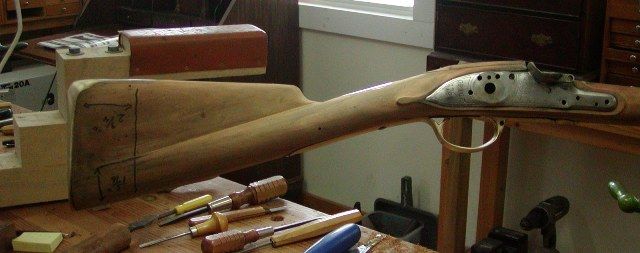
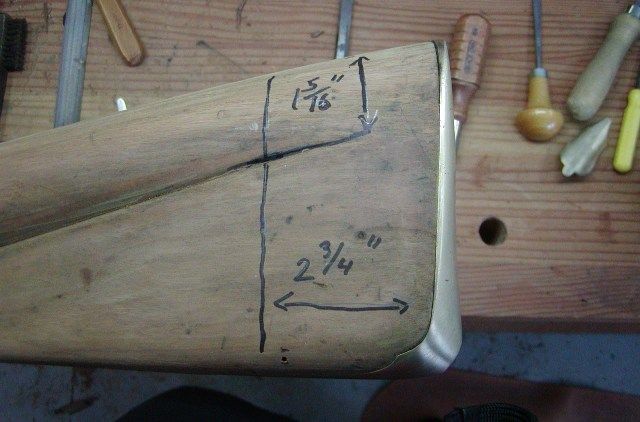
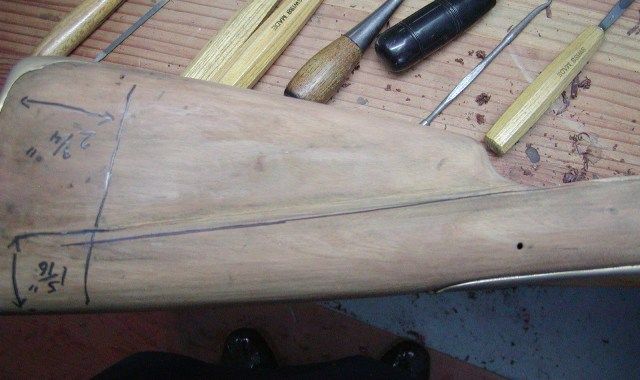
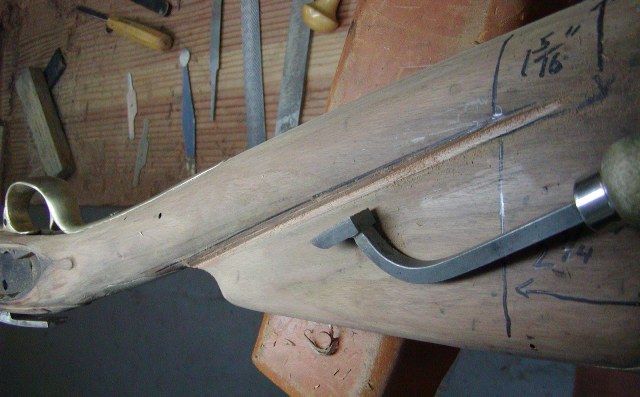
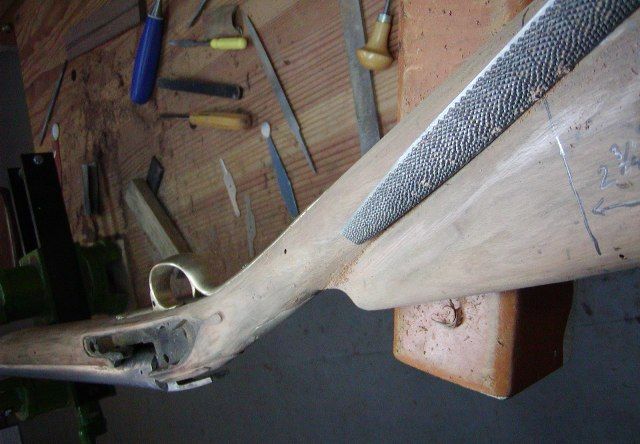
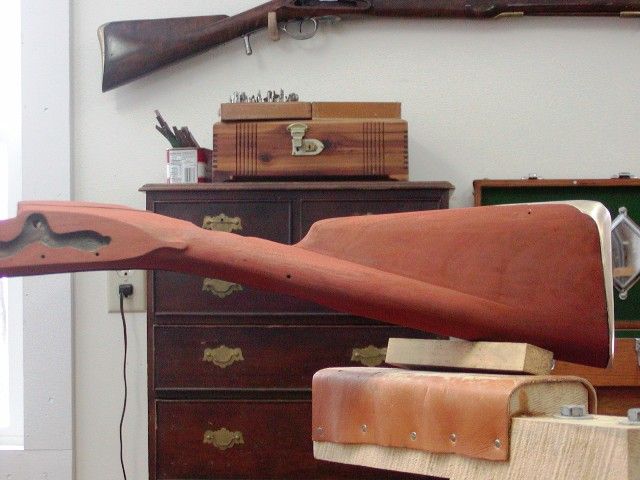
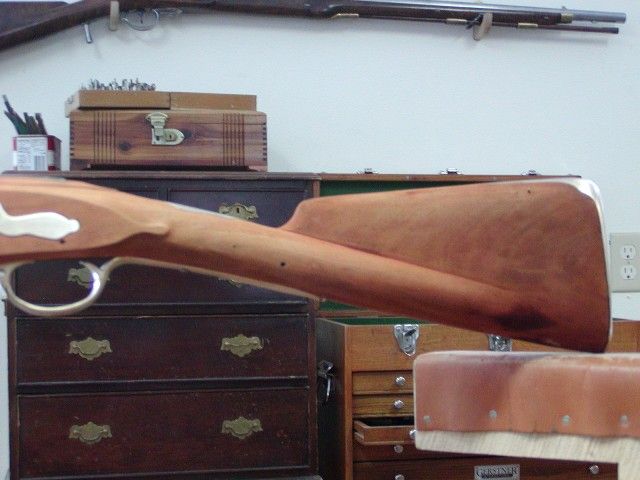
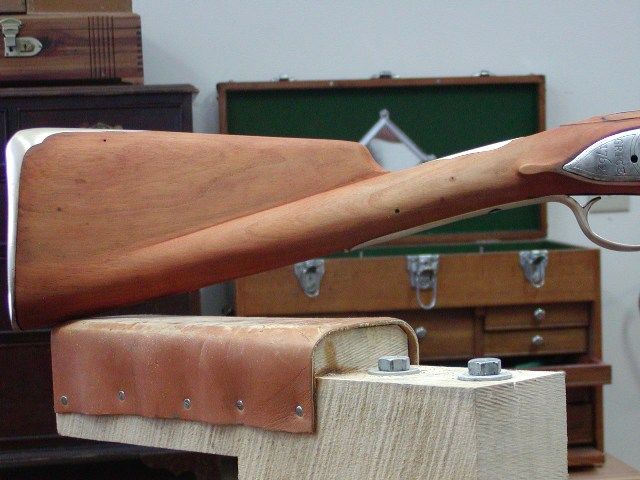
I am essentially done with the wood work that is historically correct for the gun. However, before the final scraping and finishing I will do one more thing that is not historically correct but helps create an illusion making the gun look more correct. Many of you may not want to do this but I want to show it anyway. I mentioned previously, that the buttplate is 1/4” ”“ 3/8” too short and they reduced the drop of the heel by almost an inch. That doesn’t seem like much but it makes a big difference in how the butt stock looks. The Pedersoli just does not have the proper drop in the heel or size of the butt. It looks too straight and almost like it is “perch bellied” and the butt stock looks too small relative to the lock. It is a real shame Pedersoli chose to do that. I make a modification which is not historically correct but that makes the stock look more correct. First, let me mention my “1/3 rule” for Bess butt stocks. It is based on direct measurements of originals and good photos of others that can be scaled. If you measure the length of the comb from the top of its nose to a line drawn vertically from the small of the buttplate, the baluster wrist should end 1/3 of that length in from the small of the buttplate. If you measure the height of the buttstock at that point, the baluster wrist comprises 1/3 of that height and that height remains fairly constant all the way up the wrist.


Franks%20Bess%2045_zpsdg0hnuru.jpg

Franks%20Bess%2044_zpsrid3fjzp.jpg


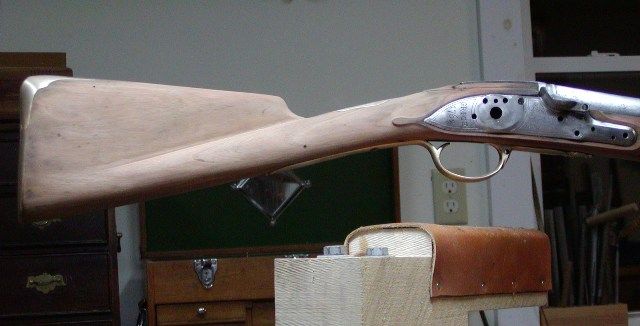
Pedersolis pretty well match that rule, however, the height measurement is smaller than originals. I find that if you angle the baluster wrist downward slightly such that it becomes thinner toward the buttplate and is a little less than the 1/3 rule, you can create an illusion of greater drop in the stock and a bigger buttstock.
Franks%20Bess%2046_zpsinhqalwc.jpg


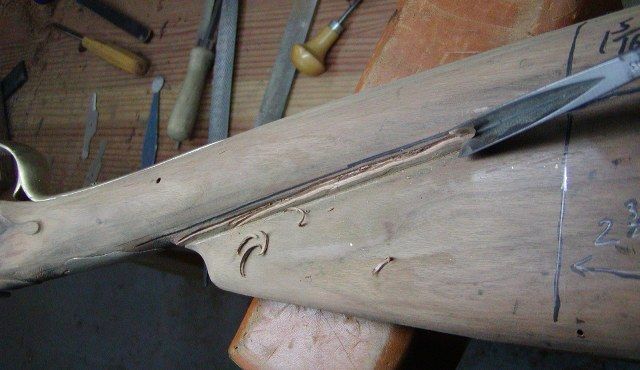
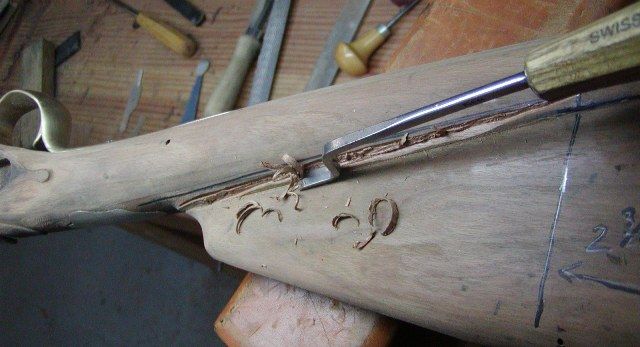
I make that adjustment starting with a large “V” chisel to cut into the crease on top of the baluster and then remove wood with a dogleg flat chisel. Then I smooth is out further with a bottoming file. I round off the flat top created by the chisels and files using my #49 Nicholson pattern makers rasp held as shown. Scrapers finish the job. Each side only takes me about 20 minutes. I also file down the wrist plate a bit to match the new wrist profile. When I have finished the stock and stained it, you will see the difference compared with the original Pedersoli profile.
Franks%20Bess%2047_zpss6secb8u.jpg

Franks%20Bess%2048_zpsoykx5tl1.jpg

Franks%20Bess%2049_zpsccp1skky.jpg

Franks%20Bess%2050_zpsfapd5ppt.jpg

Franks%20Bess%2051_zpsmtgs5ig0.jpg
 
Dave,

Prior to this last post of yours, I really did not understand what you meant about working the butt stock to make it appear more correct. I was fascinated by the ratios you found on original stocks. The effect of this modification is quite dramatic.

Gus
 
Hi,
Gus, my modification does have an effect especially after the stock is stained and finished. Unfortunately, Pedersoli also made the wrist too long. Look at photos of originals and the amount of space between the wrist plate and the comb and barrel tang apron. The plate almost touches the apron. Now look at the Pedersoli Bess. You could shorten the space by 5/8” or more. Same with the spacing relative to the comb. That is another reason why the Pedersoli Bess never looks quite right. In fact, it sometimes reminds me more of the German Potsdam musket. It is a shame, but the only way you can get an accurate copy of a Bess is to make or buy a custom one from someone who knows what they are doing.

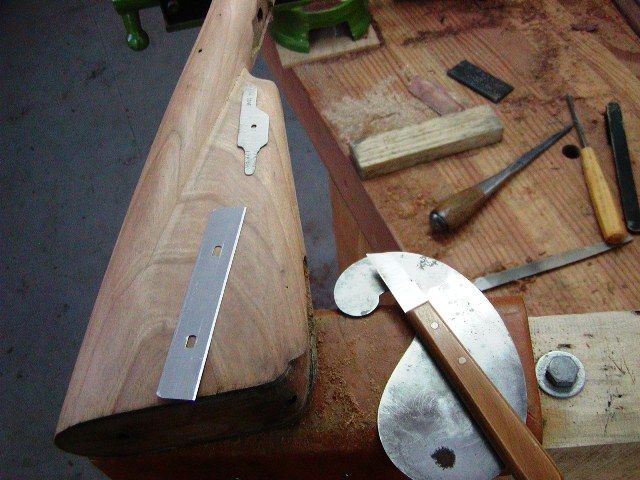
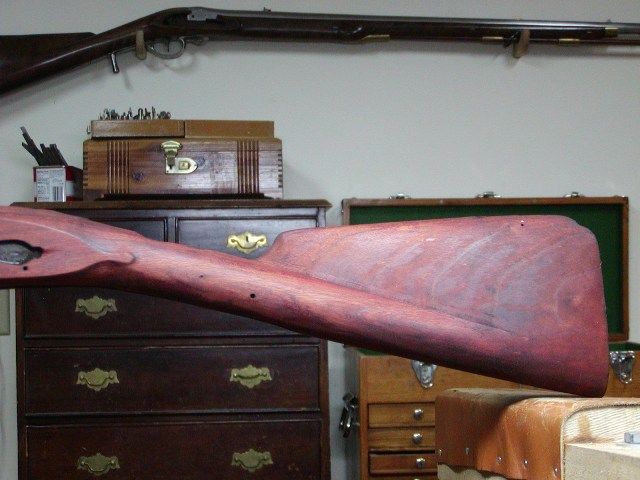
I finished scraping the stock. The photo shows my favorite scrapers with which I do 95% of the work. Scraping is not hard and you have to work with the grain, sometimes angling the scraper relative to the direction of the grain, sometime scraping in the grain direction, but never against the grain. No need to press hard, just let the scraper do the job with easy pressure, and get lighter as you approach the final smoothness. On a Bess, I don’t try to create a scratch-free surface, just scrape off the major bumps and scratches. I also rounded off the crisp corners around the lock and sideplate panels a little because I suspect the ordnance “setter uppers” as they were called, did not worry about maintaining sharp corners on those moldings. After final scraping I stained the stock with of mix of Brownell’s resorcin brown and scarlet aniline dyes dissolved in water. When dry, I rubbed the stock back with a green Scotch-Brite pad dipped in water to lighten the color. I did not whisker the wood because I want the finish to be a little textured rather than glass smooth. Any severe whiskering will be burnished down with a polished deer antler tip. Next up is finish.
Franks%20Bess%2052_zps7poay0wa.jpg

Franks%20Bess%2055_zpsl2tds0ue.jpg

Franks%20Bess%2054_zps25e5gg9k.jpg

Franks%20Bess%2053_zpsjljt8kmr.jpg


dave
 
Thanks William,
I put the first coat of thinned finish on to seal the stock. I am using polymerized tung oil thinned 50% with mineral spirits. After another coat of thinned oil I will used unthinned oil. The nice thing about tung oil is that I can make the finish look just like any linseed-based oil or varnish but tung oil is more weather resistant. Depending on how the oil builds up on the surface, I may add a small amount of spar varnish for a shinier more brittle look although I usually rub that back to mellow the sheen. I’ll see how it goes this time around. Most original Besses that I examined had some sort of oil-varnish on them. Sometimes it was quite shiny but on others it was a bit more mellow.
Franks%20Bess%2057_zps9wgxip3p.jpg


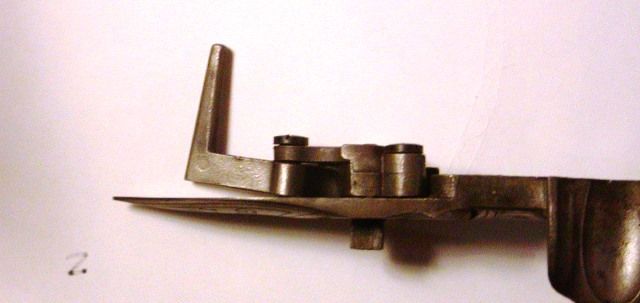
While finish is drying, I am working on the lock. After cleaning up a mass of internal gunk, this is what I found. I guess Pedersoli occasionally can turn out junk too. I think I will go walk Willow and sleep on it.
Franks%20Bess%2056_zpsfpwyfpzs.jpg


dave
 
Dave,

It is not very common at all, but I have seen Sears in Italian Military Percussion/Flintlock Muskets like this before and believe it or not, in some original Foreign Muskets and “Non Interchangeable Parts” Muskets. I thought perhaps the first one I saw had been bent in the heat treat process, but upon closer examination, I don’t think that was the case. Then I thought it may have been done to make up for possibly the position of the trigger bar being off, but again, I don’t think that was the case, either. I think they got bent during the machining process when the cutters got dull or the operator ran the machine too fast or it wasn’t lubricated properly? The original parts were probably bent when forged, after they came out of the forging dies and before they cooled.

As I’m sure you do, I usually replace this kind of bent Sear in Military Percussion/Flintlocks as the Repro Sears were both available and were not so expensive compared to what one might/would have to do to get it to work properly. However, Pedersoli Sears are NOT inexpensive or often readily available. Every now and then when I ran across this, it was with a repro that parts were not readily available for, though. Some examples were some of the “OFF” brands of Zouave muskets and even some of the COLT made muskets over the years. I did not try to stock COLT musket parts as they cost too much, were hard to get and there weren’t enough NSSA Shooters using them to put that kind of money into parts I rarely used. Real Parker Hale parts were also very expensive, BUT they always fit and worked in their locks and in most original locks that were made as “Interchangeable Parts” Muskets.

Anyway, though I certainly don’t like the way the rear of the sear bends outwards, as long as the “bolster” part of the Sear around the screw and the Face of the Screw is parallel to the lock plate, I found you could even do a good trigger job with this kind of second rate Sear, though you sometimes have to cut into the outer edge of the Sear behind the bolster to clear the inside of the Bridle. I did find I often had to clear extra wood in the lock mortise because of the bent shape and even a couple of times I had to cut the outer edge of the Sear Tail short, so it wouldn’t bottom out inside the mortise.

Well, if anyone can fix this Sear (if it needs much work) is you, but you have my condolences for finding the Sear in that condition.

Gus
 
Hi and thanks for the replies,
Gus, the sear is not bent. The hole is drilled at an angle. Somebody must have been drunk on the job. I guess it is also possible someone replaced the sear in the past and screwed up. Anyway, I will anneal the tumbler, bridle, and sear and then I think I am going to straighten out the hole probably with a rat tailed file. I am afraid a larger drill will simply follow the hole rather than straighten it. However, after filing it straight, I will run a bigger drill through it using my drill press to true it up. Fortunately, the sear and bridle have extra meat on them so I can enlargen the holes. Then I will make a new sear screw with thicker shank but similar thread size (it will have a shoulder). That should solve the problem. I don't have metric taps and dies so I will likely rethread the hole in the lockplate to 8-32 or 10-32 depending on what works best. All of the internal parts look like they came right out of the molds without any filing or fitting whatsoever. They look like parts from one of the Miroku locks. This is the worst Pedersoli Bess lock I have worked on. The good news is my finish dried nicely last night and another coat can be applied.

dave
 
Dave,

OMG, I have seen bent Sears over the years, but never a Pedersoli with the Sear hole drilled/tapped that far off center.

Do you happen to know the diameter of the current Sear Screw Thread? I wonder if even a 10-32 screw thread will be big enough for the screw hole, after you open the hole to square it up?

Parts as rough as a Miroku Bess? Good Grief.

Gus
 

Latest posts

Back
Top