Scrimshaw Class

Muzzleloading Forum

Help Support Muzzleloading Forum:

This site may earn a commission from merchant affiliate links, including eBay, Amazon, and others.
Now when I'm cuttin ,I kin only go for a bit 15 min or so an less ,so I'll put in the ink on the place I was doin,I'll hold that part upto my lite to dry her out and then wipe the ink off,usin me spit ,tis the best I know ,tried water and it don't work as good (gits muddy)
Now when yer cuttin lines and ye think they's ain't deep enuff ,ye can recut ,easy just follow them with yer tool and go a little deeper,ye'll be cuttin the black out ,so you know yer cuttin deeper,tis easy,that.
Now I'm cuttin and wipin ,Ya do haveta be aware ,that ink is an abrasive an will take out yer lines .Ye have saved ,just a note of caution.I spray my work with protection and keeps me outta trouble thattaway,for the most part.
Later Peter
 
Sorry ,been away so long.
Here goes start to finish on a regular basis.
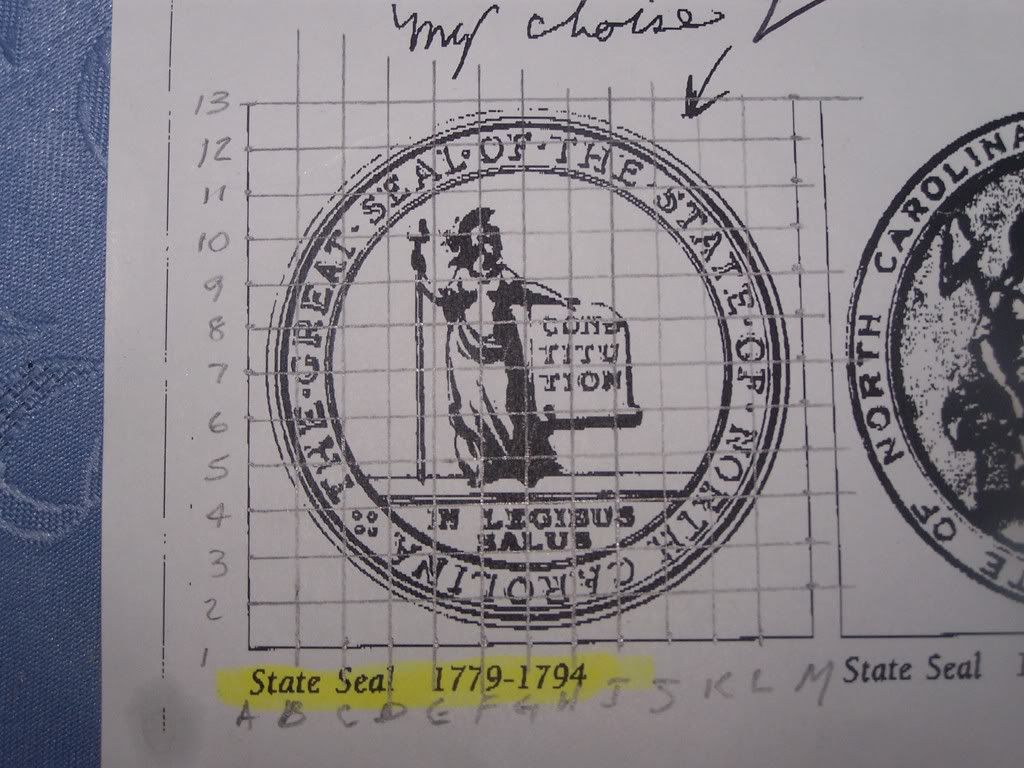
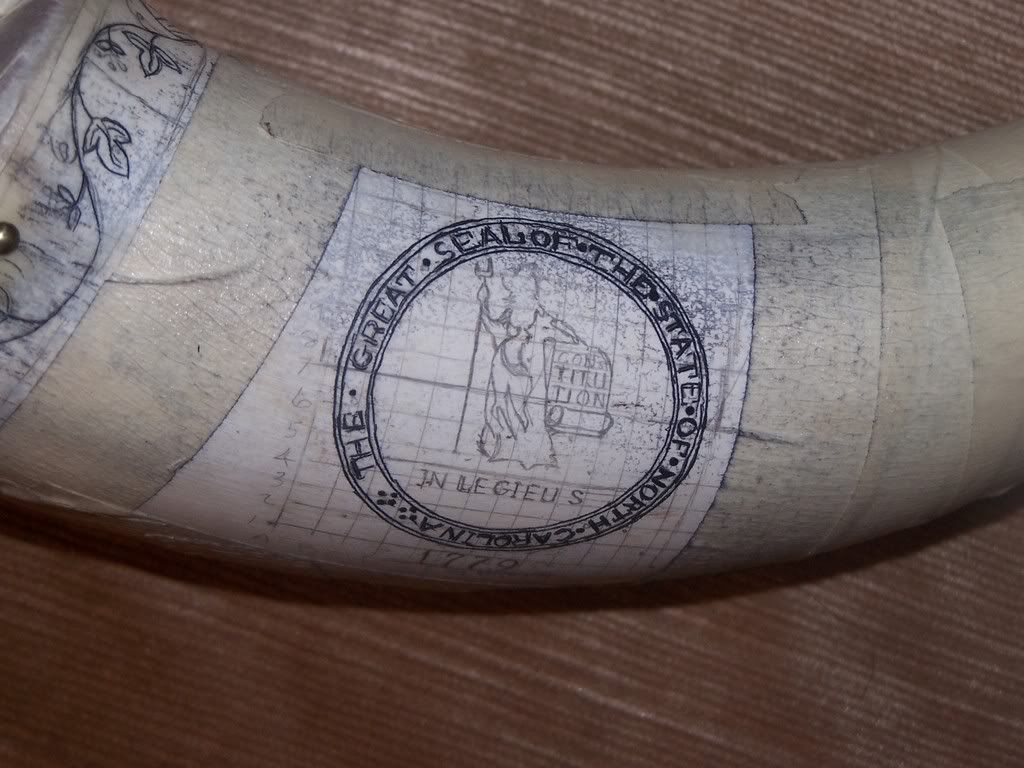
This one is a tricky one ,I'm doin as it has concentric circles,and has to be correct in detail.So I'll be usin the grid.
100_0696.jpg

Notice the numbers on the side an the letters on the bottom,It's confusing usin numbers only,for my wee brain anyway.I used a 5 mm. grid here ,thats not important as long as you have enuff lines to get the detail you want.
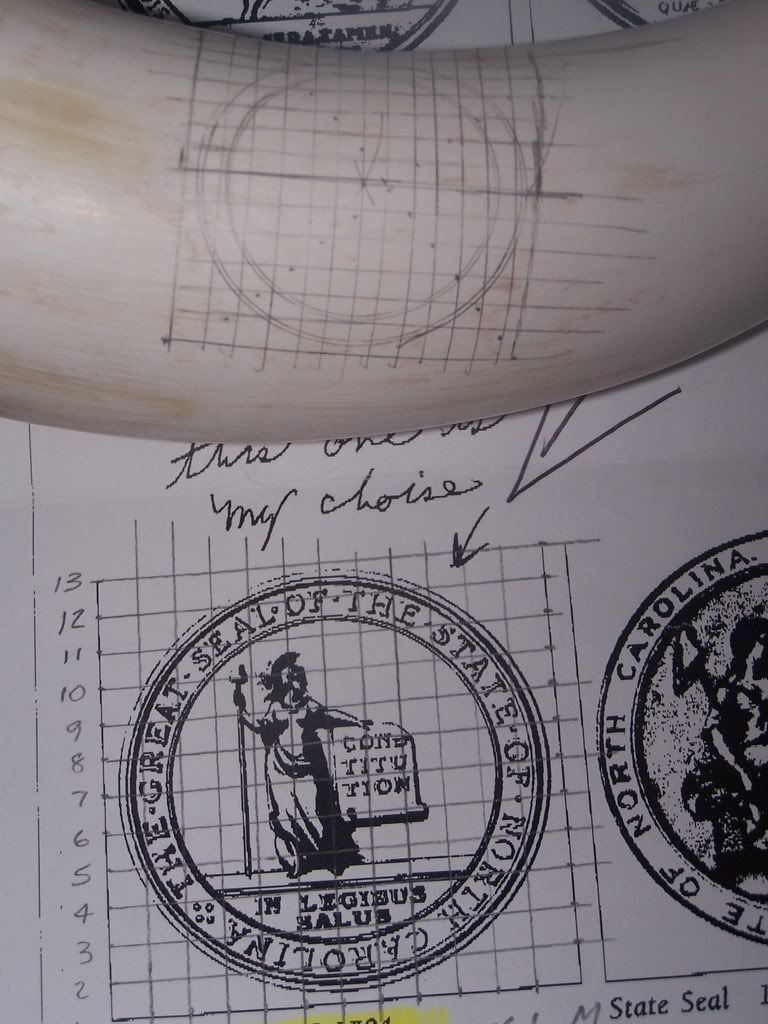
Now the actual picture is smaller than whats goin on the horn,too big .As sen here
100_0698.jpg

Woohoo ,its workin.notice the diff in size and its not an even number ,like 2:1 or 90 %.
Not a problem,mite be tellin ya ,if confused ,I'll try to explain better,later.
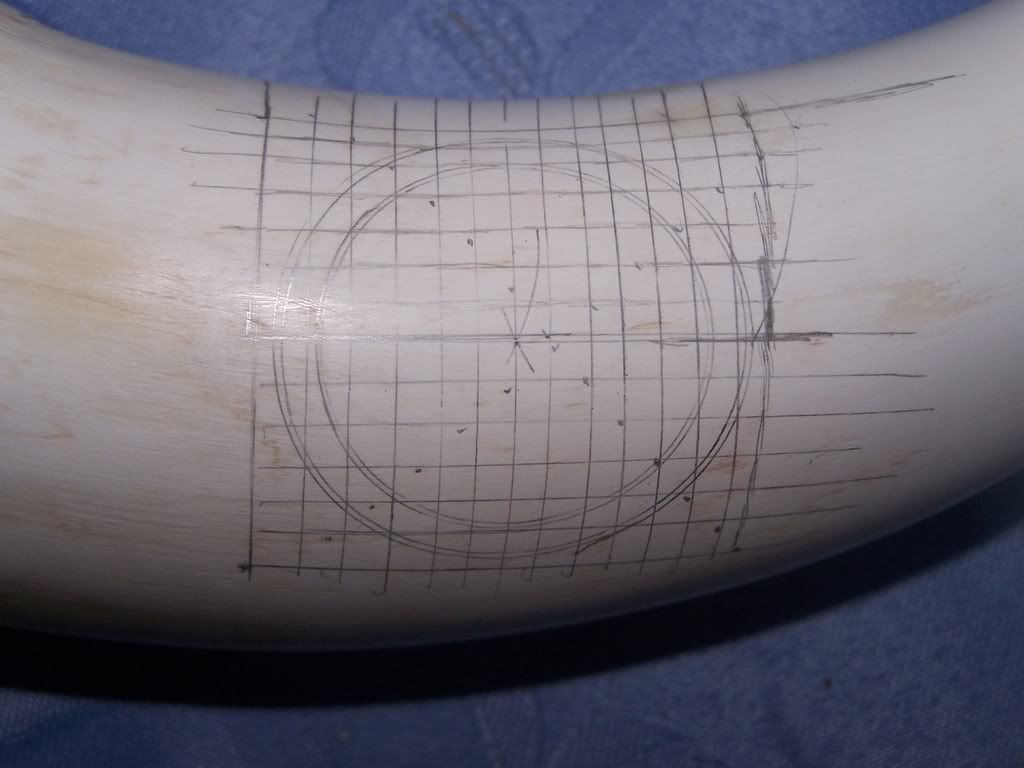
Here goes.I know I have 13 lines .So I marked a flexible edge,I used a cigarette pack.Now I mark on 13 lines(i used the 5 mm dist as I am ruducing so I know I'll reach the top line.
Now I line up No 1 on bottom line and put 13 on the top line.Yo can see that it is just outside my grid,and on a diagonal.
you can see dots goin both ways,if I hadd lined up number one rite at the corner,would only need one diagonal line for horiz.an vertical lines.
Now usin yer flexible edge,draw on the grid,parallel lines.Simple eh.easier doin than sayin.I'm bendin me brain here.
Now this layout is square,so I could use either vertical or horizontal,line ,cuz I know that my marks will reach the top line.
If yer picture is rectangular than use the long side to put yer marks on.
100_0697.jpg

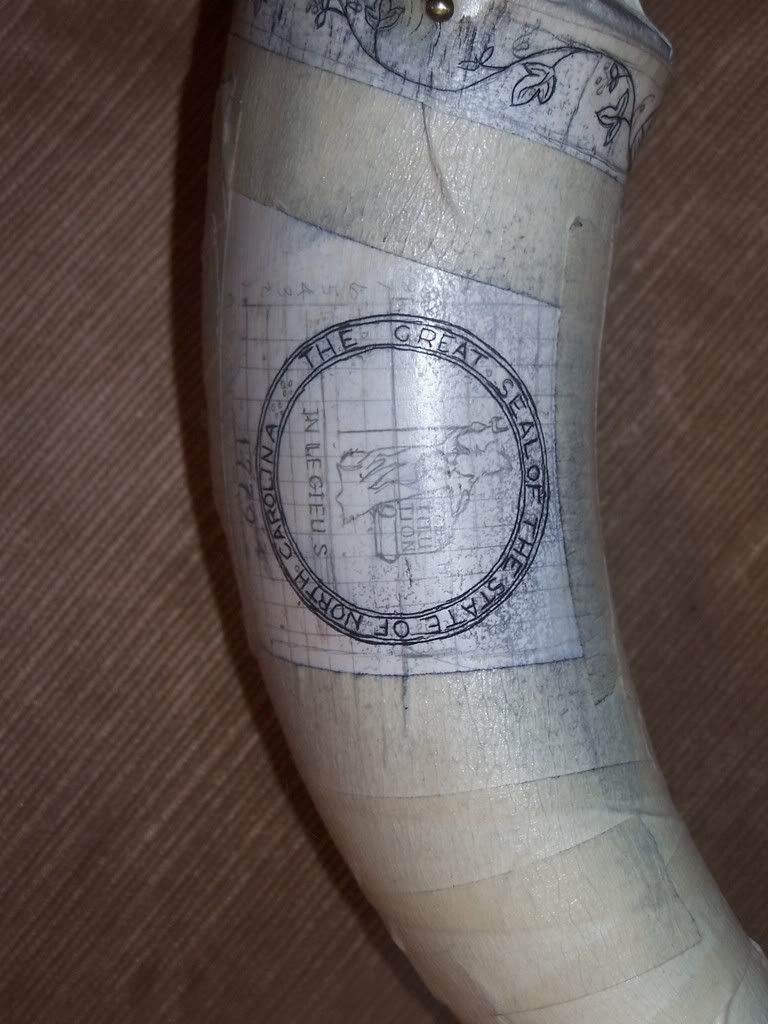
Thats a better pic of the grid on the horn.
Now I'm gonna have a beer an start to fill in the details.All for now
 
One caution,whenyer makin yer flexible ruler ,number yor lines.So's ya have the same as on yer picture...13 on the picture ,14 on the horn...so I redid the picture with 14,light lines are the way to go.
 
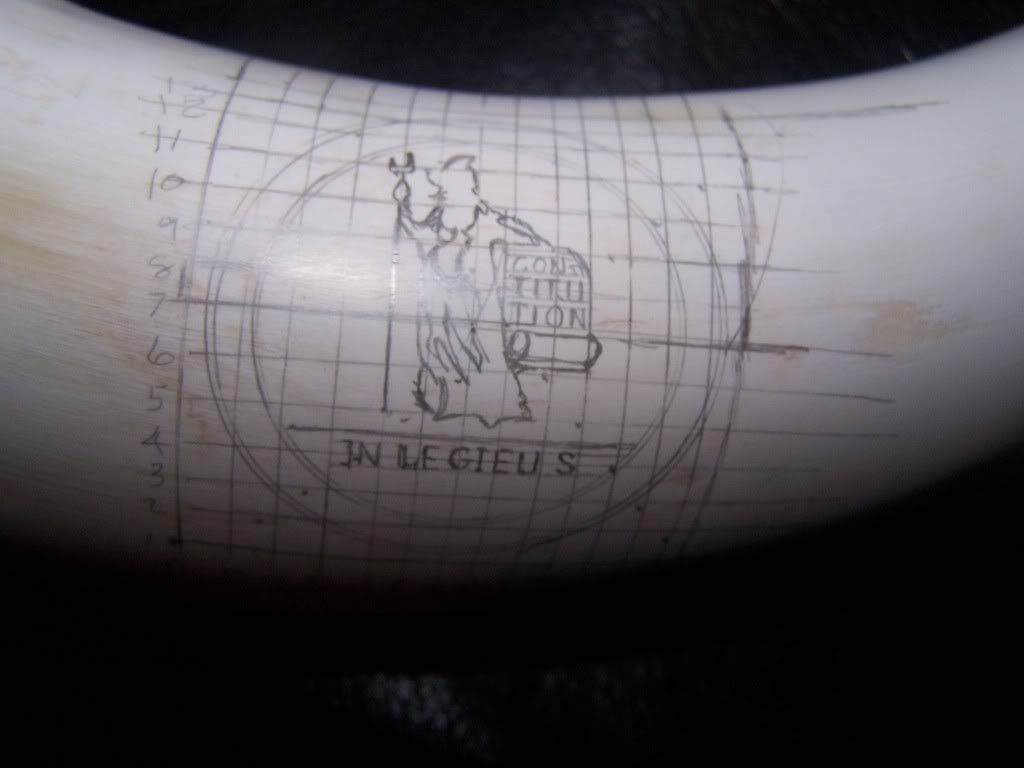
I got the drawing done as much as I want ,need a sharper pencil.This ones gonna be a tite one .letterin specially.You can put as much detail as ya want.I actually put too much,to show ,normally I'll only put one line where the shading goes
100_0704.jpg
 
Well I messed up. last nite ,phone call from hell,but I'm back now,been workin on the horn and takin pictures as I go,I'll be rite back as I have to do the photobucket thing
 
well ,I'm back,holy,didn't expect that much attention,nice to see tho,Thanx guys .
So after I got the layout done ,I taped it up all over to keep the spray ,to just the area's I want to cover.Saves gettin ink in little scratch lines I missed ,never can get them all.
I spray with Krylon clear coat.usually ,couldn't find any this time so I used varathane,the girl at the store said it would come off with nail polish remover,I let ya know how that works out.Soon.
Now you get up your nerve and start cuttin .I did the borders first ,just to get into the swing of things,nice easy work,gives you the feel of the horn,they can be different,also to get used to the grain,some are tight grained ,the best ,the tool tends not to slip much .Then there is loose grain,which is a bit trickier as it wants to grab your blade an take off.
This project had a tricky part to it ,4 concentric circles,Thanks Mark...actually Thanx ,I like to push my horizon.
100_0712.jpg

The way I did it was to go very lightly along the lines ,to give my blade a place to follow,without jumpin the line,then I went back in 2 more times,a little deeper each time.I did all 4 at once.As I had the horn at the right angle,for the cuts.
The lines aren't perfect,but not bad,look better lifesize,and I did it by firelight after a punishin day kickin some indian tribes ass for stealin the settlements favourite cow.
Now I commence to cuttin in the words,which will take your eyes away from my line work,Not much to doin words,curved lines are a pain,best to keep some part of your hand ,even a finger will do to steady you up,cut towards yerself.If yer not sure ,same as the circles just cut a light line in and then go over it,again.
100_0711.jpg

,Thats about it for now ,til I take another picture.I do have one mistake on the horn,I could say just so's I can show how to fix...I'd be lyin...its an easy fix.can ya spot it.
I wasn't the only one to make a mistake neither.If ya look at the picture ,look at the scroll and the letters,I figger the good ol boy that designed the seal.f**ked up.the letters st...1\2 size .I'm thinkin either he made the letters too big or the scroll too small,I do like his fix tho,shows imagination.
 
Good work! It sure is challenging to take on something like that. It will look great when done, even with your knife slips... :wink:
Scott
 
Back
Top