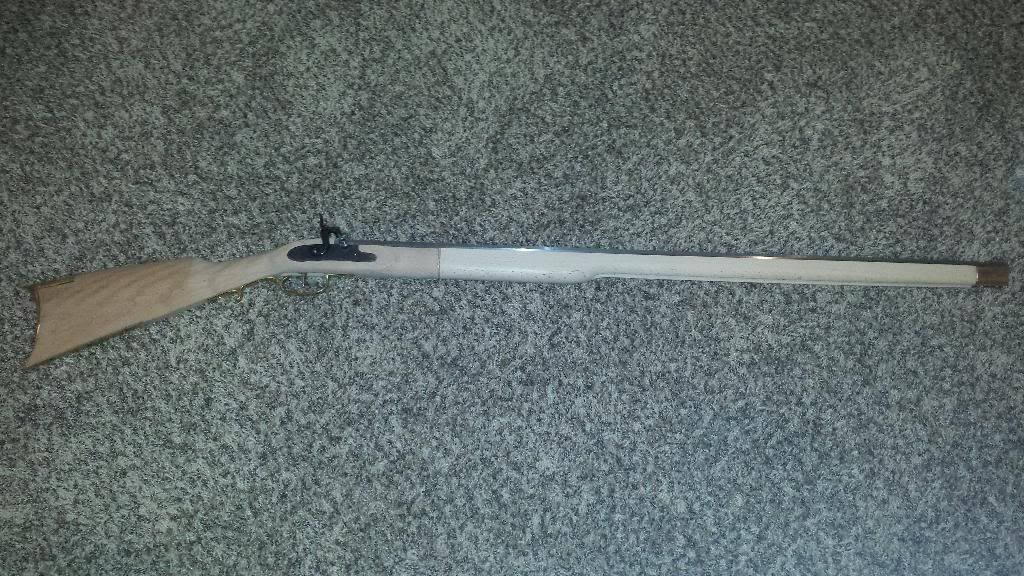
I'm working on my first kit (traditions kentucky rifle) and I'm fitting the parts to the stock everything seemed ok but the trigger is hitting the sear causing it not to latch. Has anyone. else seen this before with this kit?
You are using an out of date browser. It may not display this or other websites correctly.
You should upgrade or use an alternative browser.
You should upgrade or use an alternative browser.
traditions kentucky rifle sear and trigger
- Thread starter uno676
- Start date

Help Support Muzzleloading Forum:
This site may earn a commission from merchant affiliate
links, including eBay, Amazon, and others.
gunmaker43
45 Cal.
- Joined
- May 12, 2013
- Messages
- 718
- Reaction score
- 3
Common problem with any build. Should be around 1/16" inch gap between sear bar & top of tgr. bar. If the plate of tgr, is flush to the stock bottom, where it's supposed to be as far as inleting goes--then take out the tgr. & file off a SMIDGE, maybe 1/32" or so (width of pencil line) assemble and try lock, does it cock yet ? file until 1/16" gap is there. good luck, go slow...Tom
Tom Knight said:Common problem with any build. Should be around 1/16" inch gap between sear bar & top of tgr. bar. If the plate of tgr, is flush to the stock bottom, where it's supposed to be as far as inleting goes--then take out the tgr. & file off a SMIDGE, maybe 1/32" or so (width of pencil line) assemble and try lock, does it cock yet ? file until 1/16" gap is there. good luck, go slow...Tom
I was thing that samething but was hesitant since this is my first build. I needed a second opinion thanks :wink:
- Joined
- Jan 3, 2004
- Messages
- 14,767
- Reaction score
- 320
If the inlet for the trigger plate is too deep, here's an easy fix. Screw a small flathead brass screw into the inlet near the front and rear of the inlet without interfering with the holes for the mounting screws. Now adjust the depth (or height) of the brass screws so the plate is adjusted to the correct depth. Can't see the brass screws with the plate installed, and best of all, it's about a 5 minute fix. First thing I'd try before ever taking a file to the working parts.
Thats a great idea i'll try that firstBrownBear said:If the inlet for the trigger plate is too deep, here's an easy fix. Screw a small flathead brass screw into the inlet near the front and rear of the inlet without interfering with the holes for the mounting screws. Now adjust the depth (or height) of the brass screws so the plate is adjusted to the correct depth. Can't see the brass screws with the plate installed, and best of all, it's about a 5 minute fix. First thing I'd try before ever taking a file to the working parts.
galamb
58 Cal.
Once you are happy with the inlet of the trigger plate, you can go here (tracks trigger instructions) to learn how to tune your triggers.
You may need to read it over a couple times and pull the trigger and fiddle with it while reading, but once you get a full understanding of what they are talking about you can tune your trigger really nicely.
It is tedious so I tend to tune one while watching a football game. When there is a break in the play, you pull the trigger and "tweak it" (swipe or two with the file on the bar). Put it back in the rifle, try it - repeat.
By the time the game is over your trigger is "sweet" and you didn't even notice it took you an hour of two of fiddling around :grin:
gunmaker43
45 Cal.
- Joined
- May 12, 2013
- Messages
- 718
- Reaction score
- 3
As this is your 1st build, get a good book or 2 or 3 whatever. They're well worth the $$ gunsmith of grenville co. goes into detail on trigger placement and adjustments. How bout some pic's we all started somewhere....Tom
I filed the trigger down now it works great. I think I might get that book. I have another question because the directions that came with this arent the best. do you generally put the dovetail parts on before or after blueing/browning the barrel? thanks for the advice.
galamb
58 Cal.
I leave the sights off until after I have rust blued (same process as rust brown with one extra step).
If there are barrel lugs dovetailed in, I put them in (gives me a way to help hold the barrel when I hang it to rust or submerge it in boiling water to blue.
If it's a percussion model I leave the breech installed, remove the nipple and put a stainless machine screw in the hole, with a bit of anti-seize on the threads.
If it's flint with a liner, again, the machine screw with anti-seize in the touch hole threads - if it's just a "hole" I plug it with a little wood plug.
I never plug/obstruct the muzzle hole - just be careful to keep product out of the bore (unless it's cold blue, then I don't care - doesn't hurt anything).
Looks like your making good progress. 
When you get to the stage where you want to stain the stock (assuming you don't want a blond gun) do not make the mistake many of the people who have built this rifle made. They used a oil based stain.
The stock wood is Beech and it won't absorb an oil based stain worth a hoot.
Any stain that says to use paint thinner or turpentine to thin or clean the brush is oil based.
The alcohol based stains will give the wood a nice color and if they are thinned with a little alcohol or even water you can apply as many coats as you wish. Each coat will darken the wood more.
Using this technique you can "sneak up" on the color you want.
Alcohol based stains include Birchwood Casey Walnut, one of my favorite and its available at most gun shops and a few hardware stores.
Other alcohol based stains in many different colors can be found at woodworking stores or places that sell muzzleloading parts like Dixie Gunworks and Track of the Wolf.
If there is a shoe repair shop in your area they have "leather dyes" that are also alcohol based. They are usually quite dark but can be thinned with alcohol or water. Do not use Shoe Polish.
Remember, the real color of the stained wood will only show when the wood is wet. When it is dry it will look much lighter than the wet look.
When any kind of finishing oil is applied, the darker "wet look" will return.
You're getting there, just don't rush it. It would be interesting to know how many of us have done this before. Back in the olden days when CVA first brought out the design, a whole lot of those kits got a lots of guys started. Like many, I moved on to something shinier but those guns still win contests and put meat in the ice box, can't say much better than that! :thumbsup:
- Joined
- Apr 21, 2013
- Messages
- 200
- Reaction score
- 30
I bought a partial kit from someone who gave up, it's on my to-do list. I'm curious to watch your progress.
so things were going well until I drilled the holes for the tenons for the barrel. I believe a drill press would be a better option for this step. hopefully I can fix this :cursing:
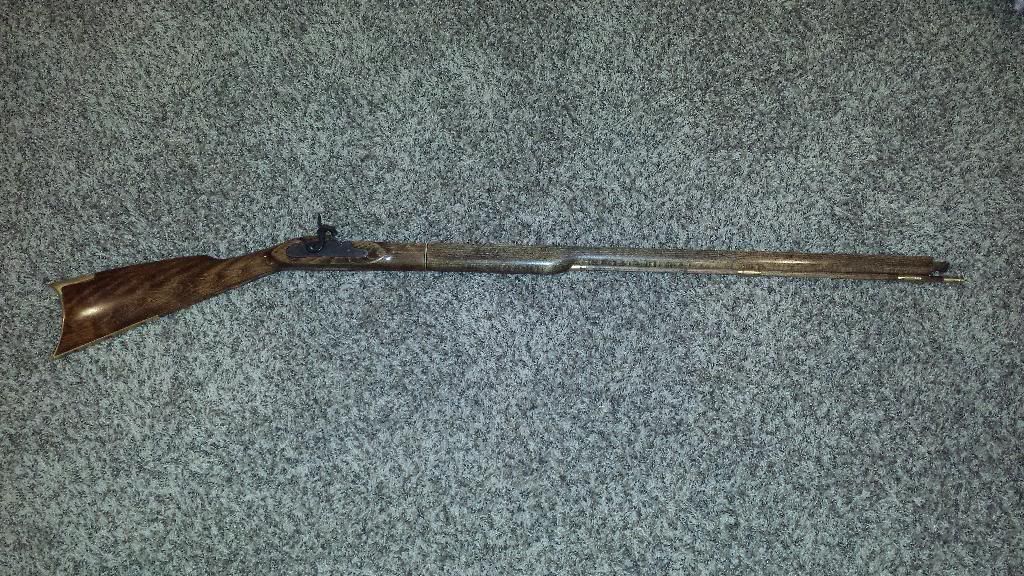
here is an update to my progress just need to brown the barrel.
![url]]](https://proxy.imagearchive.com/1e9/1e938233b9849b99c387655f7f3bd71d)
Last edited by a moderator:
I stained it with red oak 4to 5 coats and then with 1 coat of golden oak. its kind of iridecent in the sunlight. I finished it with birchwood casey tru oil. I like it so far. The wood that came in the kit was not very high grade. The buttstock was nice but the forearm didnt have much far as grain to it.
Similar threads
- Replies
- 24
- Views
- 921


