• Friends, our 2nd Amendment rights are always under attack and the NRA has been a constant for decades in helping fight that fight.

    We have partnered with the NRA to offer you a discount on membership and Muzzleloading Forum gets a small percentage too of each membership, so you are supporting both the NRA and us.

    Use this link to sign up please; https://membership.nra.org/recruiters/join/XR045103

Building an early Vermont fowler

Muzzleloading Forum

Help Support Muzzleloading Forum:

This site may earn a commission from merchant affiliate links, including eBay, Amazon, and others.
Joined
Nov 26, 2005
Messages
5,218
Reaction score
10,867
Hi,
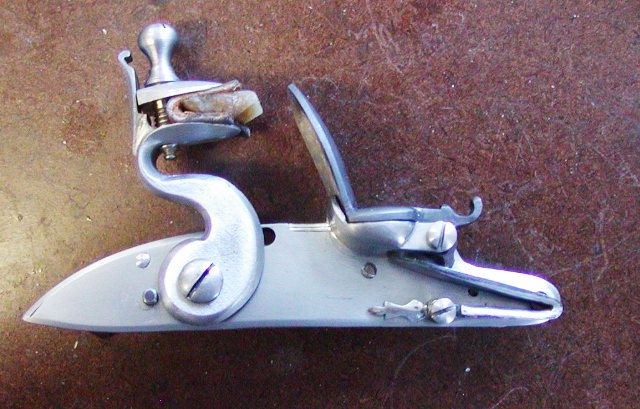
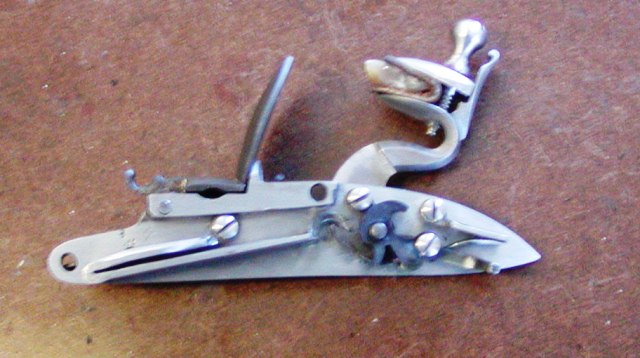
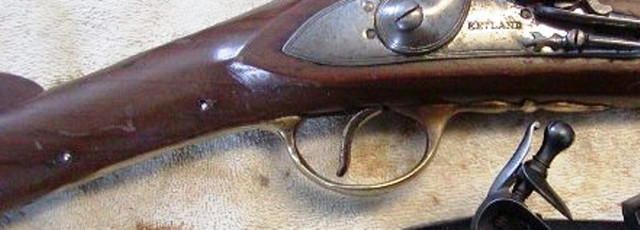
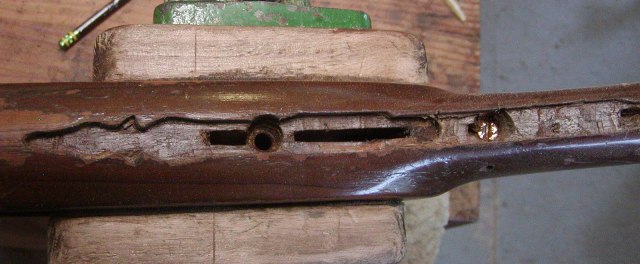
One of these days I'll get my Peter Berry finished but I have to jump on these next projects right away. I am building 2 John Hills inspired guns, a rifle and fowler. I write "inspired" because neither will be a bench copy but they should be recognizable as plausible Hills' products. John Hills likely was the first gunsmith working in Vermont. He was the son of gunsmith Benoni Hills of Goshen, CT, and brother to gunsmith Medad Hills. All of his guns were slim and elegant and usually stocked in stunning curly maple. Today, I want to discuss just the fowler project. Some of you may remember I helped a blind man named Josh Tabor, to build a Dickert inspired rifle. That project was a success but he also needs a good fowler because he is a successful turkey hunter. About 10 years ago, he bought what he thought was a good quality NW trade gun for $900 from a muzzleloader retailer. Remember, he is blind and what he was sold was an India-made "Ketland officer's fusil" that normally retails for $500. Yes, there are people who do this kind of stuff. You can see the gun on the Middlesex Valley Traders website, however, they were not the retailers involved. It is junk. Anyway, I talked it over with Josh and suggested that we could salvage a lot of the gun to make a really nice gun inspired by John Hills. All of the hardware parts are very thick with extra metal so they could be considered raw material. The lock was a mess but it had so much extra steel that I could remake it into almost anything. Here are photos of the gun and lock.
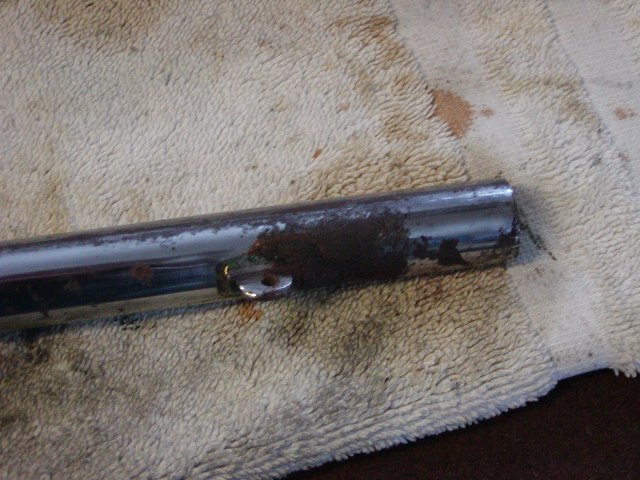
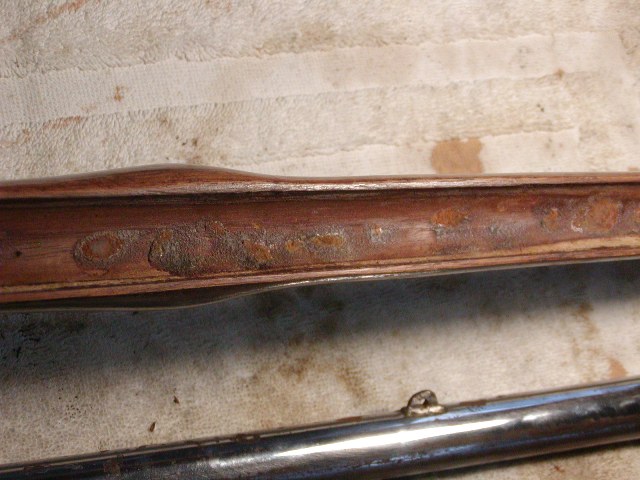
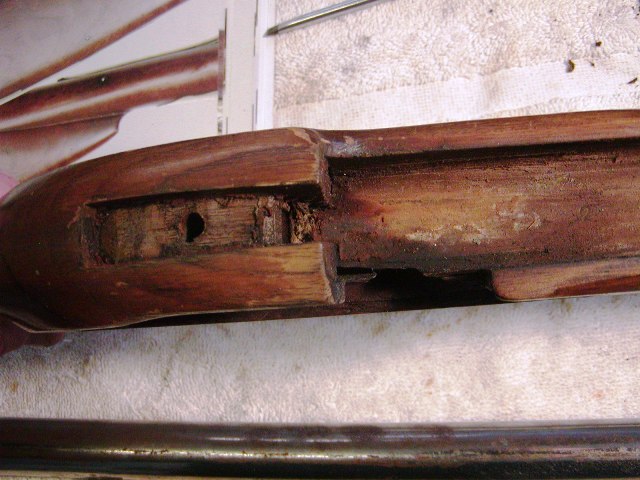
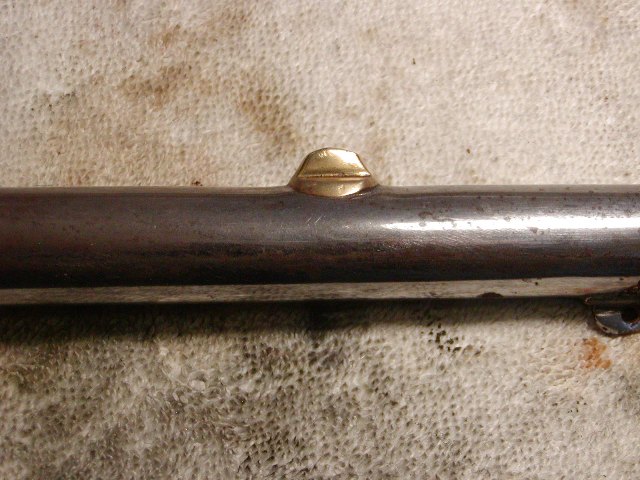
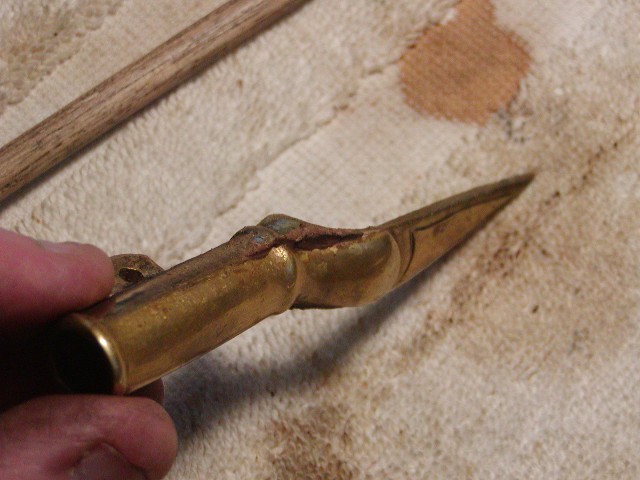
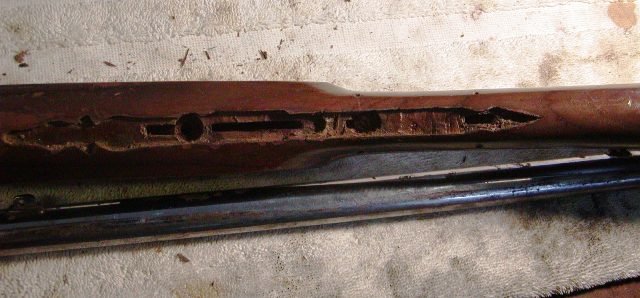
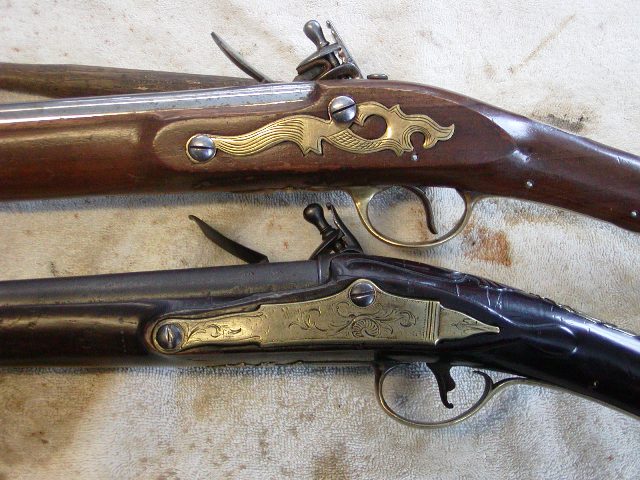
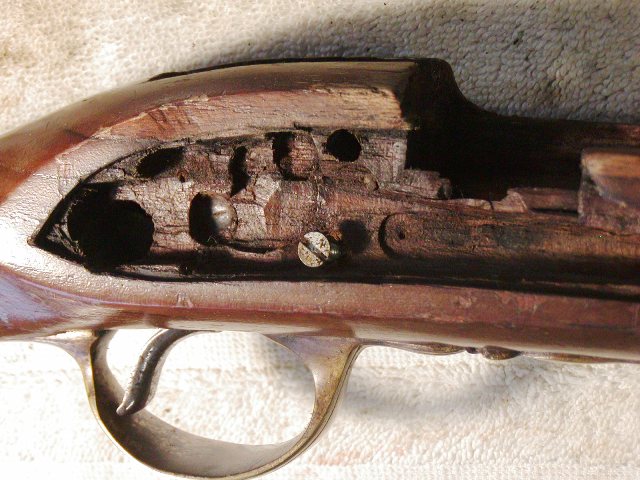
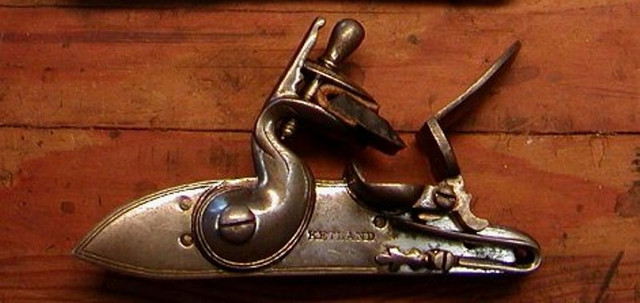
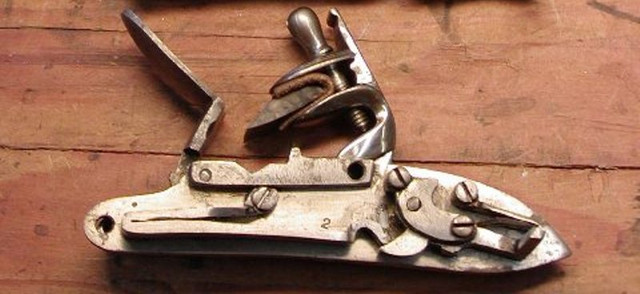


We ditched the stock, barrel, side plate, and butt plate but should be able to use all of the rest of the parts. My first task was to rebuild the lock. This was a fun project. It appears that John Hills made his own locks and I cannot duplicate one exactly with the India-made lock but I can duplicate the rustic look of a lock made in NE and with some Hills features. It turns out that the steel on the lock is a delight to work and I treated it like it was a very rough kit. I replaced most of the internals with Chambers Siler parts and used a new flat flint cock. I am almost finished heat treating the components and will post photos in the next few days. I have a really nice sugar maple stock blank and a good barrel for the project. I'll post photos as I go. With the high price of gas, Josh will only be working with me occasionally plus he and his wife are building a new house with Habitat For Humanity. He'll be busy.

dave
 
Hi,
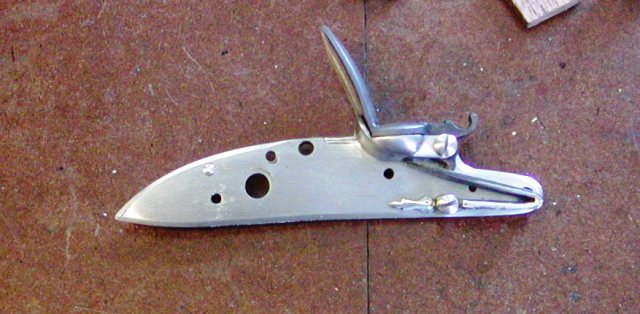
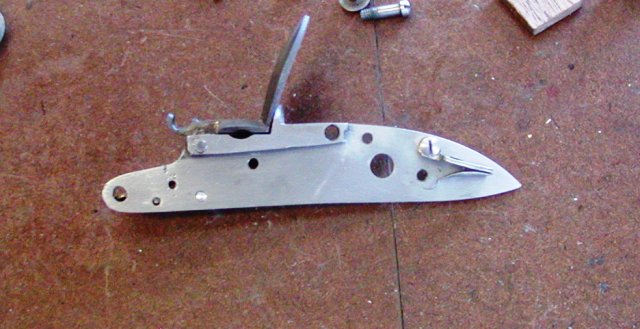
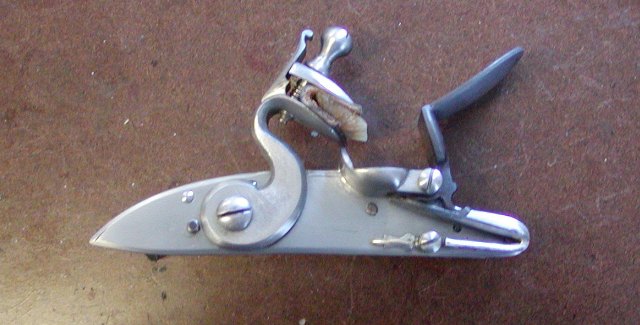
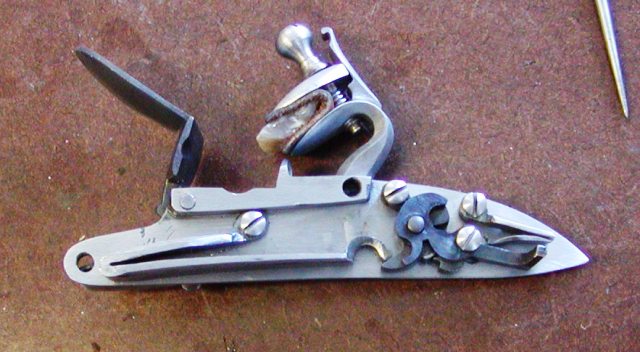
Well, I reworked the lock. I may make a new stronger mainspring but I will leave the reworked original on for now. It is a little weak and I initially thought it was too stout on the lock as it came. However, that heavy feel was not the spring rather the shoulder on the post of the tumbler did not protrude above the lock plate so when you tightened down the tumbler screw, you tightened the cock against the plate! No wonder it was hard to cock the lock. The fit of the frizzen to the pan was bad enough that 4F powder could leak from it. The tumbler post was not perfectly round and the hole in the bridle was not true with the tumbler hole. However, there was plenty of excess metal to work with considering the plate was almost 1/4" thick. I decided to thin and flatten the plate, reshape it more like those on Hills' guns and replace the flintcock, tumbler, bridle, and sear with Chambers Siler parts. Here is the original lock.


First, I had to drastically thin the plate from both sides, clean up the surfaces and file a bevel on the outside of the plate. I used my coarse single cut files and they did a speedy job of it. I don't have a milling machine so I work with hand tools but I can file very flat, even, and clean surfaces. I put a bushing in the tumbler hole because the original hole was not perfectly round and too large for a Siler tumbler. I've done this before. I drill the hole to 5/16" then counter sink both sides of the hole. Then I cut a 5/16" steel plug to fit in the hole, flux it, and solder in place with low temp silver bearing solder. Then I peen both sides of the plug to fill the counter sinks. This works really well even if I want to later case harden the plate. During that process, the solder will flow again but the bushing is held in place by the peening and when the plate is quenched, the solder simply congeals again. The photos show the plate with the bushing in place.


I file the bushing flush and then fit the bridle. I used the existing hole for the upper screw anchoring the Siler bridle. I had to fill the sear hole just like I did the tumbler hole. Then I used the bridle to mark the location of the sear hole and drilled and tapped it. I installed the bridle and used the tumbler spindle hole to mark the center of the new tumbler hole in the lock plate. Using my drill press, I drilled through the bridle hle and through the lock plate. Then, without moving the plate in the drill press vise, I removed the bridle and drilled a hole through the plate just a hair smaller than the tumbler post. I then reamed that hole to fit the tumbler. It came out great. I reused the sear spring, which was a very nice forged spring and could be bent a little to work perfectly. Now, I was able to install the tumbler, sear, bridle, and sear spring and make sure they all worked. I selected a flintcock from a deluxe Siler lock to replace the round-faced original. It fit perfectly with a little filing and looks just right. I reused the top jaw from the original lock after reshaping it a bit.

Next I had to work over the frizzen. I annealed it and reshaped it. Then I fit it to the pan to close any gaps. I came out well but could be a little tighter. I am not sure if I will worry about the fit any further. Next I worked over the frizzen spring, reshaping it, closing the bend, and cleaning up the uneveness of the steel leaves. I reshaped the finial. I polished it, hardened and tempered it and installed it on the lock with the frizzen. Next I worked over the mainspring and reshaped it to give it a little more strength. Its architecture is fine but it may need more thickness. I may have to make a new spring. Anyway, the lock works very well, has a nice smooth feel and function. I would say it is now at least the equal of any well assembled Siler lock. It will need some tuning and cosmetic work but it is ready to be inlet on Josh's new fowler. It has a nice rustic, hand made look much like the locks typically found on Hills' guns.


dave
 
Hi,
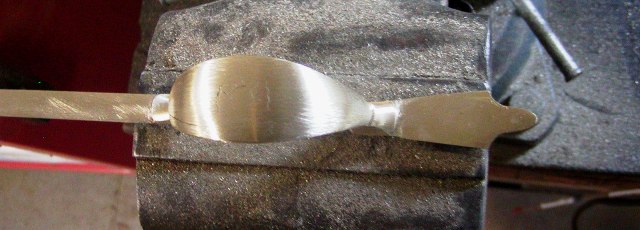
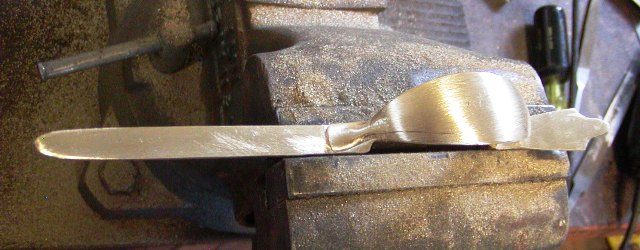
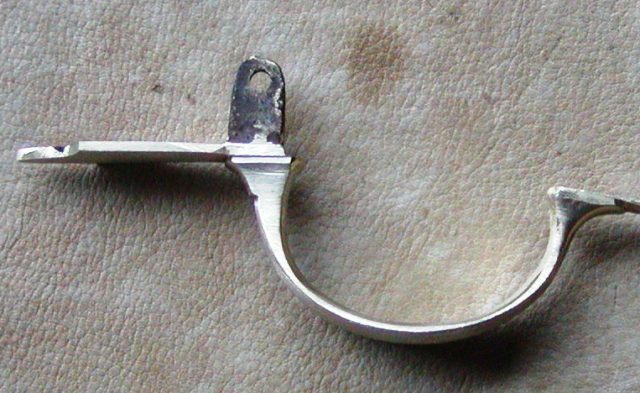
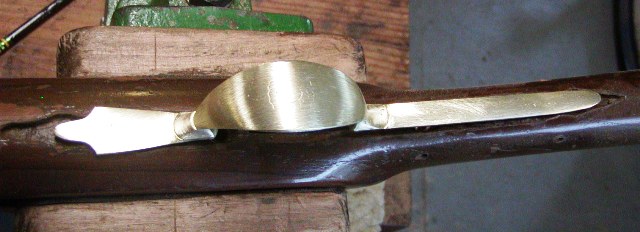
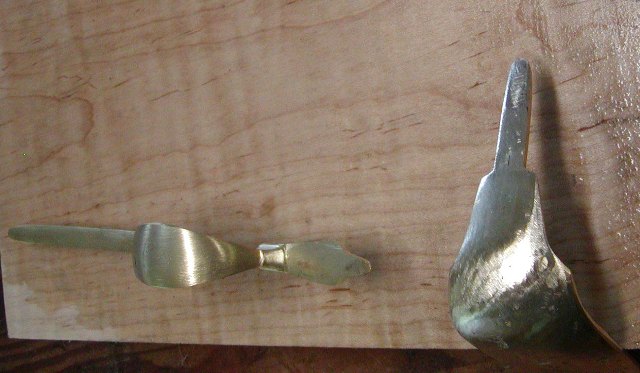
It was time to make the trigger guard. One goal Josh and I have is to salvage as much from the India-made gun as possible. John Hills used a simple design that he modified a little over time but he used the same basic design over and over. The guard from the "Ketland Officer's Fusil" was very different but it had so much extra brass thickness that I thought I would try and use it. I like this part because I get to use my torch and a big ball peen hammer. There is nothing I like more than bashing stuff. So I annealed the old guard and started beating the snot out of it to flatten and stretch the brass. It worked really well. The resulting guard is a little shorter than it should but not by much. It will work just fine.

Here is the original guard and mortise.


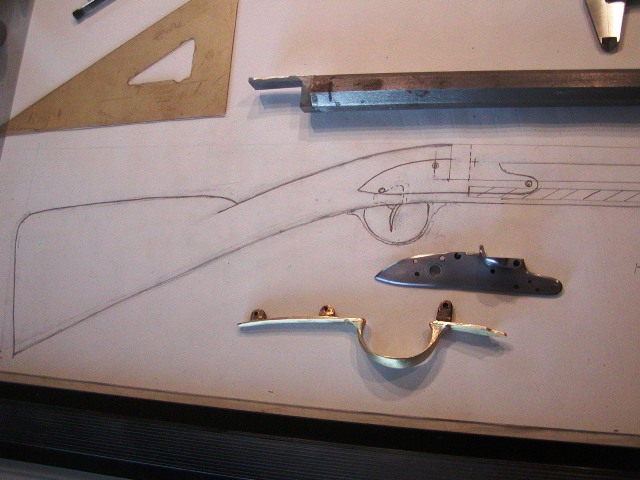
Here is the new guard.


It still needs some detailing and clean up but it is basically ready for inletting.

dave
 
Wow, way to get after it, and with fantastic results.
For those of us that don't have some of the high dollar books, would it be too much trouble if I asked you to post some pics of some Hills guns that inspire this build.
I always like hearing about the Hills gunsmiths. One of my favorite little old school gunshops and smiths in this area happens to also be in Goshen, CT.
 
Hi,
I fitted the breech plug today. It was really easy. I measured the depth of the shoulder in the barrel and ground the face of the plug to that depth. Then I twiddled the end of the plug on my sanding disc attached to my stationary belt sander to create a nice, even chamfered shoulder. Tried it in the barrel and I was just 1/4 flat short. I just cranked on the plug bolster so it swaged its way into the shouldered breech and it was done. I checked with Prussian blue and it makes contact all around in the shoulder. One detail, most commercially machined plugs have a radius where the bolster meets the tang. Get rid of that radius. File it into a right angle. Inletting will be so much easier.


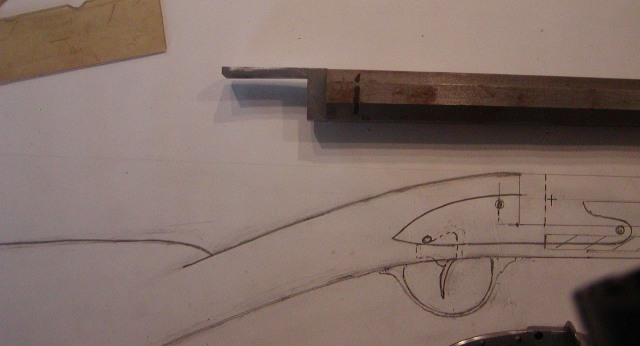
I've not made a John Hill gun before so I made a drawing based on scaled measurements from photos of originals and requirements to fit Josh. As you can see from the drawing, it should be an elegant gun. I fuss over the drawings because I will cut the stock blank to within 1/8" of the lines in my drawing.

dave


Hi,
The barrel I am using is a Colerain 20 gauge smoothbore, 1 1/16" at the breech and 44" long. The barrel is too heavy but the saving grace is Josh is 5'7" and benefits from a shorter, lighter barrel. So I cut it back to 40", which improved the balance tremendously. I scribed a line 4" from the muzzle using calipers, put tape on the breech side of that line, and cut the excess off with a hacksaw butted against the tape. Then I held the barrel vertically in my vise and cleaned up the muzzle with a medium cut file walking the file all the way around the muzzle. I chamfered the bore by using a 3/4" round stone mounted in a "brace and bit". The results were great.

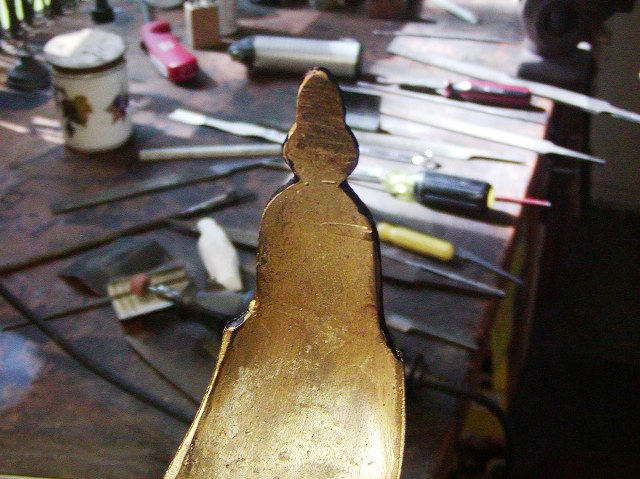
Next I had to make a butt plate. I had a wax cast plate with thick brass that had the right profile to the shoulder plate but needed the tang lengthened and reshaped. I annealed the brass and then used my cross peen hammer to stretch the end of the tang almost 3/8". You use the cross peen like an adze, hammering the metal in the direction you want it to move. Anneal, hammer, stretch, anneal, hammer stretch etc.


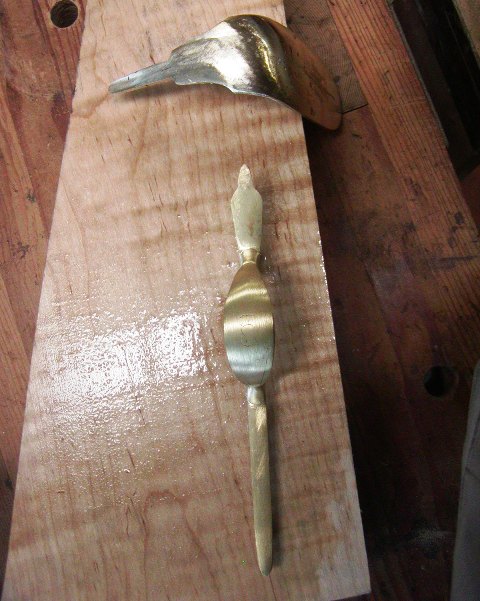
Then I filed it to shape like those used on John Hills guns. It is scaled a little smaller because my whole gun is scaled 7% smaller than the original gun I am using as a model so it fits Josh.


You can see the shape and also the final shape of the trigger guard. I also wet the maple stock to show the nice figure.

dave
 
Wow, way to get after it, and with fantastic results.
For those of us that don't have some of the high dollar books, would it be too much trouble if I asked you to post some pics of some Hills guns that inspire this build.
I always like hearing about the Hills gunsmiths. One of my favorite little old school gunshops and smiths in this area happens to also be in Goshen, CT.
Hi Brokennock,
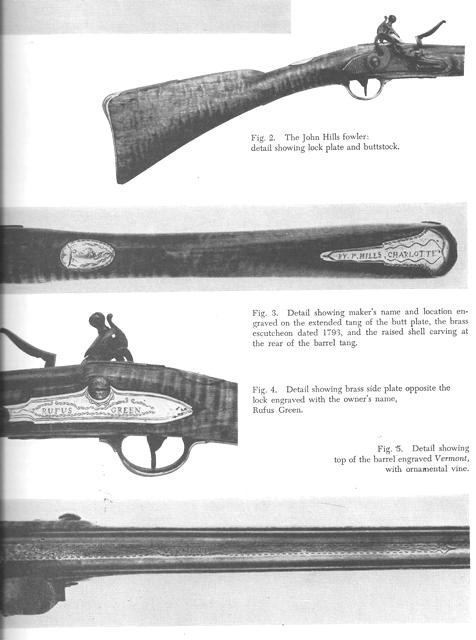
Unfortunately, I don't want to post my best photos because of copyright violations. Examples of John Hills work are online but none of the ones I've found are very typical of his work. Here are some photos of one of Hills' Vermont guns from one of Guthman's long out of print books.
dUUjm0N.jpg

The gun was recently up for sale at auction and sold for $8000.

Other examples are in Grinslade's book "Flintlock Fowlers" but the guns I am working from are shown in George Shumway's "Longrifle Articles Published in Muzzleblasts" volume 2 available from Track of the Wolf. An interesting sidebar is that both George Shumway and the great contemporary gun maker, John Bivins had strong strong attachments to Vermont. Shumway went to Middlebury College and always traveled to VT for skiing, and Bivins had a second home here. In fact, I think John died here, while at his second home.

dave
Thank you Sir. I always appreciate the time you put into your posts and replies.
I will try to see what I can find online. Often results in having to filter out a lot of unrelated nonsense.
 
Hi,
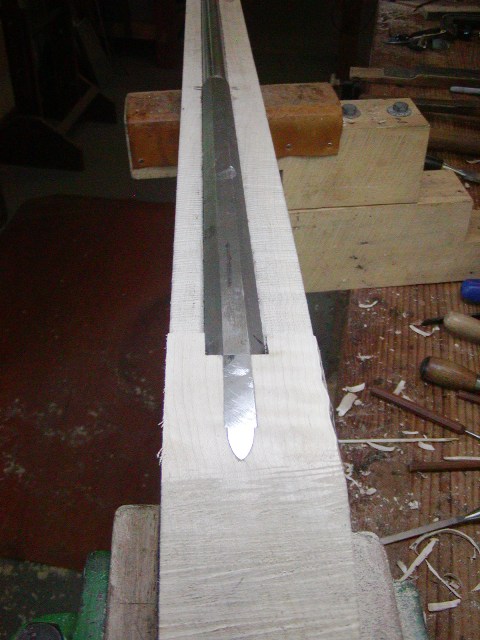
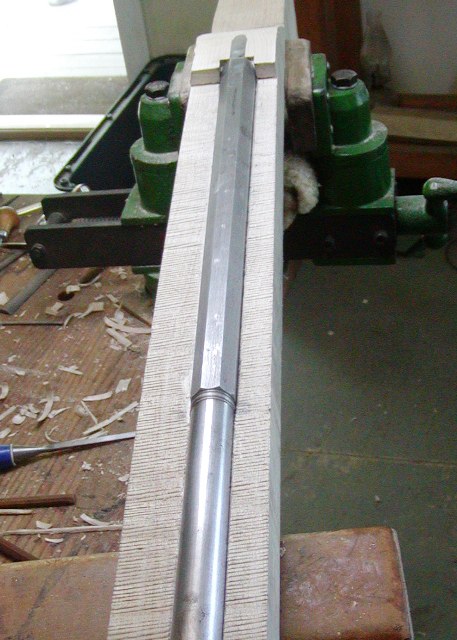
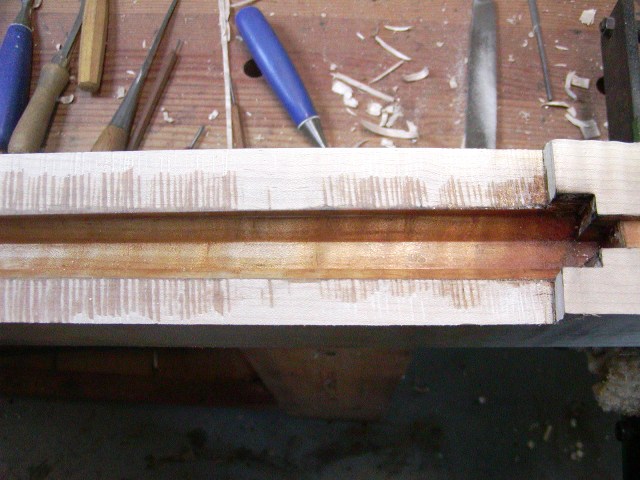
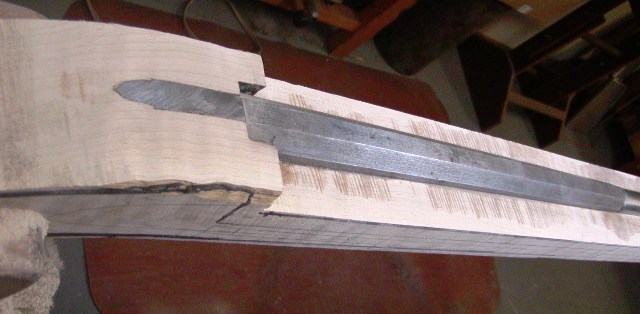
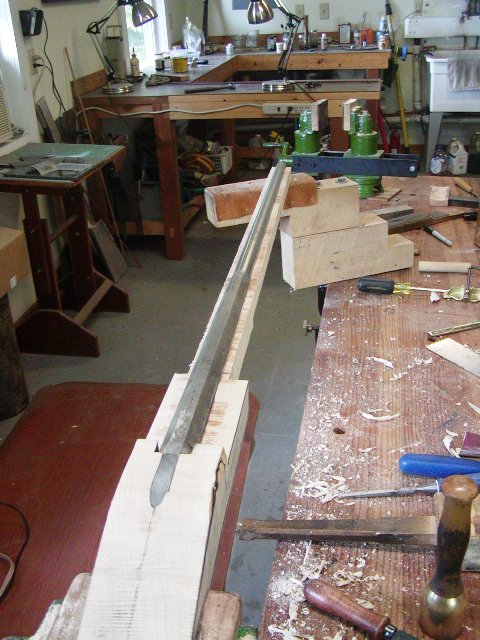
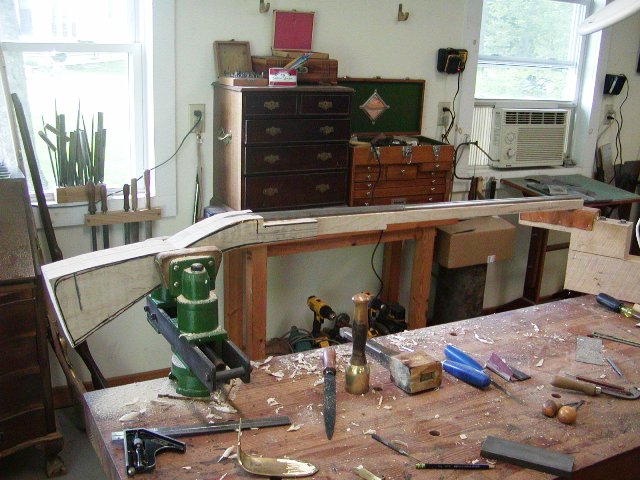
Got a bit done. I inlet the barrel, which is a Colerain 20 gauge octagon/round barrel shortened to 40". I find these barrels to be pretty easy. The round sections rarely taper much so they are almost like inletting a pipe but the octagon section is more challenging because it tapers a lot. On this barrel, I used a 3/8" wide dado cutter on my table saw to cut a narrow groove just shy of the bottom of the round section. Then I used the dado set for 3/4" to cut a wider barrel channel just under sized for the minimum dimension of the barrel. I inlet the breech and that allows me to set the barrel in so I can trace the outline. Then I just cut that outline with a mortise chisel controlling for depth of the side flat (by eye). I use Gunline round barrel floats and octagon barrel floats to mostly complete the inlet, although scraping flats with a 3/8" flat chisel helps a lot.


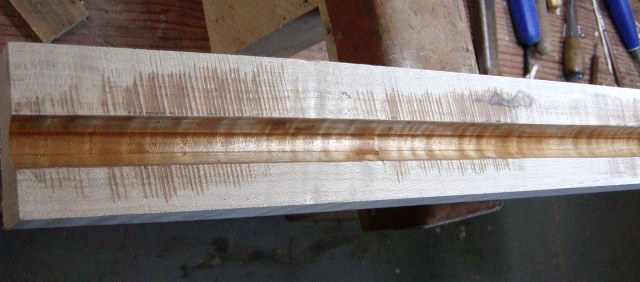
Unless the owner or my objectives preclude it, I always coat my barrel channels with a varnish thin coat of AcraGlas. It seals the wood but more importantly, adds a great deal of strength to the barrel channel side walls. I know this from actually testing the process. The strength increase ranges from 3 fold to 10 fold over untreated wood. On this gun, I mixed 10 ml of hardener with 40 ml of resin and a heaping teaspoon of fiberglass flock. I tinted it with 3 drops of Laurel Mountain Forge Lancaster stain. This is what a varnish thin coat looks like. Note it is so thin you can see the wood grain underneath.


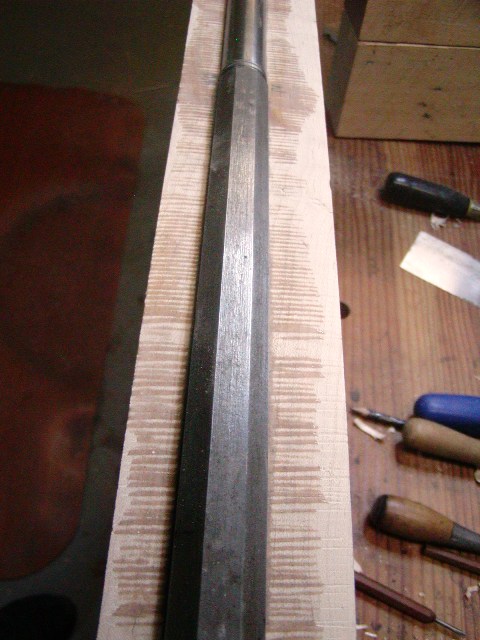
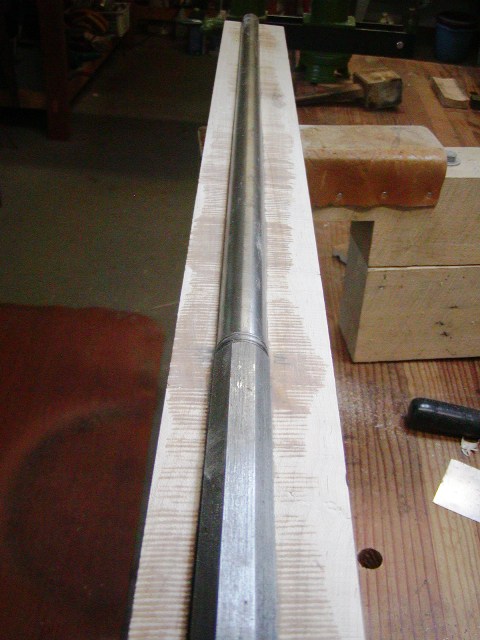
To prep the stock for the coat I make sure the barrel can be pressed in place with firm finger pressure and removed by a solid tap on the bottom of the stock with a mallet.


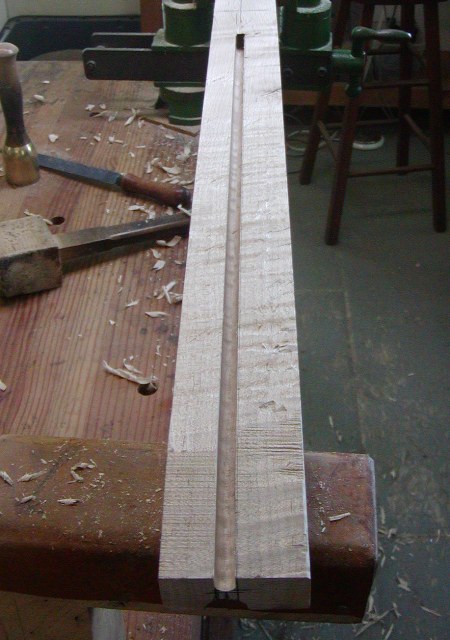
After squaring up the stock, I used my router table to cut a 3/8" groove for the ramrod.


Then a brace and bit and 3/8" drill to make the ramrod hole.

Finally, I trimmed the stock with my bandsaw.


More to come.

dave
Thank you for your clear and detailed explanations.

I'm reworking/finishing the locks of an unfinished flint SBS kit I traded for about a year ago, and am just getting back to. I've polished the internal surfaces of a couple flint locks, but haven't tried such major finishing before. Your coverage of reworking the lock provided needed tips and increased my confidence that I'm on the right track, more or less.

I recently posted a question about AcraGlassing the barrel channel of a Fusil I just added to my reenacting kit. Handling it, I'd noticed the forearm (which is nicely thinned) flexing slightly up to the barrel and was concerned about durability. Your tip, about a varnish-thin coat, seems the best (indirect) advice or answer I've gotten yet.
 

Latest posts

Back
Top