• Friends, our 2nd Amendment rights are always under attack and the NRA has been a constant for decades in helping fight that fight.

    We have partnered with the NRA to offer you a discount on membership and Muzzleloading Forum gets a small percentage too of each membership, so you are supporting both the NRA and us.

    Use this link to sign up please; https://membership.nra.org/recruiters/join/XR045103

Building an early Vermont fowler

Muzzleloading Forum

Help Support Muzzleloading Forum:

This site may earn a commission from merchant affiliate links, including eBay, Amazon, and others.
Hi,
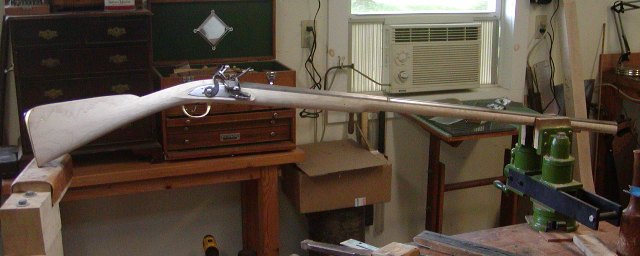
Did some shaping. There is a John Hills gun in there. I just have to cut away all the unnecessary wood to find it. The stock is hard red maple with a lot of figure. It does not plane well because you can only work in one direction and it always seems to be the awkward direction. It will be fine.


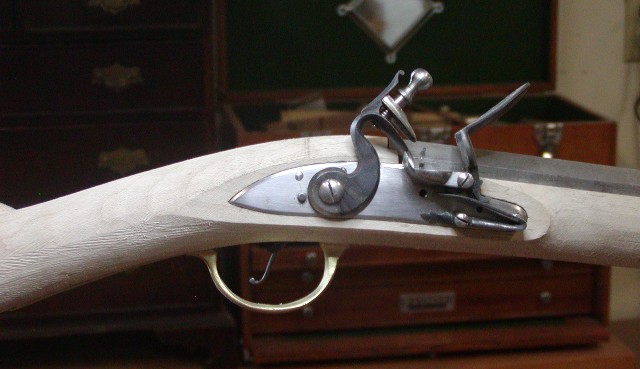
I positioned the lock understanding I will install a 1/4" "white lightning" liner so I made sure the vent hole is sufficiently far in front of the breech plug so the liner hole and threads don't interfere. I inlet the lock plate but will do the guts later. I worked over the lock a bit more before starting to inlet it. I wanted the cock to rotate a tiny bit further forward overhanging the pan a little more. Now the shoulder of the cock hits the lock plate just as the rear of the tumbler hits the back of the bridle. It is a very good lock.
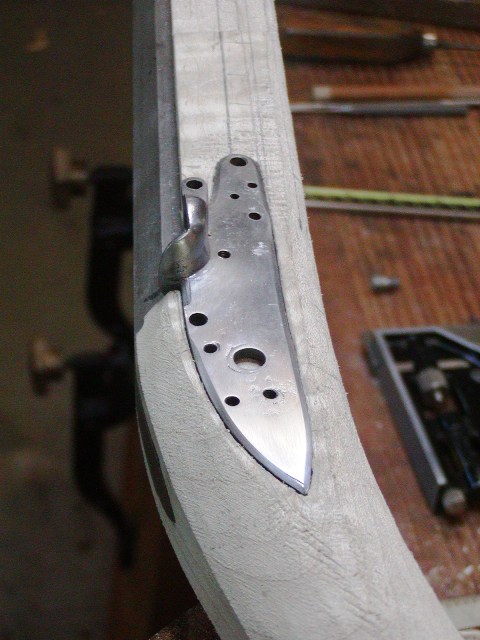
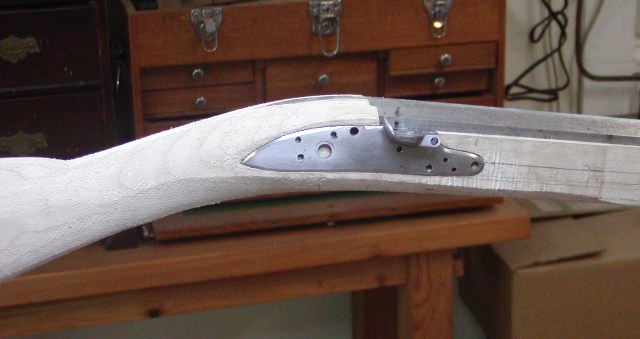


Note that the plate is already drilled for the lock bolts from its previous incarnation. The line on the stock forward of the forward lock bolt hole represents the bottom of the barrel. You can see that the bolt hole will just miss the barrel but it will just snick the top of the 3/8" ramrod. That will present no problems.

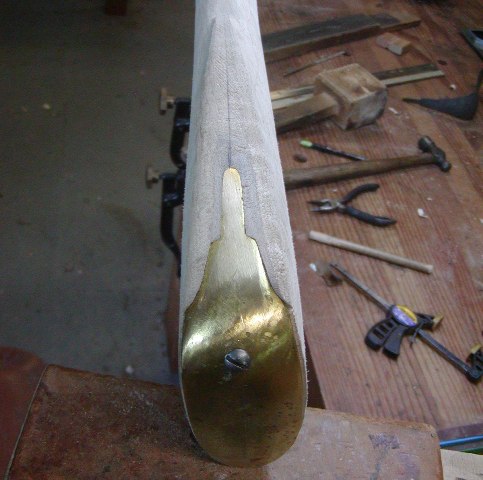
After installing the plate, I trimmed off a lot more wood and began shaping the wrist, lock area, and butt. Then I installed the butt plate. It went in really easily.
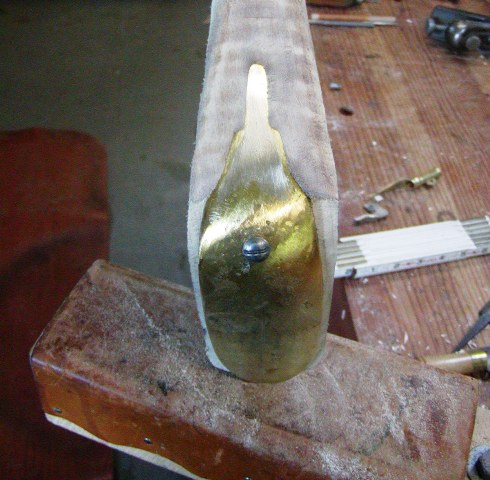
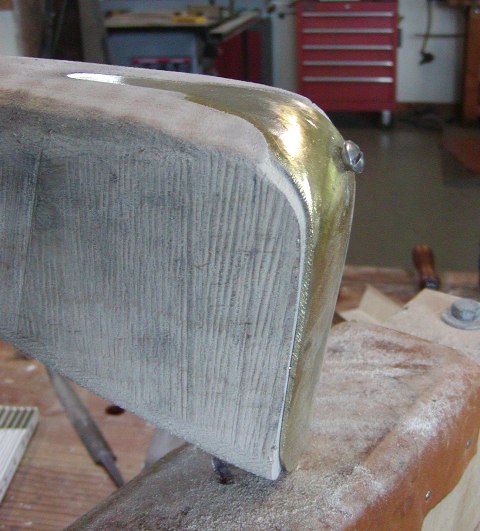


Now I can thin and shape the butt more and refine the profile a bit more. After that I shift to the fore stock.

dave
 
Hi,
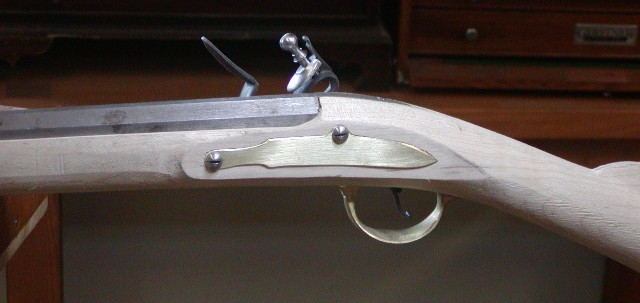
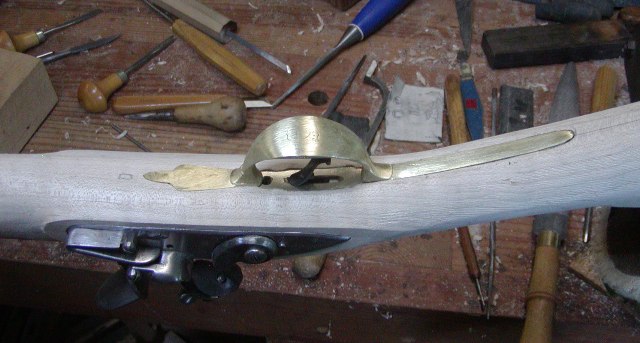
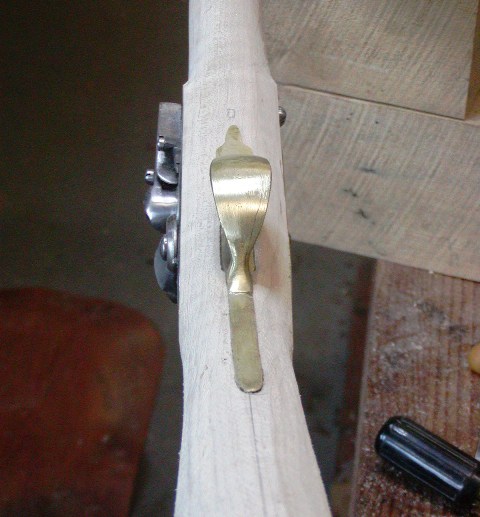
Got back to the John Hills' fowler after several diversions. It is ready for final shaping. All the components are installed and working. It will be plain with some simple "John Hills like" carving around the barrel tang. The red maple stock has nice figure so it should be a very nice elegant gun. Everyone who shoulders it falls in love with how it feels. The simple side plate is fashioned after Hills, There will be an oval wrist plate. I have to reshape the trigger a bit to be more like Hills' work but the trigger pull is a crisp 2 lbs. The rest of this project should go fast.


dave
 
Hi,
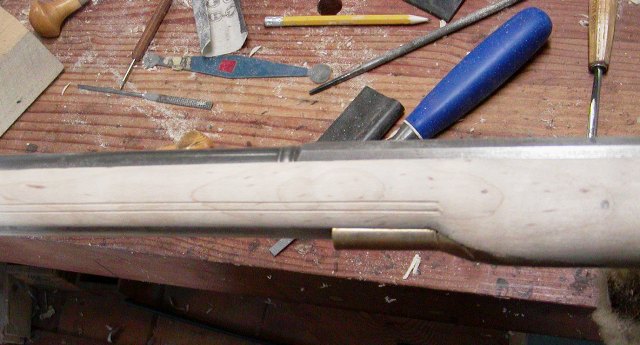
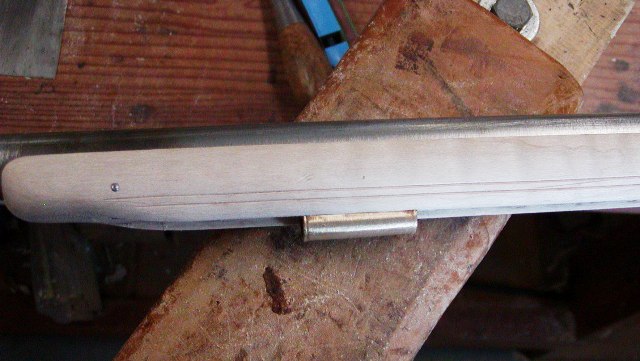
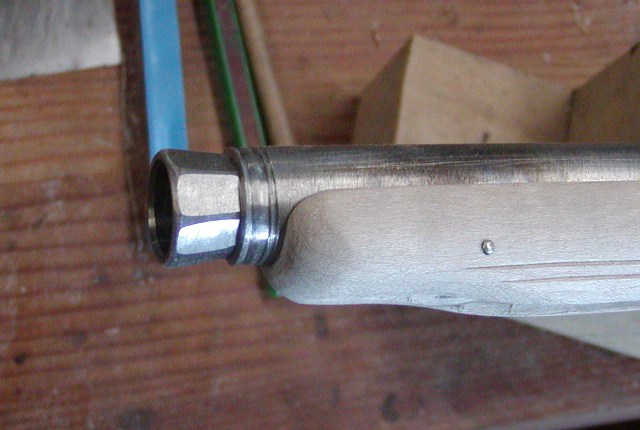
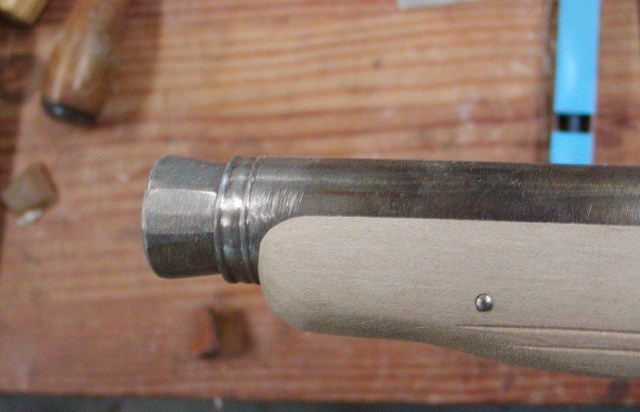
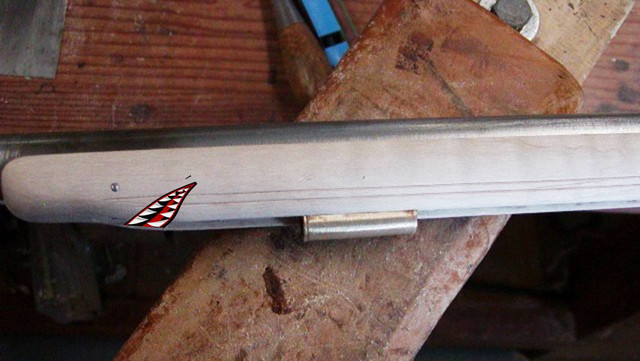
Two John Hills features on many of his guns (not all by any means) are a double line border along the ramrod channel and an octagon faceted muzzle. The molding lines simply start at the rear pipe and fade out near the muzzle.


The faceted muzzle is more work. The octagon facets flare toward the muzzle and are often bordered by a wedding band. I don't have any way to turn a 40" barrel in a lathe so I just went at it with files. First I put tape on the barrel marking the edge of the round to octagon transition and used the tape to guide my triangular file creating a deeply cut ring around the barrel. Then, using a coarse flat file with safe edges, I filed the muzzle into a flared cone. To keep it even, I counted strokes of the file, then turned the barrel about 20 degrees and filed the same number of strokes again, repeating all the way round until I had a nice even cone. I filed a flat on the top, turned the barrel 90 degrees and filed another flat, turned it 90 degrees and filed a flat and then another 90 degrees and a flat. Then I filed the flats in between at 45 degrees. I counted strokes to keep them even. Next I rounded off the corners and dressed the muzzle. Finally, I filed the bordering wedding band. It came out well.


Finally, I cut back and reshaped the stock.

dave
 
This is a really interesting looking Fowler. The cannon muzzle is just as pretty as can be!
The gun looks heavier stocked than your others including the Besses. But my eye is untrained and this is a work in progress.
It is simply fascinating.
 
Last edited:
Hi Bob,
Thanks for the note. It is actually quite slim. The thin trigger guard, which is just 5/16" wide at the rear extension, kind of makes it look bulkier than it is. The wrist at the comb is only 1 11/16" tall. The height of the stock at the breech is 1 13/16", whereas a Bess is almost 2 inches. The lock is only 5 1/4" long, smaller than a large Siler. There just is no ruler for scale in the photos.

dave
Thanks Dave. It is hard to really see these things in a photo. I so often imagine how much more can be learned by seeing and even more so by handling the actual thing. I think many days could be happily spent studying just one fine gun like this one.
 
Hi Bob,
Thanks for the note. It is actually quite slim. The thin trigger guard, which is just 5/16" wide at the rear extension, kind of makes it look bulkier than it is. The wrist at the comb is only 1 11/16" tall. The height of the stock at the breech is 1 13/16", whereas a Bess is almost 2 inches. The lock is only 5 1/4" long, smaller than a large Siler. There just is no ruler for scale in the photos.

dave
now yer talking! just the information i need to steal for my build. of course mine will be a faint shadow of yours Dave!
 
Hi,
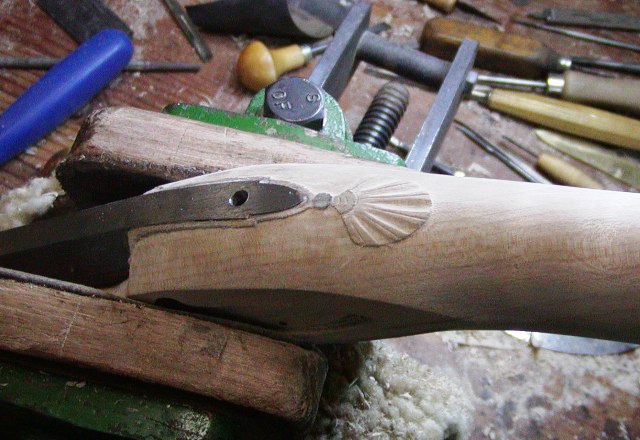
John Hills had a distinctive style and it is elegant. I carved around the barrel tang today. John Hills had a distinct carving design with minor variations that he used over and over again. It was a fluted fan, shell, or shield and varied in quality from fairly well done with some fine details to pretty rustic verging on crude. I wanted to honor his style but while I admire rustic, I dislike crude. So I came up with a design that fits in with Hills' work and is simple, easily carved, and looks rustic but is not crude.


It needs some clean up but after the final whiskering of the stock. A feature very common on New England guns from the 18th century is that there is rarely carving other than around the barrel tang and the design usually is placed at the end of the tang without any flowing design around the tang leading into it. It is kind of stuck there like a potted plant on top of a featureless table. Often there is not a lot of creativity shown and not much complexity. That is just as well as this red maple stock is a pain to carve. I have to keep sharpening my knives because the softer wood just compresses under the blade rather than shearing off. It tears out easily and is difficult to scrape because of that. Everything has to be scary sharp all the time or I get nowhere. Any John Hills experts out there, please comment. I think I got the flavor and style of the man right.

dave
 
Hi,
One other comment. I hope that any of you new builders notice that the lock and side plate panels on this gun are not cut in except around the front. They are almost entirely shaped by the action of forming the wrist and lock area using rasps, files, and scrapers. Please look at the photos closely. I could easily form a nice lock and side plate panel molding at this stage if I desired but this is the level of shaping you should be at before you ever make cuts around the lock and side plate.

dave
 
Hi,
John Hills had a distinctive style and it is elegant. I carved around the barrel tang today. John Hills had a distinct carving design with minor variations that he used over and over again. It was a fluted fan, shell, or shield and varied in quality from fairly well done with some fine details to pretty rustic verging on crude. I wanted to honor his style but while I admire rustic, I dislike crude. So I came up with a design that fits in with Hills' work and is simple, easily carved, and looks rustic but is not crude.


It needs some clean up but after the final whiskering of the stock. A feature very common on New England guns from the 18th century is that there is rarely carving other than around the barrel tang and the design usually is placed at the end of the tang without any flowing design around the tang leading into it. It is kind of stuck there like a potted plant on top of a featureless table. Often there is not a lot of creativity shown and not much complexity. That is just as well as this red maple stock is a pain to carve. I have to keep sharpening my knives because the softer wood just compresses under the blade rather than shearing off. It tears out easily and is difficult to scrape because of that. Everything has to be scary sharp all the time or I get nowhere. Any John Hills experts out there, please comment. I think I got the flavor and style of the man right.

dave
Can you provide those of us with an untrained eye some examples of the differences between "rustic," and, "crude," please?
 
Hi,
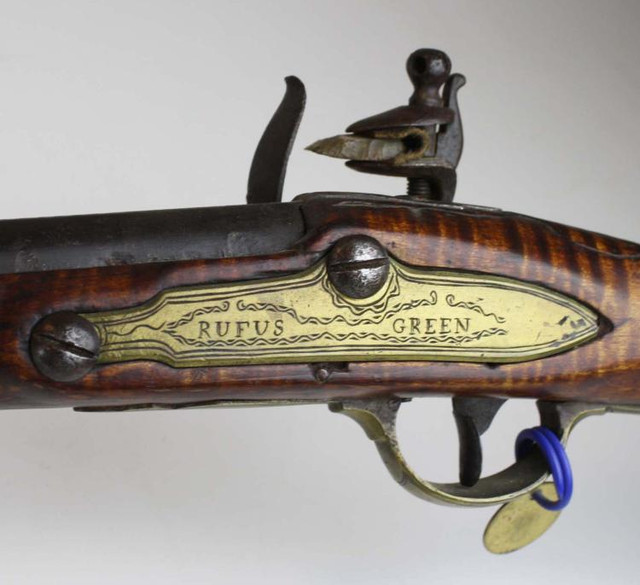
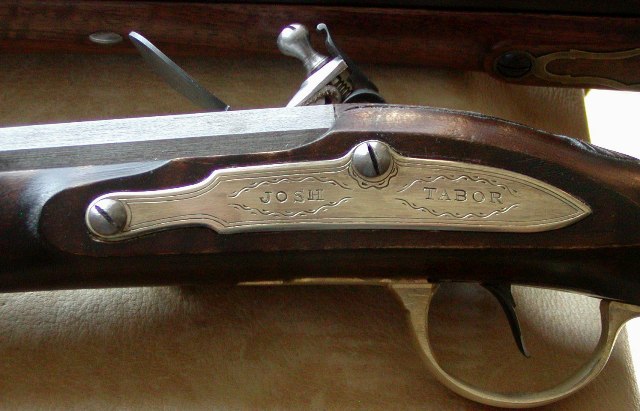
Just got done engraving the new side plate. The sheet brass was a dream to cut compared with the previous bad casting. I am trying to capture the style and flavor of John Hills' work but not the crudity of some of the decoration. I want a true rustic feel to it but also evidence the engraver has some skill. Double line borders are a great skill to master when learning to engraves. They are far better than scrolls to learn tool control. I wanted my lettering to show skill but keep with the rustic feel of the gun. I do that by applying beeswax to the metal and hand drawing the lettering with a pencil. Then I coated the plate with Dykem blue and scribed the wiggly borders around the lettering. I used an oval template to scribe an even guideline for both names but scribed the wavy lines freehand. I think the result captures the feel of the real thing.


dave
 
Back
Top