• Friends, our 2nd Amendment rights are always under attack and the NRA has been a constant for decades in helping fight that fight.

    We have partnered with the NRA to offer you a discount on membership and Muzzleloading Forum gets a small percentage too of each membership, so you are supporting both the NRA and us.

    Use this link to sign up please; https://membership.nra.org/recruiters/join/XR045103

First Build - stock shaping

Muzzleloading Forum

Help Support Muzzleloading Forum:

This site may earn a commission from merchant affiliate links, including eBay, Amazon, and others.

19283

36 Cal.
Joined
Feb 26, 2014
Messages
60
Reaction score
0
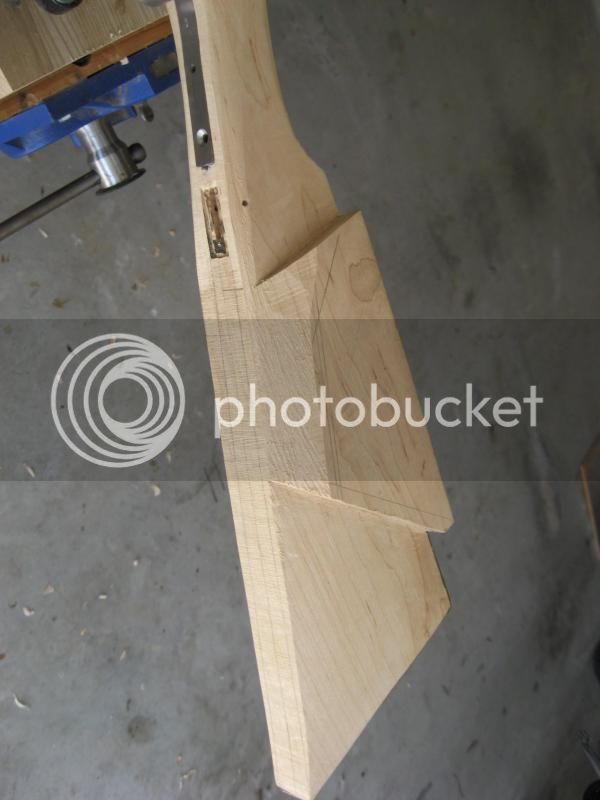
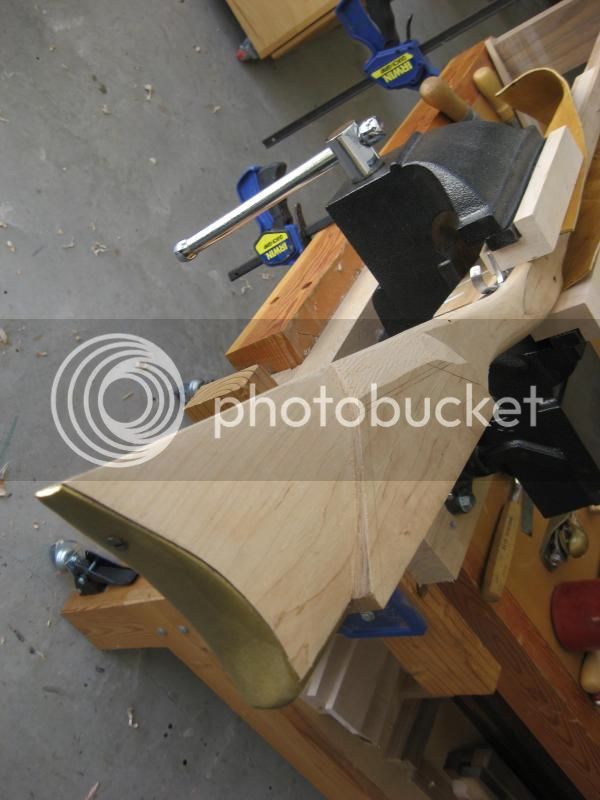
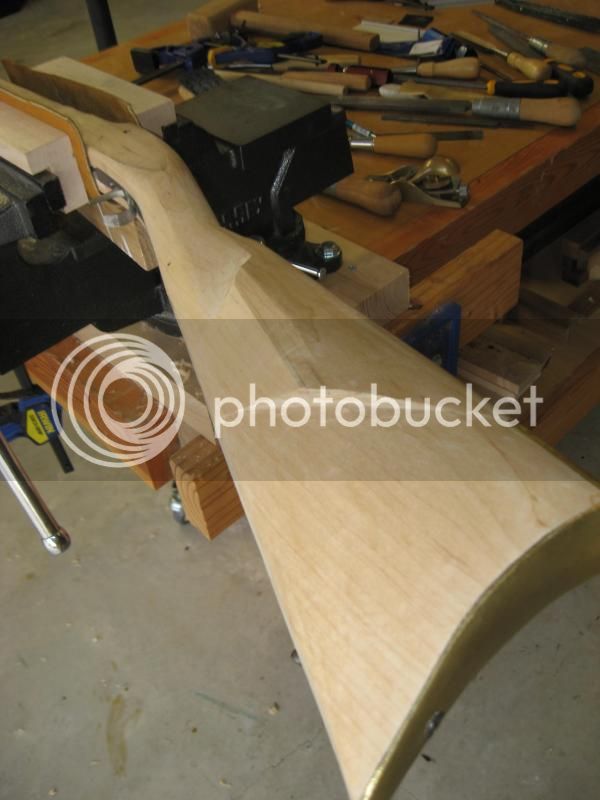
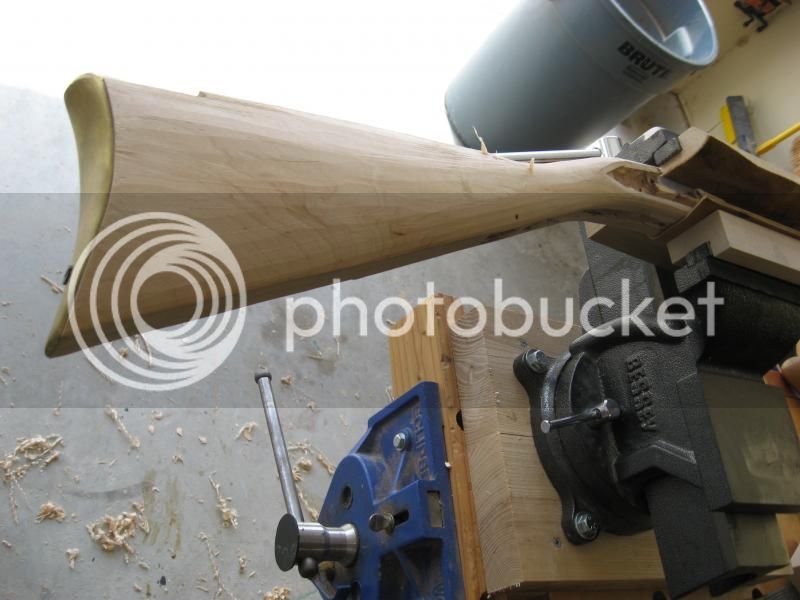
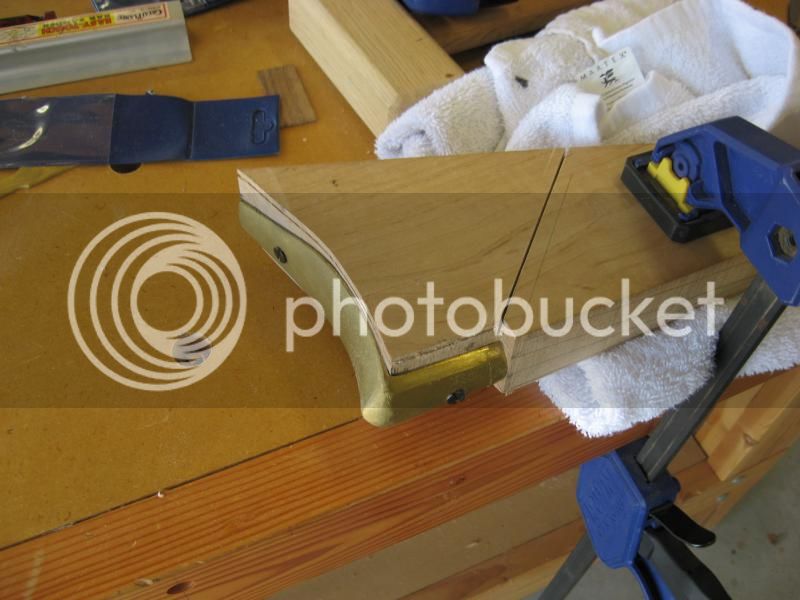
I started a new thread on my build. I spent a fair amount of time in the garage this weekend on the stock. Thought I'd catch everyone up on the progress!
IMG_1161.jpg

IMG_1162.jpg

IMG_1163.jpg

IMG_1175.jpg

IMG_1165.jpg

At this point in the game, I still believe I have a lot of wood to remove, but I'm only taking of a shaving at a time, for fear of making a major misstep. To me, the upper comb, especially by the nose, needs a lot of work. Any advice from the experts is welcome.

Thanks!
 
I like using a cabinet makers rasp then finer grades or sanding, then scrapeing that cheek area....it is a challenge always to get a nice transition and flow~ on both sides!
marc
 
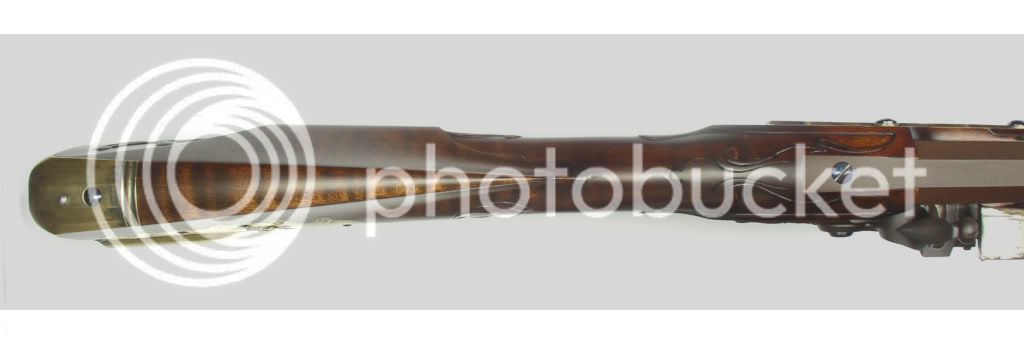
The "nose" of the comb and the nearly vertical sides which have to blend into the wrist, are cut w/ mainly chisels and finished w/ coarse rifflers and shaped scrapers. . Both the vertical sides are nearly identical except that the cheek side vertical wall must also blend backwards into the cheek, while the other side just blends into the butt.

I prefer a pretty sharp pointed comb "nose" but some prefer a wider "nose". A pointed comb "nose" accentuates the blend into the wrist which I find attractive.

You're moving right along and what you've done so far looks really good. But...like you said...a lot of wood still has to be removed. Going slow and thinking things out will eliminate the "oops". Below is pictured a top view of the comb of a Lancaster style LR. It shows the narrow comb "nose" and the nearly identical vertical walls and their blends.....Fred

 
Thanks Fred,

That picture really helps out. I started to go in to brain lock yesterday, and decided to put my tools down before I made a mistake!
 
Nice work so far!
Like you said, a wise move to put the tools down, before you make a mistake.
Been there many times, too much in a rush.......to get the stain on, and the lock is not inletted yet, the barrel has not been started. Woah! Slow down boy! ( that is me, talking to me )
There is no rush, the journey is a good part of the fun.
Please post more pictures as you progress.
Fred
 
I would be carful in wood removal....work that far butt area, then the wrist......with the lock cut out, that wrist area is weak and can crack! :doh:

I like your work!...downing fine!
Marc
 
I agree with that with the exception being of what I am building...... IF I am just building a Lancaster I would do it as what pleased me.... But if I am replicating an original, or attempting to replicate an original, I would do the comb like the original shows, be it sharp or wide at the point of the comb. :idunno:

But everyone has their own Durthers... :surrender:

Keith Lisle
 
I presently only build Bucks County and Lancaster LRs and don't replicate any particular original LR or a LR of a particular original builder. Never had access to an original whch made my learning curve much steeper, sorry to say.

But I agree that if I was replicating an original, the original would take precedence over personal preferences. Don't think I could do it anyways :grin: it's too hard.....Fred
 
Oh that is total B.S. Fred :rotf: :rotf: You could build anything you wanted with your precice skill & mind set... Your work is much better than most originals, and if you had those originals In Hand, you would clearly see that.

I have seen few originals In Hand that impressed me as much In Hand as they did in a book.
Allot of it is much more crude up close than the photos show in books or on the internet.

What really impresses me of original rifles, is how & what they had to build with. THAT to me is the impressive part..... and 200-300 years later it is still together & still awesome. :doh:

Keith Lisle
 
Well Keith,
I don't agree with you!
With today's epoxies and magic wood fillers, I can fill cracks, voids and screw-ups that would make the old gun makers weep.
Matter of fact, I make modern gun makers weep with tears of snicker ( :rotf: )
When I go to places like Dixion's, I am humbled by the fine workmanship.
As I am and was a machinist lecturer, I often told my students, the sign of a master ( what ever work) is the "good" cover up of his mistakes.
The above rifle is a fine example of good work.
Best regards
Fred
 
:grin: That's OK. If we all agreed all the time, we would be all doing the same thing & boring the manure out of each other. :rotf: :rotf:

Keith Lisle
 
:surrender:
The only tools I have is a pocket knife and a bent nail......those makers 200yrs ago did better work than me because the tools were better......see, my nail was made in china! :rotf:

I hoping this year to get a second nail, and another shop cat.....and a set of instructions on the proper sequence of a build.... :stir: :haha:

I live WAY outside the box y'all..... :slap:
I'm stepping off the Lancaster train....onto the KY rifles bus....headed up thru the barrens....toward Corbin, back toward Lexington.............
Madmanmarc
 
Old Ford said:
Nice work so far!
Like you said, a wise move to put the tools down, before you make a mistake.
Been there many times, too much in a rush.......to get the stain on, and the lock is not inletted yet, the barrel has not been started. Woah! Slow down boy! ( that is me, talking to me )
There is no rush, the journey is a good part of the fun.
Please post more pictures as you progress.
Fred

:thumbsup: :hatsoff:

point well made !

it's not a race, after all.
 
Thank you sir. I'm doing my best to keep my foot off the throttle. Since this is my first gun, I'm really anxious to see it done!
 
A few years back I was visiting TOW and while talking w/ Dave Ripplinger the owner, the proud builder of one of TOW's completed "kits" walks in and wants Dave's opinion as to the value of his LR seeing he might want to sell it.

This put Dave in an awkward position, but he often deals w/ gun prices because of TOW's consignment sales and didn't want to quote an unrealistic price because it might be sold through TOW.

Dave looked the LR over closely and gave a retail price that was below that which the builder had paid for the "kit". The builder was very disgruntled and argued w/ Dave asre the quoted price and vowed to never buy another item from TOW. He promptly walked out.

After leaving, Dave told me that the builder's LR reeked w/ impatience and if the builder had spent a little more time w/ many of the details, the quoted price would have been higher and possibly the LR would be worth more than the cost of the "kit".

That conversation stuck w/ me and I've never forgotten what Dave said, even though while serving a 5 yr tool and diemaking apprenticeship, I was taught and learned to have patience.

Many beginning builders take their time through much of the process of making a MLer, but once they can see their way clearly, become impatient and many times the impatience is quite visible......Fred
 
So far...there's not even a hint of impatience w/ your build. You do good work....Fred
 
As I see it, taking your time has nothing to do with the amount of days, weeks or months it takes to finish a project. Leaning a project gun in the corner for weeks has nothing to do with patience and more to do with not knowing what to do next. Knowing what to do and doing it quickly doesn't show impatience if you do a good job. I bet someone could tell you all they know about tool & die making in a lot less than 5 years. It is my experience that becoming a proficient journeyman takes years of experience after one has served a formal apprenticeship.
This is just my worthless observation.
 
I mainly agree w/ you, but hopefully you'll admit that patience is req'd when building MLers? Your post supposedly "reads between the lines" of what I wrote because I certainly didn't digress into details of the procedure of building. MLers.....Fred
 
Keith I totally agree, one thing I tell people is make the the gun to your style just as they did. If you ad something then its in your taste. As far as gaps your right back then there were gaps, and remember steam can cause those gaps to close too. When needed. :bow:

Beaver T.
 
Back
Top