My Apprentice and Her English Fowler

Muzzleloading Forum

Help Support Muzzleloading Forum:

This site may earn a commission from merchant affiliate links, including eBay, Amazon, and others.
Hi,
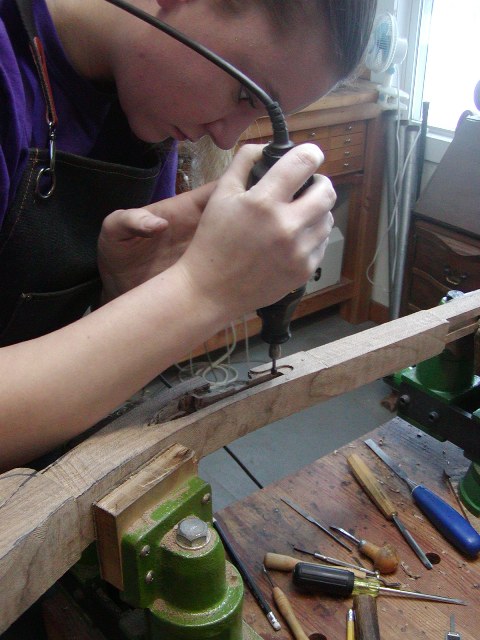
The lock inlet is finished. Here is a photo of Maria using the "Dremel Destroyer" to smooth out some of the lock mortise.


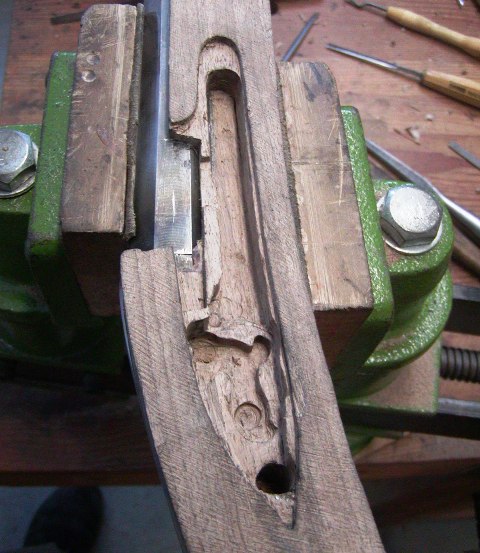
Here is the almost finished mortise. She will clean it up later but the work is excellent. This is her first lock mortise.


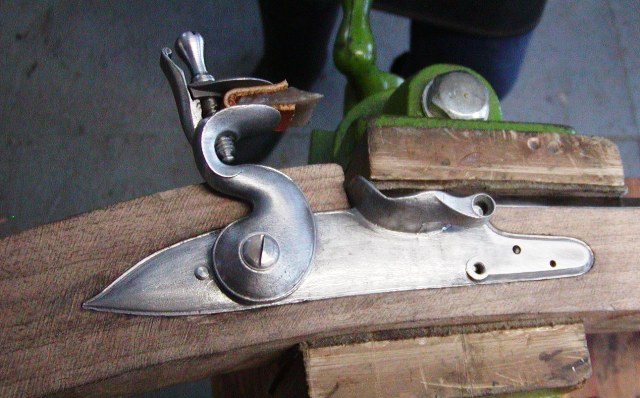
Her inlet was too tight causing a chip to pull away when removing the lock. You can see it on the bottom just in front of the hole for the sear. It is fine because the wood is higher then the plate so the chip will disappear. However, it serves as a warning.

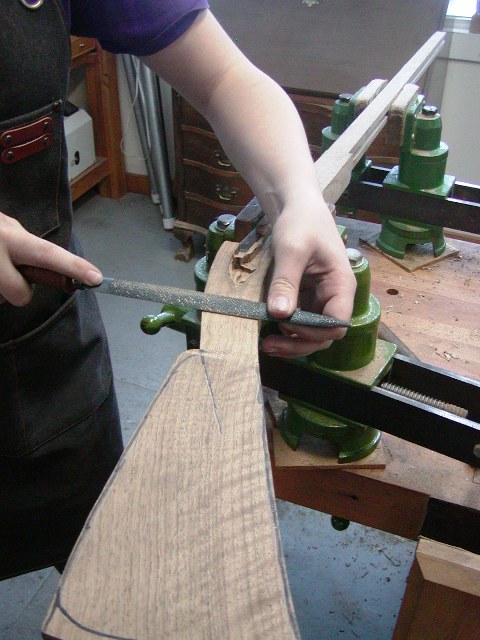
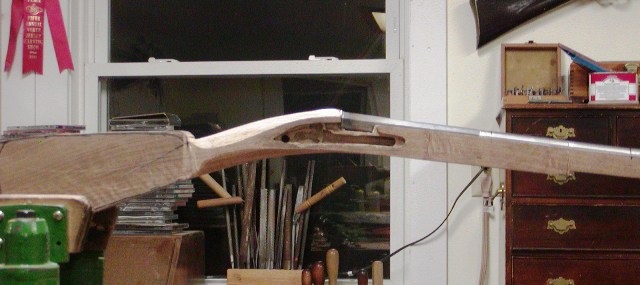
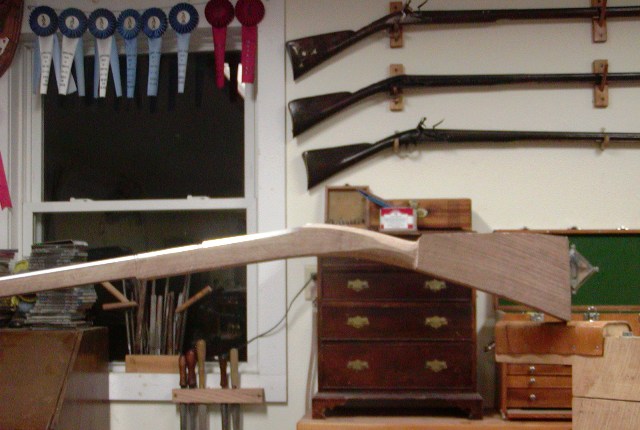
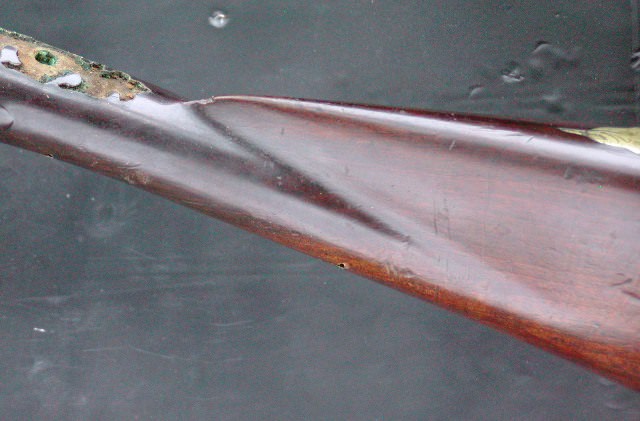
After inletting the lock, I wanted to let Maria do a task that will make her gun more realistic and less abstract so I had her start shaping the wrist. I taught her to use half round pattern maker's rasps and files to begin the shaping. It is important to learn where convex shapes blend into convex ones around the lock and side plate panels. She did very well and the result begins to reveal the look and feel of the final gun.


dave
 
Dave, one thing on fowling pieces that I'll be interested in learning more about is the proper shaping of the area where the wrist blends well down into the buttstock.

When I look at fowling pieces my eye is sometimes caught by the absolute grace and beauty of how that lower area of the buttstock and wrist blend so beautifully. Other times my eye rejects that area as just not looking right, but for the life of me I many times cannot really consciously determine what it is that distinguishes the elegant from the "something just isn't right."
 
You have a good eye Spikebuck.
Its good to filter what you see through this screen you have. You may not know what is wrong at times, but you do Know it's wrong, and that's a real good start!
Oversimplifying it, we can say the wrist tapers all the way to the toe, whereas the heel tapers to the nose of the comb,.....and they sort of pass in the middle!
I know this will make Dave cringe in its crudeness, but it is a basic fact, LOL!
 
Hi Mike,
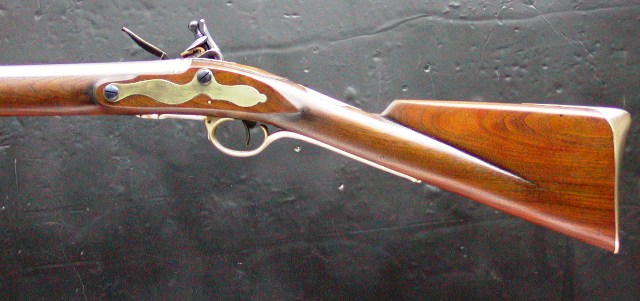
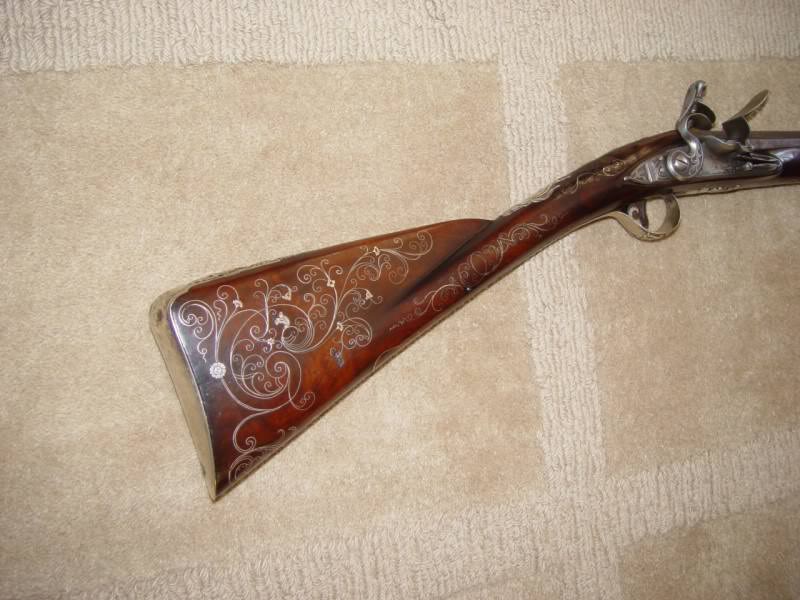
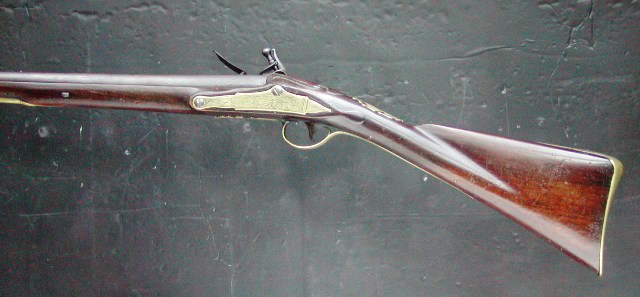
That is a great question and Richard answered a chunk of it. They are all a form of "baluster" wrist meaning they look like round balusters supporting a hand rail. The blending varies from a hard crease, as on Brown Bess muskets and the fowler shown below,
xQVWE3d.jpg

JIlW3Un.jpg


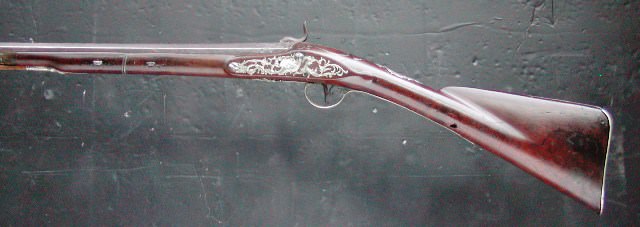
to radiused blending as on these guns.

aVzpIH1.jpg

ThX3zde.jpg

Wy1r4db.jpg


Now look closely at the crease or the overall visual effect of the radiused blending. The effect is to create a straight line trending toward the toe of the butt stock. On the radiused combs, you can see a sharp "V" of light created by the glare and it points down toward the toe of just above it. The round portion of the baluster also seems to be tapering thinner toward the toe. Add to that a prominent and almost straight comb angled such that if you place the edge of a ruler on the comb, that edge will go almost always right through the tumbler screw holding on the flint cock. That varies a little of course depending on how much drop at heel the stock has but it is a good general rule. In most cases, the bottom of the butt stock starts to curve down right about at the trigger. However, there are some originals on which the curve begins just before the trigger guard bow and that can also yield a nice profile. Finally, there should not be more than about 1/4" of wood below the lower edge of the lock. Locks are set low even if you have to drill the vent hole a little below center on the barrel.

dave
 
Thanks for the pics and explanation.

I thought that perhaps there was a golden mean related to the area I was missing as I do know that guns built using the golden mean measurements (as I learned from my first gun building book by Susanne Bicio) always seem to be more pleasing to my eye than those not.

In the guns I've built I also always use the lighting techniques you:ve sometimes discussed along with photos to do self checks. I many times see things in the lighting of the pics that shows an issue that my bare eye doesn't seem to grasp looking straight at the build.
 
Late to the party here, will echo some of the other comments. So cool for a high schooler to get this opportunity….very awesome of you to support this. Progress is looking great.
 
My first and only post.

Maria is simply amazing. Time for a new movie. The Natural Part Two. Swap out the glove and ball for a chisel and rasp.

It's a damn shame more young people refuse to dig deep and really find themselves. Discover who they really are. What makes them tick. What brings them true inner joy.

America, as an institution, will fail because there are more brain dead tik-tokers than there are talented apprentices.

A tip of the hat to Dave and Maria.
 
Hi,
Kind of a grunt work session yesterday. Maria wanted to decompress after her exams this week so she came over to work in the shop. We installed and inlet the barrel lugs. We used milled steel lugs from TOW rather than make them from scratch to save time. I prefer the loops on lugs for barrel keys to be wider providing more metal surface for the key to slide over but these will do fine and are about 3/32" wide. We positioned them to avoid the pipes so they ended up not evenly spaced on the barrel, which is fine. I clean the bottom of the lug and barrel surface thoroughly, then flux the barrel and lug and wire it in place.
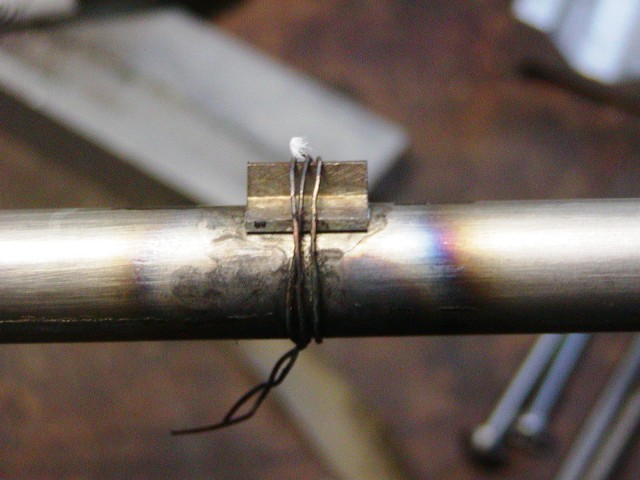


Then we tilt the barrel over on its side and place a little solder (Stay Bright or Hi-Force 44) on top of the the edge along one side of the lug base. Heating from below on the other side of the lug then draws or sweats the solder through the joint. No need to tin the surfaces and try to hold the lug in position as the solder melts on the tinned surface and the lug sits down into the soft solder.

Once soldered in place, Maria ground the edges of the bases down a little to round them.
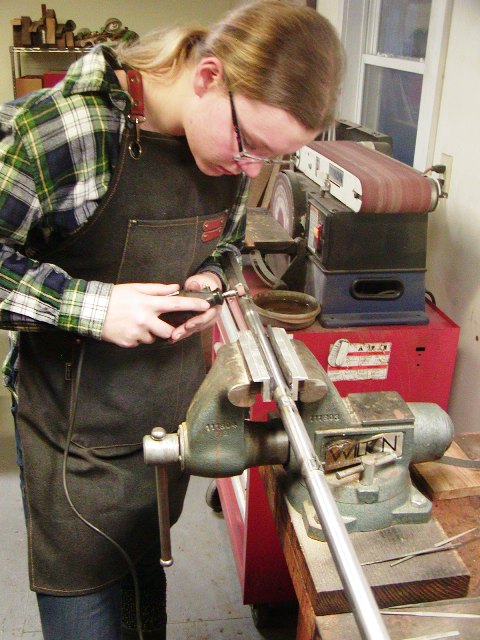


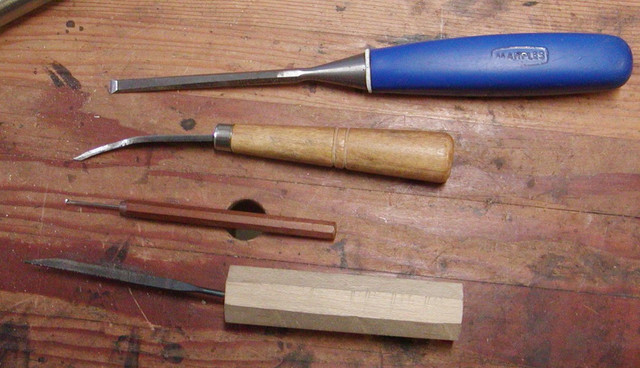
Next we drill 3 holes in a line to form the slot in the lug. We used a 1/16" drill. After that, we cut out the metal between the holes with a jeweler's saw and file the slot with a flat needle file. We are using cast steel barrel keys that are about 1/16" thick. The slot can and should have a little extra length and width than needed to pass the key. To inlet the lugs in the stock, Maria coated the bottoms of the loops with blacking, she placed the barrel in the stock and squeezed it marking the positions of the loops in the stock. Then she drilled a series of 1/16" holes in the stock and cleared away the wood between holes with a little chisel made from a flat needle file and a bit of fret saw blade held in an X-acto knife handle.
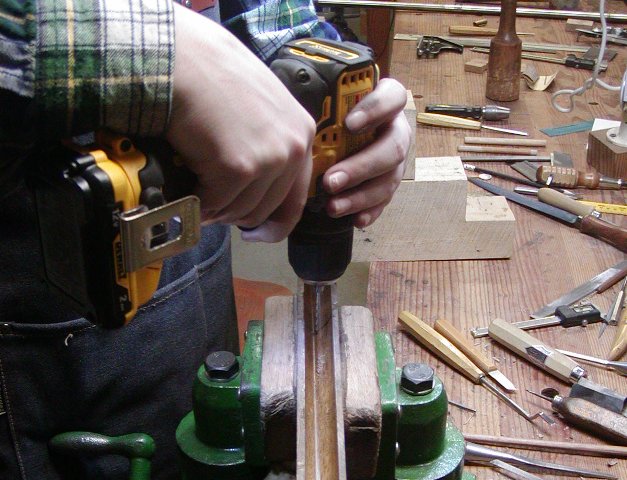


A little filing with a needle file cleans things up and the barrel is placed in the stock with the lug bases blacked. That marks them in the stock and using a 1/4" flat chisel, she cuts nice clean mortises for the bases.
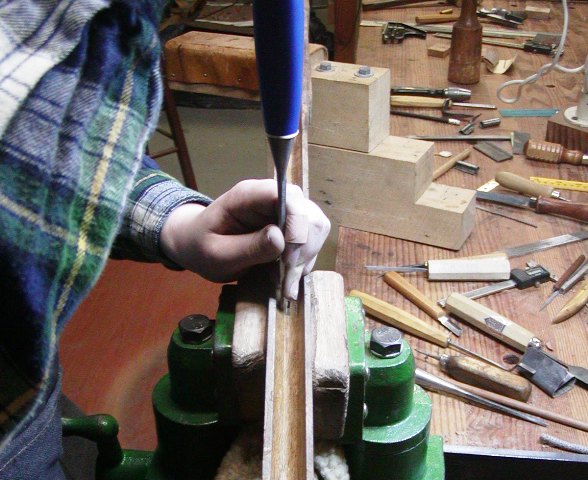
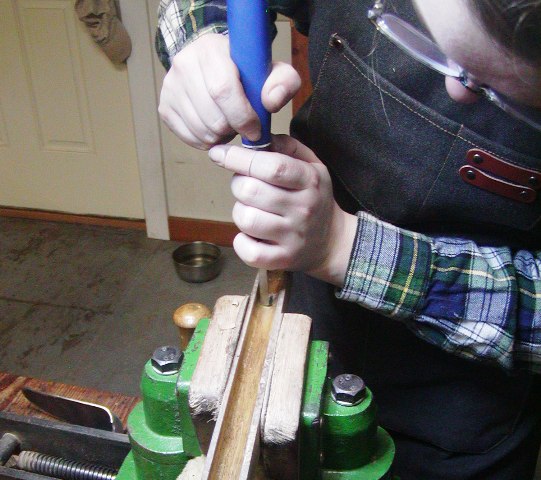
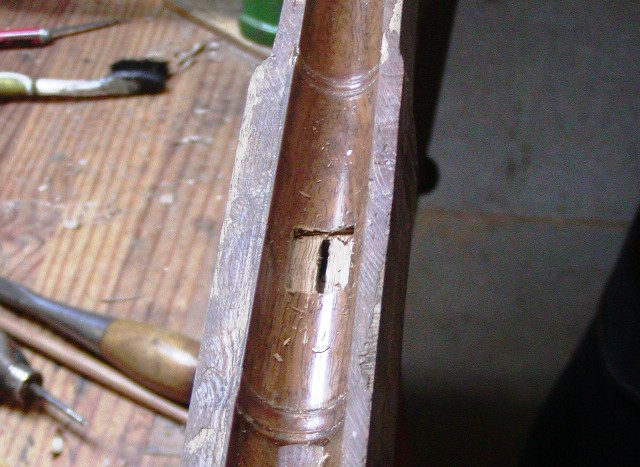


I am not concerned about having the lugs pass through the stock into the ramrod groove and hole. I know some folks obsess about that but when building a correctly slim English fowler from this period, you cannot really avoid having the lugs show in the ramrod groove because the web of wood is thin. You can see how thin the AcraGlas coating is in the barrel channel. You can see the wood grain right through it. It is thin but it really strengthens the side walls of the barrel channel particularly when they may get as thin as this:
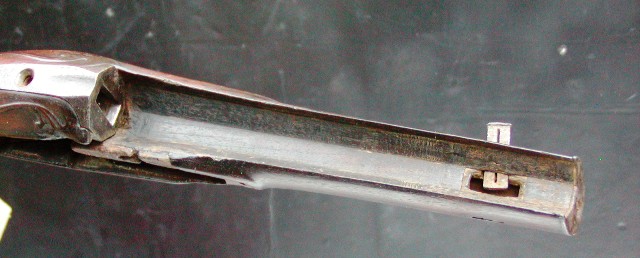
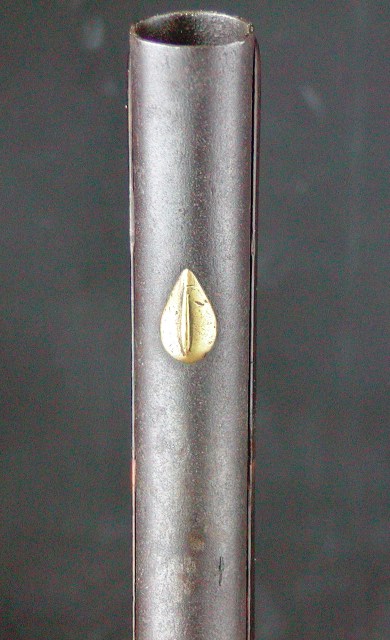


On both of those originals, the barrel side walls are very fragile and chipping off in spots.

Next will be installing the barrel keys.

dave
 
Dave, I know I’m jumping ahead a little bit here but just curious. I followed your other posts on building English Fowler. In the next step of installing barrel keys. In the past you do your final fit by heating the keys. Then letting them burn their way in. All this is done before the stock is slimed down to the final dimensions. I’m assuming once the stock has been sanded to the final dimensions you reheat the keys for a final fitting?
Aaron
 
Hi and thanks guys,
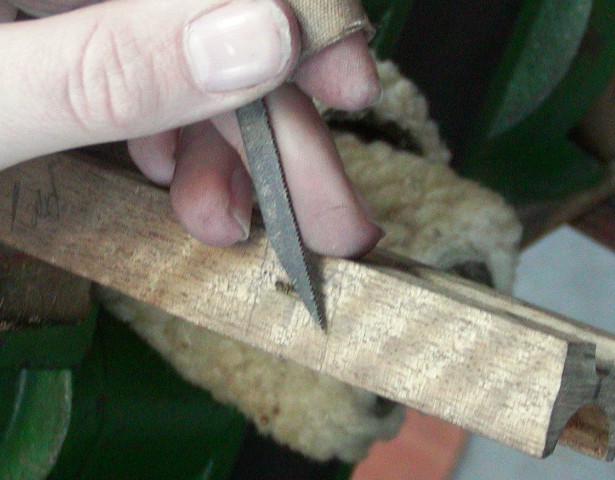
Aaron, I only burn the keys in when the stock is still squared up so any burned wood on the surface is rasped away. There is no need to fit them again after shaping the stock other than making sure the heads lie flat on the stock. That usually means angling the heads on the forward keys to fit the sharp curve of the fore stock. Sometimes I don't used heat at all. I made a small little saw from a flat needle file, which works really well cutting the slots after drilling the holes such that I don't always need to heat the keys any more for fitting.

dave
 
"Maria wanted to decompress after her exams this week so she came over to work in the shop"

I had read that several times to be sure I read it correctly. A teenager... after exam week...decompressing by working on a gun build vs drinking, partying or spending countless hours at the game console!

Amazing and uplifting.
 
Hi Folks,
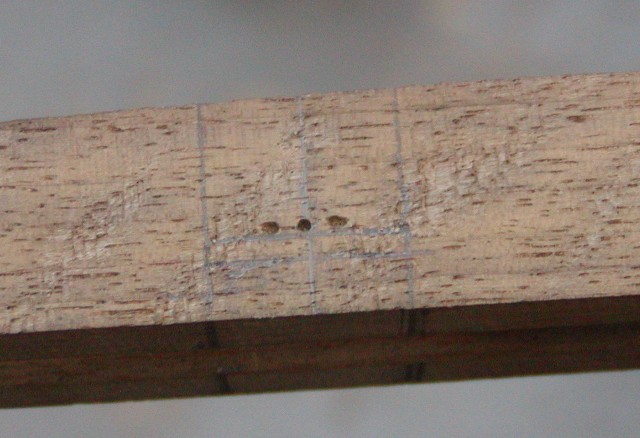
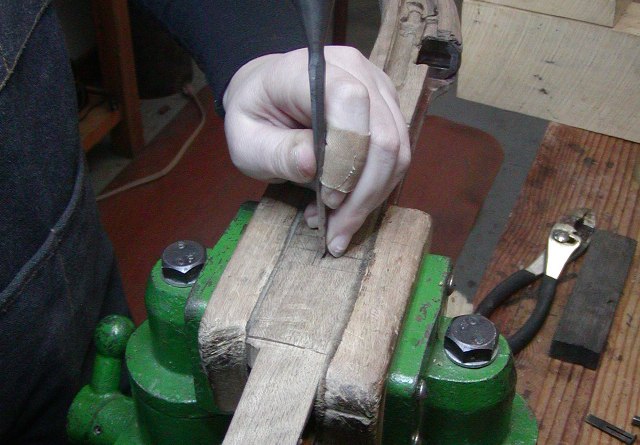
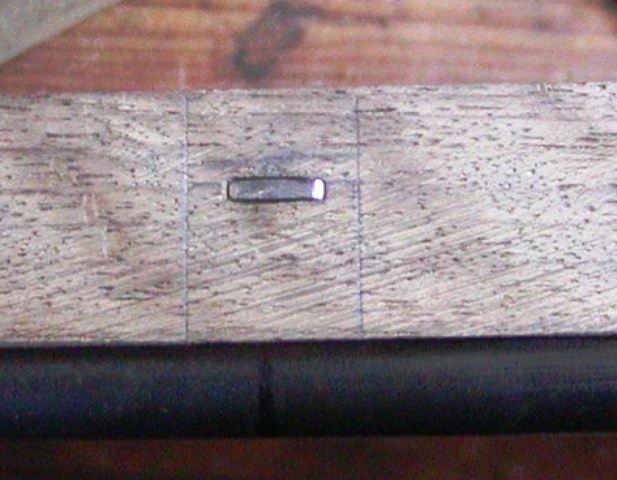
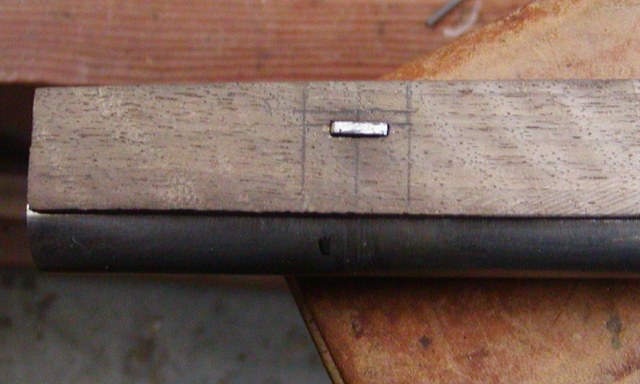
A milestone day; inletting the barrel keys. This is a job that intimidates a lot of folks. Maria and I will show how we do it. The job is not hard but requires good measurements. Moreover, trim away most of the excess wood along the fore stock and square it up. It is foolish to try and do this task with more than 3/16" of wood left on the stock sides. The barrel lugs for the forward keys show in the ramrod channel. That gives us a good handle on the dimensions of the lugs. We measure the depth to the bottom of the lug from the edge of the ramrod channel and transfer that to the side of the stock. Then we measure the width of the loop above the bottom and draw that line on the stock. We measure the length of the lug and determine the middle. Then we punch a hole with an awl marking the center of the slot in the loop and holes on either side delineating the width of the key. The key is accurate measurements.


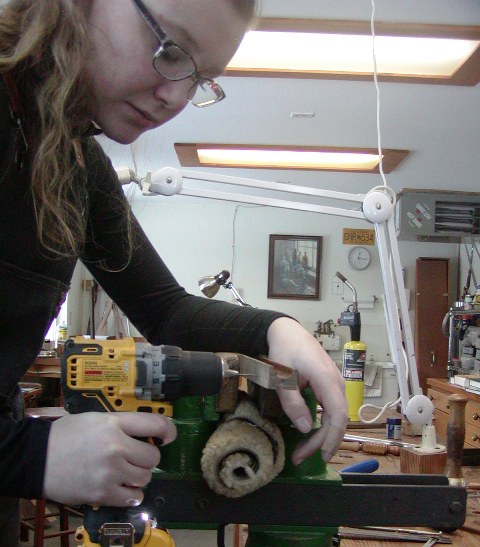
Then we drill small holes (less than the thickness of the keys) from both sides keeping the drill level.


With that done we begin to open up the slot. Here are the tools we use.

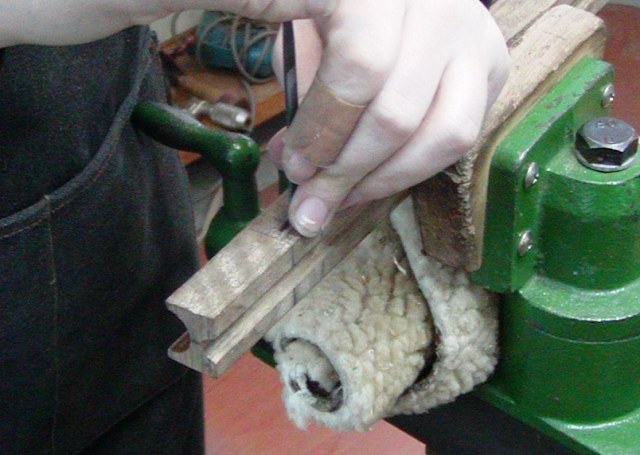
Working from both sides, we inlet an outline of the key using flat chisels.


Once the opening is defined, Maria uses a little saw made from a needle file to clear away the wood between the drilled holes creating the slot.


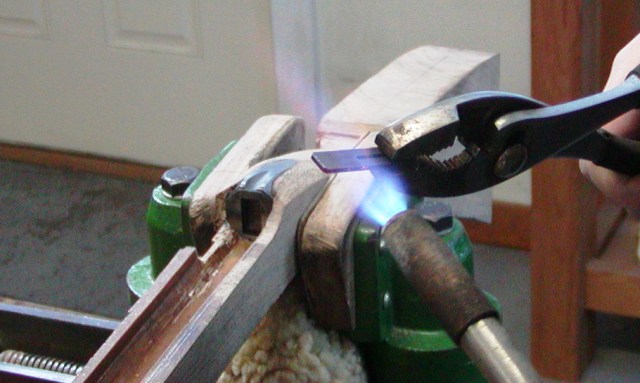
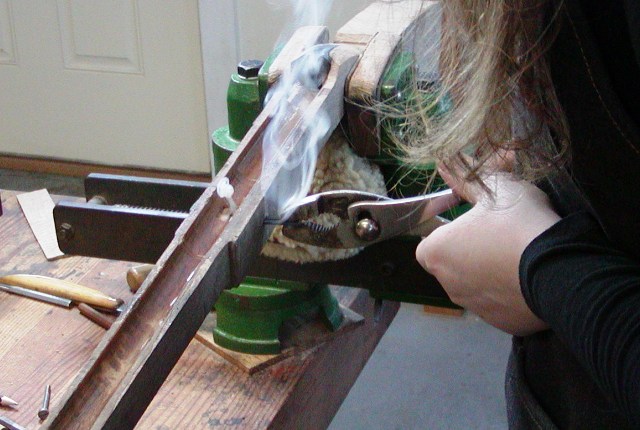
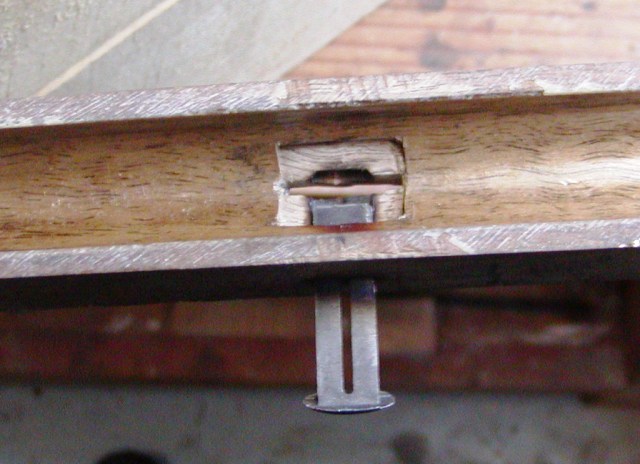
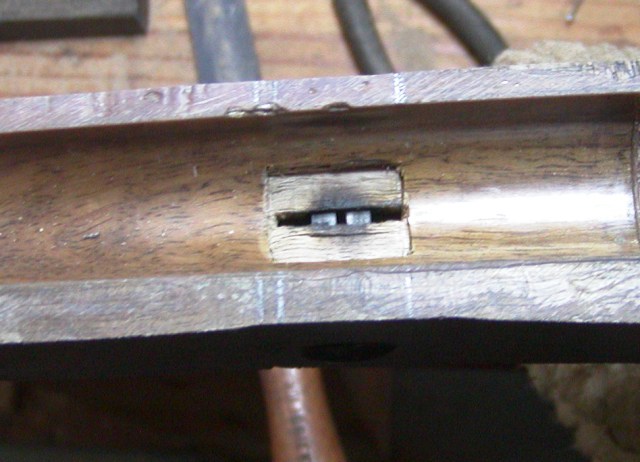
When that is done, we heat the barrel key blue hot ( the photo shows too much heat as Maria waited for me to snap the picture; it cooled before inserting) and burn the key in for a perfect final fit.


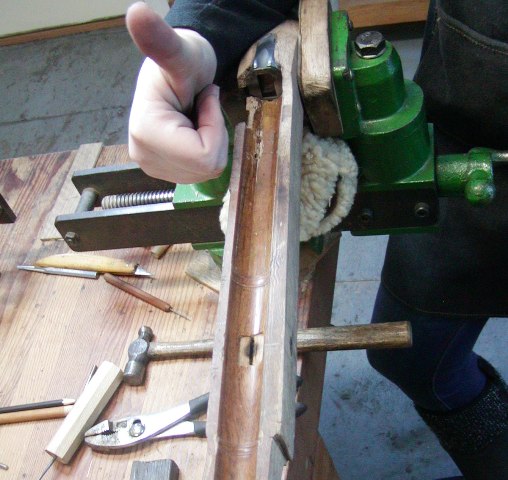
Here is the result.


Dave
 
Many modern small drill motors ,have a built in bubble level paralleling the axis of the bit , to be used to level the drill motor frame. I successfully drill all the necessary holes in m/l gun stocks . Process......level the stock in a vise , or whatever you want to use. Mark the stock and use a 6" , 90 deg. square to mark the entrance point of the drill bit. Once the drill entrance point is marked , using the bubble level to assure all is going drill straight , drill the hole. Hundred of holes drilled successfully ,proves this method works. No need for drill presses , jigs and dies , extensive set up procedures , etc..
 
Hi Necchi,
I do this alone all the time. As Oldwood wrote, a bubble level on the drill works well. However, I find I can hold the drill level pretty well without any aid. That is the key reason I urge folks to trim off wood from the stock before drilling any of the pin or key holes. Because of the shallower depth of your holes, any small deviation from level has very small effect and can be mitigated if your holes are slightly smaller than the finished width of the pins or keys. In addition, we drill from both sides to the middle not from one side and all the way through. In Maria's case, after drilling from one side, the drill hit every already drilled hole dead on when she drilled from the other side. We had one miss in which she marked a hole for one side of a key too close to the center hole so the drill broke into that hole and we had to cut the excess wood in the slot away with our little saw rather than drilling it out. It caused no problem. Again the secret here is trim the wood away first and measure accurately.

dave
 
Back
Top