• Friends, our 2nd Amendment rights are always under attack and the NRA has been a constant for decades in helping fight that fight.

    We have partnered with the NRA to offer you a discount on membership and Muzzleloading Forum gets a small percentage too of each membership, so you are supporting both the NRA and us.

    Use this link to sign up please; https://membership.nra.org/recruiters/join/XR045103

Traditions Kentucky Pistol

Muzzleloading Forum

Help Support Muzzleloading Forum:

This site may earn a commission from merchant affiliate links, including eBay, Amazon, and others.

Claycow

36 Cal.
Joined
Jan 26, 2015
Messages
93
Reaction score
0
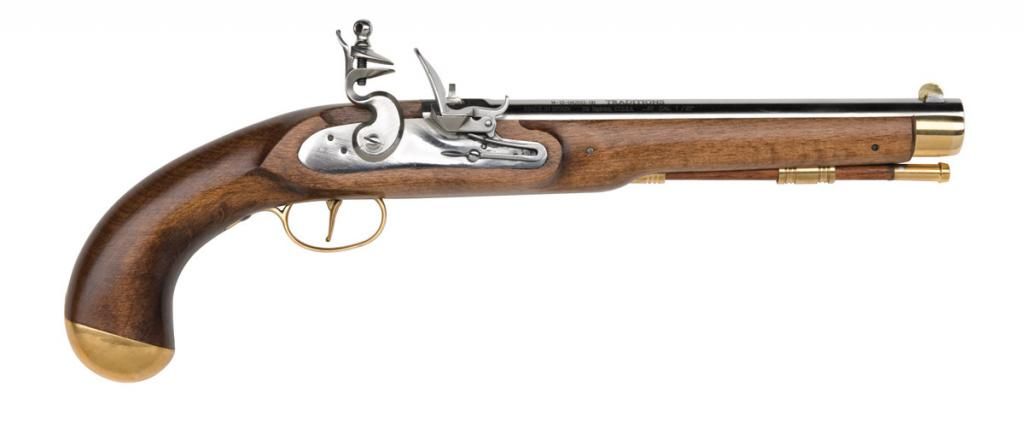
Well, i've embarked on another project. The Traditions Kentucky Pistol, I bought it from http://www.oldsouthfirearms.com/ and it had pretty fast shipping along with great prices.

I don't know if I'm stupid or not, but I could've just paid extra $25 for the fully assembled and functioning one. Instead I'll likely spend countless hours of sanding, staining and frustration building this little thing. I was originally going to go with the pirate pistol, but, at twice the price and my large credit card bill, I opted for the cheaper one. I got what I paid for. Here are some pictures.

Does anyone know how I can get rid of that writing on the barrel?


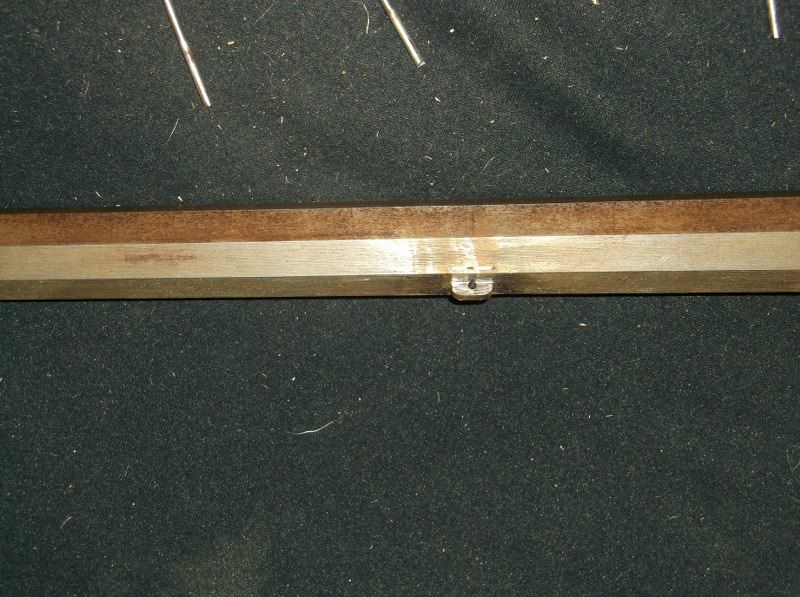
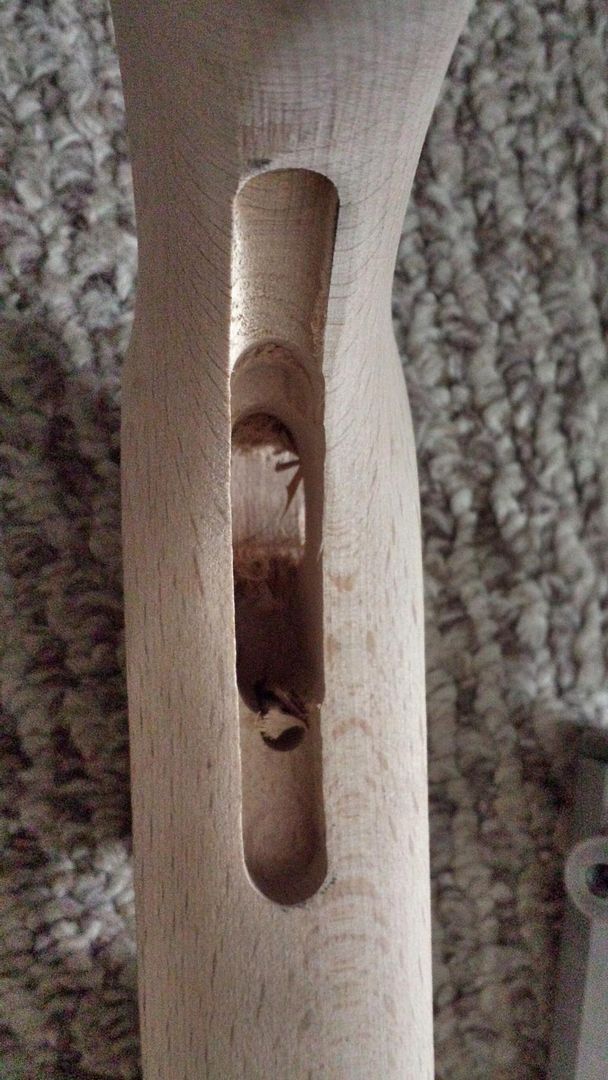
Rough carving job by the people who made this


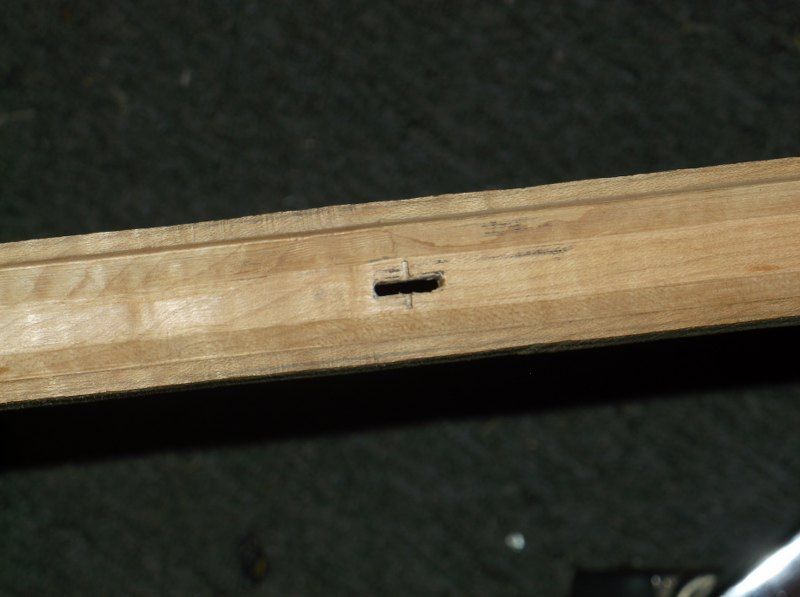
More examples. I'm pretty sure that wood is caved in where the bolt is supposed to go (towards the bottom of the picture). But I think the Bolt should go deep enough to not be a problem


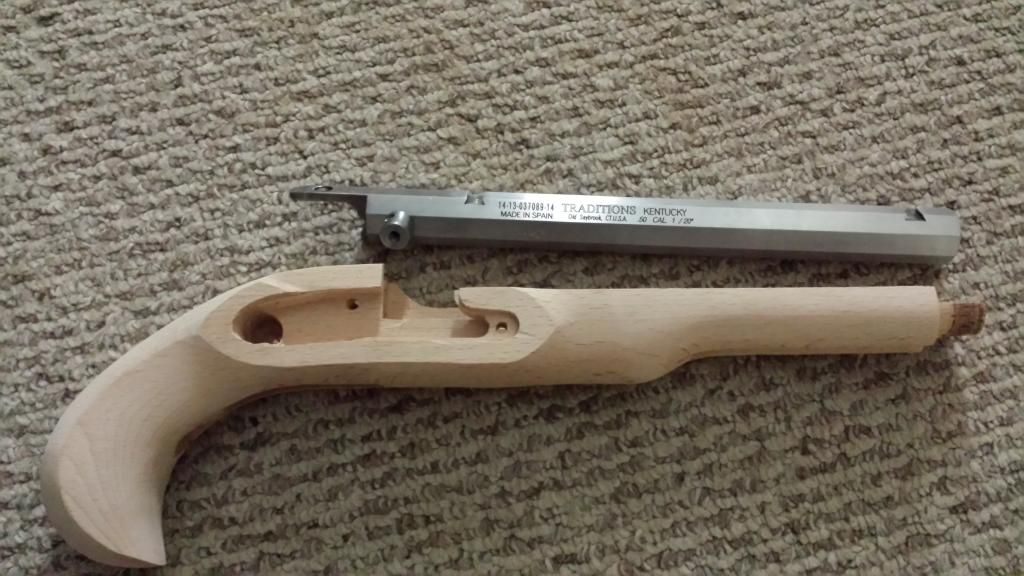
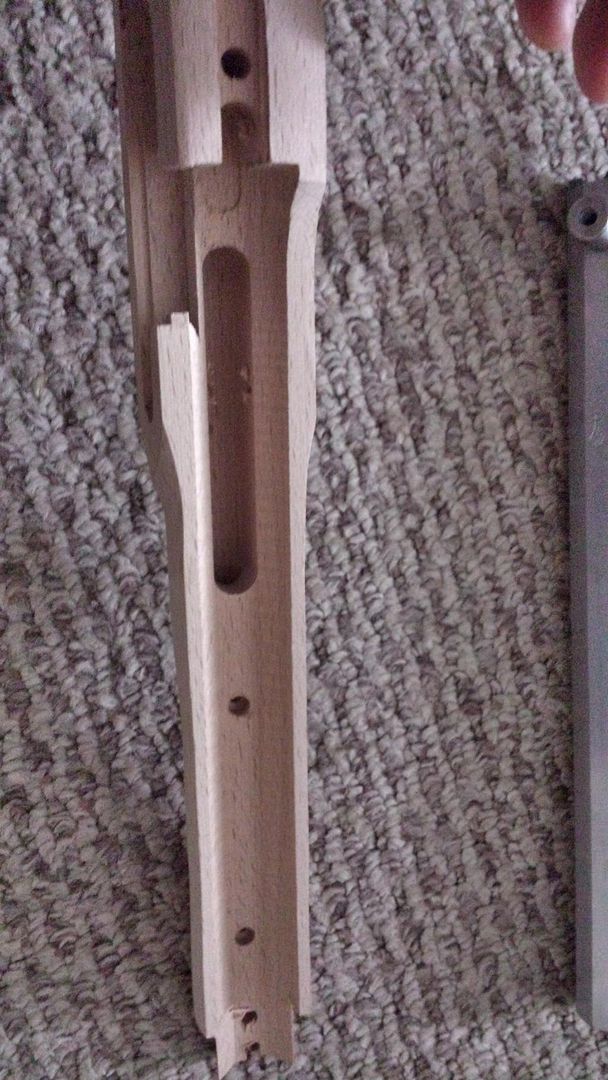
Long view, but you can again see where they left wood shavings.


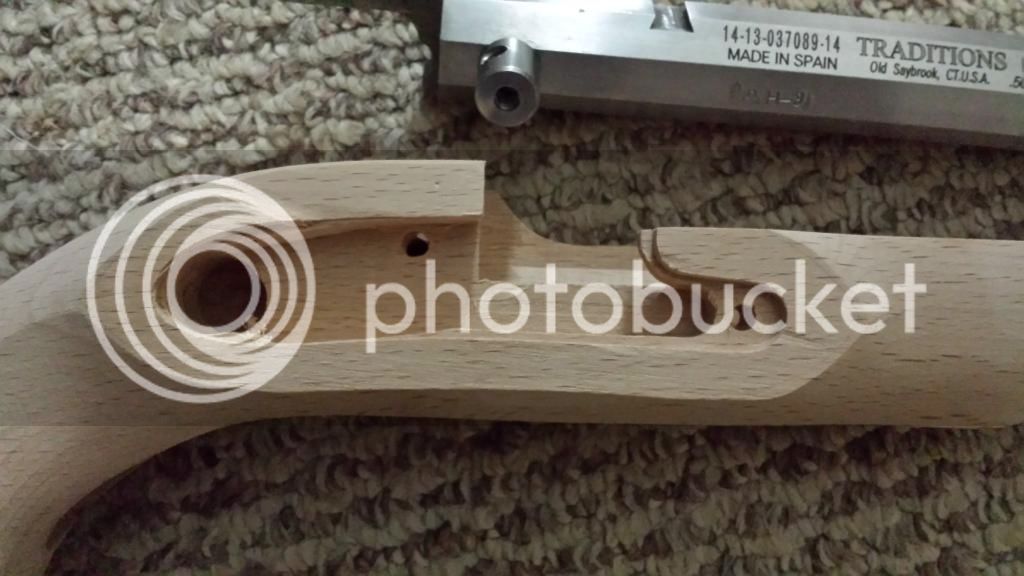
I did a rough fit, everything except for the trigger guard and the thing for there barrel screwing in fits. The trigger guard is going to take some serious wood removal, but the barrel inlet? tongue? Whatever the end piece that screws into the stock is going to be slight removal.

So, I found the only real difference between the kentucky and pirate pistol is the shape of the handguard (which the kentucky can be shaped down) the bottom brass cap, and of course the flintlock top. Would I be able to find a brass cap from anywhere (like a hardware store) and the flintlock mechanism to swap out on my kentucky pistol?


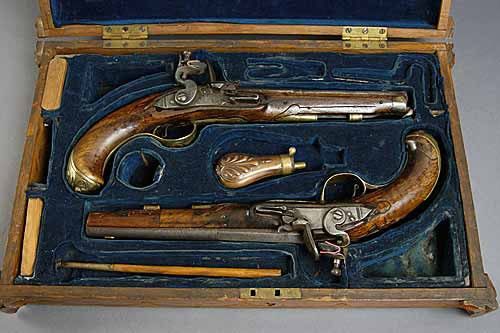
Trying to eventually get 2 pirate pistols and then put them into a "dueling box" as for decor like see below. I am debating makign the box myself or just paying someone to make it. I assume it would cost ~$150ish to have someone make it. While I could it for $50 + countless hours of frustration.


Thoughts? I'll be updating this with more photos as I do stains and clean things up. Just thought I should start a thread with pictures, as this site seriously lacks them!
 
Last edited by a moderator:
Here's an opportunity to learn some basic building techniques. I can't tell from the photos how deep the stamped or engraved writing is on the barrel. The thing is, if you file too heavy on that flat, it will be wider than the top flat. Then if you file the top, the sights won't fit right. Then you'll have to file the left side. I'd put a heavy browning job on it, and leave it alone. Next, the wood, looks normal for a kit gun of that quality. An opportunity to get into sanding, staining and finishing. I think Track Of the Wolf, has the brass cap, but converting to flintlock, is really going to add to the expense. I'm not even going to get into that. I'd use this as a learning experience, and perhaps you could build a flintlock kit next, or send it back and start all over.
 
thank you. That is kind of why I went with a cheaper pistol too. To practice twice (pistol and my previous percussion kentucky rifle) then buy 2 higher priced ones.

Pedersoli has a Kentucky Pistol for slightly more than the Traditions Pirate pistol, except...it doesn't have that bottom brass cap. Which, other than the shape of the handle (which can be sanded) is the same.

Hmm, I was hoping I could use acid or something on it to get rid of the etching
 
Your kit project is a good "learning tool" if you have never built a pistol before but you are stuck with the barrel stampings. You also show a set of flintlock cased pistols as your finish desire but you are building a percussion pistol.
If it were me I'd finish the cap lock and then build two flintlocks (not kits) and go from there.
 
Is a flintlock that much different than a percussion? It comes all together from Traditions I think
 
You need to qualify your statement -"Is a flintlock that much different than a percussion?"
Do you mean to build or to shoot?
A flintlock can be a bit "fusser" to shoot but once you get the knack of it they all go bang and push a projectile toward the target.
I think a flintlock is less complicated to build. No fiddling with aligning the hammer with the nipple and the path of fire is direct to the powder charge. My two cents :hmm: .
 
I meant in terms of building. I would also be building from a Kit, not sanding and making the inlet by hand. I really don't trust myself enough yet. So I'm pretty sure between a flintlock and percussion, it's simply placing it in the already carved out area. So with a kit, there is no difference other than price, am I wrong?
 
Well. Started on the project. Apparently everything fits, just need to push and pull a little. Running into some issues an had some questions

#1) Is the trigger just loose? It just wobbles around, I feel like there should be something that keeps it taut. But nothing in my kit suggests otherwise. I simply drop in the trigger, and the percussion assembly.

#2) When I hit and push in the opposite end of the barrel to make it flush at the stock, it pushes this end up. Somewhere, something isn't make the barrel sit flush and im getting this. Any ideas?


#3) Don't know if you can see it, but the area around this percussion assembly isn't flush. I'm going to sand, agree?


#4) Towards the left hand side of the trigger guard, see all that space? Am I forgetting something? I doubt it as there are only screws and bolts left. But it just seems odd for that trigger guard to just sit there. Sorry, it focused on my carpet.


#5) Right side of teh trigger guard, again if you look close, it is not sitting flush. I'm going to sand down unless this is bad idea.


#6) Not sitting flush, this is the one way out of place. Isn't flush on the sides, isn't touching the barrel, and isn't flush on the bottom side. Sides can be sanded in, and so can the bottom, but i'd need to take the brass cap off and sand underneath it.


Which, also, the holes don't align on the brass cap with the holes on the wood. The wood is slightly too short. Is this a problem? The only thing which holds this pistol in place are these 2 screws and the one in the back near the stock.


Any comments appreciated. Also, should I buy a cheap 20 piece wood carving set?
 
1. The trigger is just going to be "loose". Something that many modern shooters often just don't want to accept. Differing sear positions at fullcock, half cock, and hammer down, plus the fact that wood expands and contracts demands that the trigger have at least a little play when the sear is in its lowest position (meaning usually half cock). If it's REALLY loose, even at half cock, perhaps a new, taller trigger could be fitted.

2. The inletting may be "humped up" in the middle, or the stock may simply be warped down at the nose. Can you squeeze the barrel down in the inlet at both ends and have it bottom out? Or do you have a definite "rocking" fore and aft?

3. Yes, the wood is too high (normal for a precarved stock) and you can cut it down to where it is flush with the lockplate, or ever so slightly below the lockplate surface.

4. That's just the way it's made. You could conceivably bend the triggerplate down into proper shape and maybe fill in wood up underneath it.

5. Though I can't really see in the photo, yes, with this type of triggerguard, you can shape, cut, sand, chisel, scrape, file, whatever the wood down to match the triggerguard (or vice versa). Make the metal look like it grew there. No raw inlet edges showing.

6. Well, even for a precarve kit like this, that nosecap is hideous. I would strongly suggest finding one of more suitable shape (preferably without the groove on the bottom... makes grabbing the ramrod a lot easier) and fitting it. With that, I would also strongly suggest fitting a tenon to the barrel and pinning it into the stock in normal fashion.

If you're gonna stick with the original nosecap, I don't know, you'll have to fiddle around with the holes in the wood so that they line up with the holes in the barrel first (making sure the barrel is secure and all the way to the rear), THEN fit the nosecap on and see where it sits. If the holes in the nosecap line up, good. If the holes in the nosecap line up, but the nosecap isn't pushed back in the inlet all the way, well, that's ok, except for the visual ugliness of the gap... maybe fit a sliver of contrasting wood in there to take up the space and make it look like it's supposed to be there. If the nosecap bottoms out at the back end in the inlet, then you just have to inlet the cap further back to make it line up.

:wink:

Sharp chisels. And be careful, beech wood likes to chip.
 
"then you just have to inlet the cap further back to make it line up." Or file the rear end of the cap off, which would probably be easier.
 
What is a "Tenon to the barrel?" I'm not sure there is much I can do about that piece, don't know where to find another piece for it.

So, i'm going to try and carefully describe my situation about that piece. The 2 screwholes in the barrel, 1 screwhole does line up with the hole on the barrel, wood, and brass piece. The 2nd screwhole matches up with the brass piece and not the wood. I need something like, more wood to grow unless this tenon thing works?

Everything is pushed back as far as possible, this just made it past QA/QC, maybe ill give traditions a call?


You mentioned #4 that I could bend the triggerplate and fill wood up underneath. Bending I can do, where do I get wood to fill up underneath?

Thanks for all the responses. Ill get to sanding, work has been cancelled for tomorrow.
 
Ok, just get rid of that little bit of wood that's in the way at the front screw hole so the screw can go through, it's no big deal. That should be all that's required to secure the front end of the barrel.

On normal muzzleloading guns, the barrel is held in the stock by use of tenons, dovetailed into the bottom of the barrel (or soldered on). The tenons fit into mortices in the stock and are then pinned in place (or fitted with wedges). A classic pinned mortice and tenon joint.
tenon001_800x597_zps2d25fde8.jpg

tenon002_800x597_zpseb1108f6.jpg

There's not much room there, and my pins are high, just touching the barrel, so the pin holes show through the barrel channel. Maybe you can get an understanding of how the barrel is held in by this.

I'm not sure how best to handle the shaping of the fore end. It's about three times thicker than it needs to be, and normally the fore end would have the same shape as the nosecap, but with that nosecap I don't know...
 
Totally understand your tenons. I have them on my kentucky rifle im building. However, this pistol barrel did not come with such attachments. Am I able to drill a small hole (not all the way through) for a bolt to hold the barrel?

Also, if I get rid of that little bit of wood...does it matter? I guess the barrel would still be attached to the brass object?
 
Shaving down that wood still doesn't solve my problem. The right and left isnt flush, which is no problem as I can sand. But the bottom part of the brass sticks out too far. I can sand the bottom of the wooden part there, but i'm afraid of taking off too much wood and making it week.

Otherwise, I may have to custom order another part somewhere else? Are these brass caps standard?
 
That little bit of wood ahead of that front screw hole is irrelevant. Knock it out and don't worry about it. :wink:

If you can get the existing screws to work, and if you're not familiar with this type of gunsmithing work, you're probably best to stick with what you've got.

But, if you wanted a learning experience, you could ditch the nosecap, forget the screws, and find or make a new nosecap that would fit better. One could probably most easily make a wood nosecap, maybe of a dark contrasting wood, cut off the stub of wood left where the old nosecap went on, and glue the new piece on in the same way one would put a fore end tip on a modern rifle stock. Fit a tenon ("underlug") on the barrel, pin it, and there you have it. I could probably describe the entire process, but it would take a lot of internet "ink" to do so!
 
yeah, that nosecap is flat out ugly, and with it hanging down below the wood like that, I'm not sure you could do much with it other than just let it be. That is not a normal nosecap/barrel attachment system... except for modern automated production line manufacturers!

If you chose to change it, the muzzleloader builder supply houses (like Track of the Wolf, Muzzleloader Builder's Supply, Log Cabin Shop, etc.) sell all kinds of nosecaps and barrel tenons ("underlugs"), and your pistol could be made to be a little more "presentable" by going that route, but without experience or guidance, it may be more work than you want to do. If you had one of the gunbuilding books (like "The Art of Building the Pennsylvania Longrifle"), that would help you immensely in seeing how it all would be done. :wink:
 
Can I file down the visible portion of the brass and somehow repolish it? Seems like a better idea than shaving the wood. Dont want to mess with the integrity
 
At first I took the nosecap to be thin sheet brass, but if it's heavy cast brass and thick enough to file away without cutting through, then go for it. File it off, shape it as necessary, matching the bottom to the bottom of the fore end, then match the sides of the fore end down to the sides of the nosecap. Fit them to each other. Then you can sand in increasingly fine grits to clean it up. 220 and steel wool will be fine enough, though it won't shine mirror bright. It doesn't need to anyway. :wink:

Most of this kind of thing is NOT all that critical. You don't have to worry too much about removing too much material or causing weakness, especially when you have such a massive amount of wood to work with as you do (you might be surprised to see how T H I N the wood and metal often is on original guns). Things can get too thin or weak, of course, especially when you go cutting into the barrel, but if you leave the barrel alone, you're fine. If you cut the sides of the stock all the way down even with the surface of the nosecap, it will still be thicker than most originals!
 
Back
Top