• Friends, our 2nd Amendment rights are always under attack and the NRA has been a constant for decades in helping fight that fight.

    We have partnered with the NRA to offer you a discount on membership and Muzzleloading Forum gets a small percentage too of each membership, so you are supporting both the NRA and us.

    Use this link to sign up please; https://membership.nra.org/recruiters/join/XR045103

far from done but getting excited!

Muzzleloading Forum

Help Support Muzzleloading Forum:

This site may earn a commission from merchant affiliate links, including eBay, Amazon, and others.
What helped me was the simple advice:
"Shape the lock panels first. Cut the molding afterwards."

You cut the molding before shaping the panels. I did the same mistake on my first practice stocks.

Best regards
Rolf

Pistolstock3014.jpg
 
dave, that pic helped me visualize a lot thanks!

some very good advice here, and i am soaking it all in.


I have read two very good books, cover to cover, a few times and mikes tutorial many times as well. I think it just comes down to missing the forest for the trees once you are IN the build. Thats why i love having you guys around to point out what im missing.

after all, i just looked like a fool on national tv with a B. A. R., so my skin is pretty tough at this point!

anyway.......i hit the other panel today for a few minutes before work and i am starting to see how much better it will look blended with the file. there is still plenty of wood to work with on this fowler, so im not too worried. I AM NOT DONE with this panel, but here is how it is coming so far.

photobucket-5583-1330433319587.jpg
 
Coming along. Remember that when viewed from the side, not angled, the top edge of the sideplate panel should approximately lead to the top edge of the side flat of the barrel.
 
Where you are it right now gave me fits on the first few guns I built. We see it quite often, I tried to do it every time.

I was trying to incorporate the architecture into the carving. It wont work. First you have to have the architecture. Even if you think the gun is getting too small, don’t worry about the carving. There will be room for it. Deep carving is 1/16” and that’s way deeper than you need. 1/32” is deep enough.

My point is, get the architecture done first. Hold the gun and sight down the barrel like you are going to shoot it. You can feel all that extra wood under the rear of the lock (front of wrist) with your trigger finger. I do the bottom of the lock side first then make the other side the same. Next I work both top sides and at the same time work on the transition and shape of the wrist to the lock and side plate panels.

I leave both panels about 1/16” too deep. This will save you from rounding the edge of the finished panels. The last thing I do is flatten the panels down to the finished inlets.

For most of the guns I build I want the finished panels 1/8” or less around the lock plate. I want the tail of both panels to be a point that transitions straight into the round sides of the wrist.

That done I go over the whole stock, work out all the little details, remove any rasp or file marks and make sure all the metal to wood fit is finished, completely. Just like I was getting ready for stain.

Now it’s ready to lay out the carving.

That’s the way I do it anyhow.

Bruce Everhart
 
got it rich, thanks necci!


good point long. You are right about the fits.lol

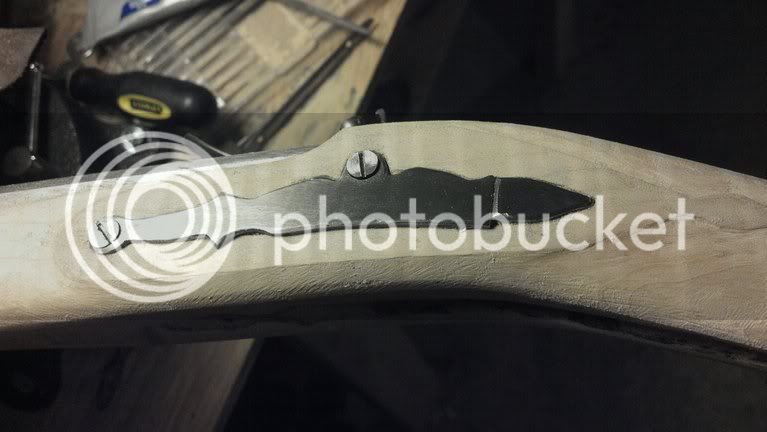
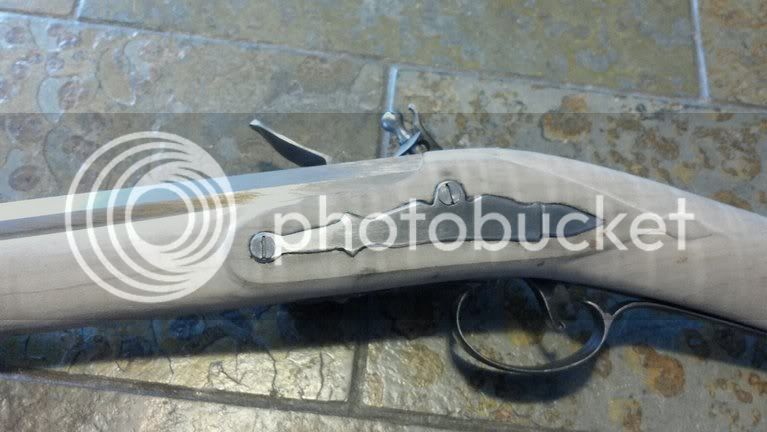
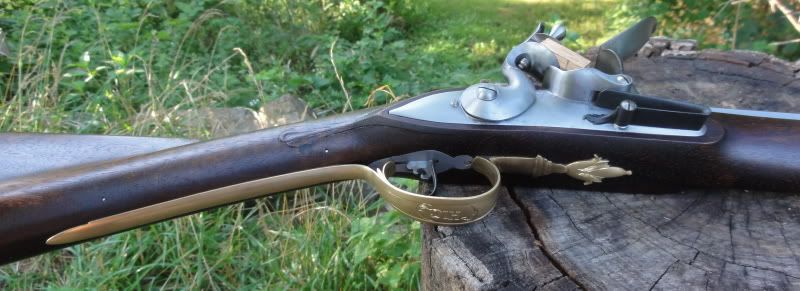
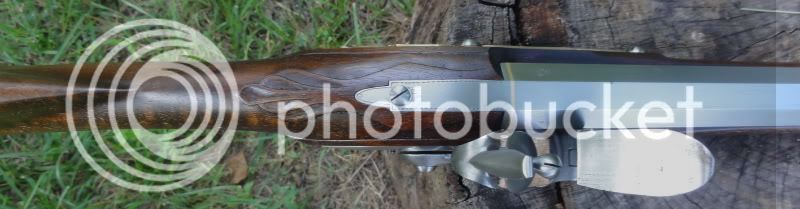
looking at mr. brooks pictures has me thinking about a blend of the carving/fading. i like the way how some of his fowlers look very faded along the bottom and front of the panel, with a more defined line on the finial and top. I may try to emulate that a bit. i realize thety are probably not carved at all, but the defined line would be easy to keep, and i think i shall on the finial portion.


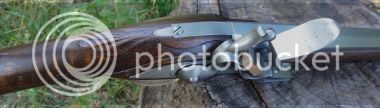
its funny, it looks like a gun, it functions like a gun, and yet there are hours and hours, and probably a bit more blood to spend before i even think about a coat of stain.


then again, since it will last more than a few lifetimes if cared for, i think thats a pretty sweet deal!
 
Yeah Man!
I was ready to stain one Saturday evening, I'm finding just a few more things to button up before I make that move,, maybe Thursday
 
You're doing fine. I believe the late Turner Kirkland said that a man needs to build about six muzzleloaders before he gets consistent quality, something to that effect. This forum is a great source for critiques and helpful suggestions for gun builders. Thanks for sharing. Please keep us posted on your progress.
 
Thanks sutherland. I am finding many things to work on yet.


i was right about the blkood, some of the pigment you see is bloo, but most of it is a light stain. I wanted to see how it would react with a glue i used to patch a booboo before i did anything else with it.
anyway.....

photobucket-5292-1330518989060.jpg


photobucket-4330-1330519019085.jpg


photobucket-6033-1330519047495.jpg


photobucket-5388-1330519075731.jpg


the bottoms of lock panels are rounded up nicely, the barrel is unburied more at the panel a touch, and all the way out past the lock panels it is unburied fully. with a full 2/3 of the flat showing. the top of the panel lines up with top of side barrel flat.

The front of the lock panels and the top are getting to where i think i probably need to think about leaving them alone........due to their relationship with the forestock which i don't want to thin all that much more...

the wrist can still be significantly thinned i believe, so i am thinking the rear and finial of the panels can still be improved. also, the wrist is too thick when viewed from the rear, even though it feels great in the hand. circumference of 5 1/8 " right now.


the gun currently weighs in at just over 7 lbs all assembled.

what say you brain trust.....
 
Here is a link to another building tutorial. You're beyond a lot of the earlier stuff but there is a wealth of info and a different perspective. http://www.traditionalmuzzleloadingassociation.com/forum/viewtopic.php?f=76&t=6214

Look at a lot of photos, Good reproduction rifles and originals when you find them and save them in a file for referance. Good luck and be patient.

I think it's not how good a builder a person is it's how good a person can fix his errors. No rifle build is ever perfect.
 
Last edited by a moderator:
Still not right. Shape the lock panels then apply the carving. When you have the panels properly shaped that rear finial carving should be gone. You have a ton of wood there to work with, don't be shy.
Take all the parts off, lock, trigger guard, trigger and get in there and shape that out! Can't do anything with all those parts in the way.
 
ok, i'll kill the finials tonight, and get them back later if i still can.


what say you about leaving the front alone? i don't think i have near the wood there that i have in the rear.

I put the parts on at the end each night to just look at it and think about what i want to see. they are off during work!
 
I use a 3/8" ratail rasp to shape the front of the lock panels. I don't know what you used but it's not right. You have plenty of room to do it right just by reducing the size of the panel in front.....go look at some pictures.... :thumbsup:
 
Forget about the carving for now. You will have enough wood for that later. When you get that gun shaped the carving you have will be gone.
SIH-3.jpg


I don't recall the size of the wrist on this gun but I would bet it's about 1 3/8". The barrel ( 20ga) looks bigger in this picture but, look at the barrel and wrist together. Also look at the transition from the panels to the wrist.
SIH-5.jpg


Also, take note of how much wood is still on the forearm. You can make it thin and still be round. I used a 1/2" micro rasp and a 3/8" course file at the front of the lock on this gun. Shape it then bring the forearm down to meet it.
SIH-7.jpg


SIH-10.jpg


Hope this helps you see what we are talking about.

Bruce
 
It does bruce. thank you. i see it and know what i want but so far my hands wont really follow orders. i will pick up a larger rat tail today so im not trying to creat an angle, which ends up being too steep, and it just exists because it is in the file. i will study these and other photos very closely until then!
 
I just went back and looked at all your pictures. 2 things I see that I would think about.

1st is, your trigger gaurd is not inlet all the way. But that doesn't matter because;

2nd you have a ton of wood on the bottom, under the lock.

How far away from the ramrod are you? Did you do a depth reading yet? Drill a 1/16" hole inside under the barrel so you can find the bottom of the ramrod hole with a wire. You might have 3/8" or more you can get rid of.

Bruce
 
the trigger gaurd is completely inlet but the screws are buggered so i did not cinch it in for the pics.


depth reading has me 3/8 or less from ramrod hole. i found that out whilst elongating my rod channel and found my 5/8 screw from trigger gaurd that was not cinched in impeding my chisel.............
 
You'll want 1/8" of wood over your ram rod hole. It isn't unusual to break into the ramrod hole when you inlet the front finial of your trigger guard on a slim rifle.
This would be so easy in person, I could have it done in 5 minutes for you..... :wink:
 
FWIW, great thread, but it's beginning to be like ApprenticeBuilders forboding post above,
Too many cooks,,,
You've already got plenty of food for thought.
Do what YOU want or it could end up like Vt's thread that just kept going and going and he got frustrated,,
Good luck.
 
Back
Top