• Friends, our 2nd Amendment rights are always under attack and the NRA has been a constant for decades in helping fight that fight.

    We have partnered with the NRA to offer you a discount on membership and Muzzleloading Forum gets a small percentage too of each membership, so you are supporting both the NRA and us.

    Use this link to sign up please; https://membership.nra.org/recruiters/join/XR045103

First Gun Build Questions

Muzzleloading Forum

Help Support Muzzleloading Forum:

This site may earn a commission from merchant affiliate links, including eBay, Amazon, and others.
perrybucsdad said:
I know I won't need this for some time, but what about a dovetail cutting jig for the sights and the underlugs?
I know there is a jig made but never used one. With a little practice you won't need one either. I imagine there are some who do but most I have talked to tried it and then went ahead and continued to free hand 'em. There was a tutorial put up here recently that covered it. It's not tough as you think.

Enjoy, J.D.
 
perrybucsdad said:
So with a chisel, you push it to remove wood, but with a scraper do you pull it to remove?

Scrapers are usually held a angle slightly off perpindicular to the surfacs and are used to scrape wood off. Theory is the same as a wood plane only it's free hand vice having the iron mounted in the plane body...with a scraper you can follow the curving contours of the stock. You can't do that with a plane.

As stated, it allows you to take off fine shavings of wood, leaving a smooth surface...provide you follow the grain....the wood will tell you which way it wants to be scraped.

Enjoy, J.D.
 
Last edited by a moderator:
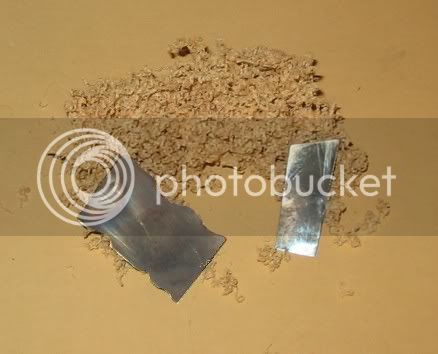
When it comes to scrapers it doesn't take much to make your own.

These don't look like much but they work very well.
They were made out of some spring stock I bought from Dixie Gunworks.

scraper2.jpg


After filing the shape I wanted I heat treated and tempered them to a blue color so they wouldn't be very hard.
They need to be somewhat soft in order to "roll the edge" on them.

A non-hardened piece of 1/32 or 1/16 piece of sheet metal will also work but it will have to be resharpened more often.

Unlike the glass scrapers some use, these have a true cutting edge on them.
The glass just scrapes wood off. These actually cut the wood off.

The edge is formed by placing the scraper into a vise or hanging it over a table edge for support.

Then, a really hard piece of steel like the shank of a drill bit up by the flutes is pressed against the edge of the scraper and rubbed back and forth.

The key to doing this is to remember that you are trying to roll the existing sharp edge at the end surface back up over the large flat part of the scraper.
If you could magnify it you would see the flat face of the scraper and as the surface approached the edge it would suddenly rise and start to curl back on itself forming a tiny hook.

In use, this tiny hook cuts into the wood and cuts it forming little curls of wood just like a plane does.

The sharpened edge will dull up as it is used but to resharpen it you just have to use the piece of hardened steel to roll a new cutting edge on the scraper.

A word about curly wood and scrapers.

Scrapers work great on straight grained wood as long as your scraping parallel with the woods grain.

Because the curl (stripes) of the wood has its grain going in a different direction depending on where your looking, scraping these woods can be difficult.
If it seems like the scraper is going to tear out a piece of the surface rather than cut it it's a good idea to change the direction your dragging the scraper.
It's also a good idea to know when the scraper is going to cause more trouble than its worth.
 
Well, change of plans, can't head down to Lodi today, so will have to delay it until next weekend or later this week.

I didn't realize the scraper had a curl to it. Would a hardened long screwdriver work to sharpen?

Again, you are pulling the scraper vs pushing it, correct?
 
The Jerry Fisher and Flexcut scrapers I linked earlier have no curl (known as "hook" on scrapers) burnished in. They are made of tool steel and are ground flat. I generally use them like you would use a....hold 'em with the thumb and fingers of one hand and pull them across the wood.

I also use cabinet style sheet metal scrapers like Zonie. They can be used with or without a hook. With the hook they remove more wood faster. They can be pulled or pushed. Do an internet search for "using a cabinet scraper" or something like that.

Scraping is one of those things that is just easier to do than to explain as it involves a lot of "feel".

Enjoy, J.D.
 
So I think I will pick up a Lyman Trade gun and the components to make a mountain rifle this week. With the Lyman, can I get a different lock that will fit the preexisting mortise for the lock so it is more authentic? I'm not sure if there ate replacements by L&R or someone that is more authentic. No big deal, but I don't want it to be too modern.

I figure the Lyman will be something I can develop some skill on before I attempts to mess up a nice curly maple.
 
Putting another lock in a Lyman doesn't make it more authentic....if by authentic you mean historically correct. Just like putting a BOSS 302 in a Fiesta doesn't make it a Mustang.

Do what makes you happy but if building authentic longrifles is you goal then buying a Lyman or any other imported kit is chasing good money after bad in my opinion. At least with the investment in the other parts you always have the other parts...even if you mess up the wood....the parts can be recycled.

If you're just buying a complete Lyman just to have something to shoot, why not....have fun....but buying an import kit over a quality parts set is another choice all together.

Enjoy, J.D.
 
I'm not trying to make a Mustang out of a Fiesta, just trying to improve the quality of the parts on the gun, and make them look like they should.
 
perrybucsdad said:
I'm not trying to make a Mustang out of a Fiesta, just trying to improve the quality of the parts on the gun, and make them look like they should.
Not trying to be smart but could you define your idea of "authentic" or "make it look like they should"?

I have no doubt that changing out the factory Lyman flintlock with an L&R replacement lock will make the gun perform better. The point I was making is that if you want an "authentic" reproduction of a 19th century rifle you would be better served by investing your time and money in authentically styled parts and building one.

If your goal is to have a good shooter then then the Lyman should serve you well but it will never be mistaken for a period rifle.

Enjoy, J.D.
 
Nor should it be mistaken for a period rifle.

What I mean is, purely for looks, and purely for more reliability, are there replacement locks that would for the most part, drop in. When I say looks, I mean, a lock you would normally see on a trade gun vs a fowler, or some other gun that this one is not trying to be.

I guess to better illustrate my point, let's say I was restoring a 1954 Oldsmobile. I wouldn't stick a 1964 Ford engine in it, or for that matter a 2012 GM engine in it. They both might be able to function in the 1964 Olds, but it would not look right. I would want to put a 1964 Olds replacement in there (could be another Olds engine, or for that matter a GM engine).

For the gun, I just want it to look right for the type of gun it is supposed to be.
 
Man, a guy makes one car analogy.... :doh:

Anyway, here is a link to one outfit that has the L&R RPL lock for the Lyman: http://www.trackofthewolf.com/Categories/PartDetail.aspx/759/1/LOCK-LR-05-F I would bet that the Log Cabin Shop carries it to.

To me it seems like a lot of money to throw at a production rifle to make it perform as it should in the first place.

Do a search on this forum and I'm sure you will find many discussions on it.

Good luck, J.D.
 
Last edited by a moderator:
Well, just got done with the Log Cabin shop and they talked me out of getting both (Lyman rifle and the components for the mountain rifle) and just got me going toward the Mountain rifle... so no more car analogies.

I got a beatutiful stock, the Manton lock, and the barrel (.50 cal in 7/8"). The older gentleman who helped me said that I may have to bring the barrel back a bit in the stock to line it up with the lock. So my question is this... should I start fitting the lock first or the barrel first?

My understanding (and I'm sure I could be wrong) is that you fit he barrel first to the inelet stock. I know I will have some fine tuning to do there to get it to seat in the grove (no, I didn't test it when I was there as the barrel was all wrapped and everything... my bad). But if I have to get the lock all inletted first, should I do the lock area first, or get the fit to the barrel right (generally speaking since it is a straight barrel and not swamped) and then move to the lock.

I don't plan on starting anything tonight other than to see unwrapping the barrel and seeing how well or not well it fits the stock.

I also picked up some chisels and small files, but will need to get some scrappers and rasps next time I'm out neat the woodworkers shop.

Thanks,

John
 
perrybucsdad said:
Well, just got done with the Log Cabin shop and they talked me out of getting both (Lyman rifle and the components for the mountain rifle) and just got me going toward the Mountain rifle... so no more car analogies.
:grin:

Congratulations....you are on your way.

(1) Did you get the stock that was inlet for the lock?

(2) Does the barrel have the breech plug installed?

Normal progression is barrel then lock. With a stock pre-inlet for a lock, the lock will normally need further inletting but it's final location will determine how far back you are going to have to move the barrel so the touch hole (when you drill it) will line up with the pan on the lock.

That being said, you don't want to inlet the lock full depth before the barrel is inlet as the barrel determines the lock mortise depth as the lock's bolster has to mate flush to the barrel side flat.

If your barrel doesn't have the breech plug installed that would be the first thing I would do. I like my breech plugs to be 1/2" on calibers .50 and under. Likely yours is a bit long. If a Green Mountain barrel it's threaded deeper than that. No matter what length you go they will probably not be the same and you will have to make the necessary adjustments.

After I've breeched the barrel and remove the breech plug for the final time to find out if it is mated fully against the barrels shoulder, I leave it out.

A good location for your vent will be the length of your breech plug plus 3/16" (half a 3/8" vent liner) mark this location on the side flat and then inlet the barrel setting it back until this mark lines up with the flash pan location that you have already determined based on your lock inlet.

The most important thing is to have the back of the barrel firmly seated against the back of the inlet....full contact. When you fire the gun the first time the barrel will want to move back under recoil. Without it firmly seated against the back of the inlet you can imagine what will happen to your breech tang mortise, your barrel pins, your vent/pan alignment, etc.

After your barrel is fully inlet and seated reinstall the breech plug, file your draft in the sides and shape it to final dimensions and inlet it.

Then inlet the lock. That should keep you busy for a bit. Enjoy, J.D.
 
Yes, stock is inlet for the lock, and No for the breech plug. I got a Green Mountain barrel (I believe it is 5/8 for the plug) and the plug is also 5/8. I'm sure I will still have to file some down to get it to fit properly. I also picked up the Gunsmith of Greenville County to go along with the DVD that I picked up. It mentions something about Permatek for the breech plug to see if it mates properly. Is this the same stuff I used on the car for gaskets? Also, what should I use to file down the plug? Any old file? I have a Dremel tool, but I'm assuming that's not the proper tool as I must get that plug level and precise to prevent myself from wearing an exploded plug.
 
5/8 x 18 is the diameter of the plug and the threads per inch...not the length. It is unlikely that the plug and barrel threads are the same length/depth....you will have to do it.

Not an old file, a new file. You are correct...flat and level. You will not just file the plug but the breech end of the barrel if it's threaded too deep and in final alignment of the tang with a flat. It's a little here/a little there thing.

Permatex Prussian Blue. http://www.amazon.com/Permatex-80038-Prussian-Blue-Tube/dp/B000HBM86Q Same company that makes the gasket stuff but different product. It is a non-drying blue paste. Put in on the face of the plug and it will show you when you have complete contact with the shoulder in the barrels breech.

Enjoy, J.D.
 
Last edited by a moderator:
Okay, well, I tried to insert the plug last night and it went almost all the way in and then stopped about 1/8" short (I didn't measure, just eyeballed it so that is not an exact measure). I will assume I need to file down the plug to get it flush. I also understand that I will need to file down the breech end of the barrel too? Why? To ensure it has a tight fit?

What is the best type of file to get for this (e.g. body file, bastard file, fine file, ??)? I'd prefer to just get one, but I'm assuming that may not be the case.

Also, I believe I need to impart an angle from top to bottom on the breech plug for when I inlet it, so this same file will be used for that too.

Now I just need to convert my old Air Hockey table to a work bench. Okay, don't laugh too hard. The table is built like a tank. I figure I will need to raise the work surface up a bit though as it is a little low. I'm thinking of getting some 4x4's and then covering all that with some thick plywood sheeting. If I screw the sheeting down to the 4x4's and position those tight against the edge of the air hockey surface, it shouldn't budge. If that doesn't work, then I'll just build a new base for the workbench, but I'd prefer not to have to do that.
 
perrybucsdad said:
I will assume I need to file down the plug to get it flush. I also understand that I will need to file down the breech end of the barrel too? Why? To ensure it has a tight fit?
Have you measured how deep the barrel is threaded? If more than 1/2" my preference is to file (or cut if necessary) down to a hair over that.

How long is the threaded portion of your plug? You may want to cut that off then file.

Even if you choose to leave the barrel alone, the reason you will have to file the plug and the barrel is that when you get the plug seated it is highly unlikely that the tang on the breech plug will line up with one of the flats on the barrel.

What is the best type of file to get for this (e.g. body file, bastard file, fine file, ??)? I'd prefer to just get one, but I'm assuming that may not be the case.
For steel work a standard single cut flat bastard file can leave a remarkable smooth finish if used correctly. You will want to polish the face of the breech plug with with abrasives when finished.

You are correct in assuming that you can not effectively build a gun with one file though.

Also, I believe I need to impart an angle from top to bottom on the breech plug for when I inlet it, so this same file will be used for that too.
Yes...flat, single cut bastard or finer. The angle is called "draft" in your books.

Now I just need to convert my old Air Hockey table to a work bench....
Whatever works. Many guns have been built on kitchen tables....they will fight you the whole way but it can be done.

Enjoy, J.D.
 
jdkerstetter said:
Even if you choose to leave the barrel alone, the reason you will have to file the plug and the barrel is that when you get the plug seated it is highly unlikely that the tang on the breech plug will line up with one of the flats on the barrel
Well that brings up a question then. I thought I don't want ANY gap between the plug and the shoulder of the barrel? So in filing this down, I have to make sure that I always make that contact, correct? Wow, what a PITA that could be. So if my plug is 5/8" in depth (don't know for certain but I will measure tonight), I can safely go down to 1/2" for a 50 cal? Or is this why I may want to cut down the barrel just slightly to keep the depth at 5/8"? And if I am just removing a sliver of the barrel, I assume I would use a file to do that. Could a bench grinder be used if I put the plug end of the barrel flat against the SIDE of the grinding wheel? WHen I say the side, I mean just that, the side, and not the face (or where you would normally grind against)? I would think I could keep everything flush this way, and then clean it up with a good file to ensure that everything mates up good.
 
Face of plug must mate in a tight/crush fit with shoulder inside the barrel to ensure a good seal....and at the same time the tang of plug must mate to the barrel so it is lined up with a flat.

YES....can be a big PITA and that's why some people pay others to do it. A little filing here a little filing there....take your time.

1/2" is my preference and has proven safe...for myself and others. If the plug is 5/8" long it is made that way knowing that you will have to do some stock removal to get the fit required...either from the plug, barrel or both. If the plug is kept 5/8" long then your vent is likely to be 13/16" from the end of your barrel if you don't notch the plug for it...and I'm not a fan of notched breech plugs...some don't care. Do some research and decide how long you want it.

Files (and a hacksaw if necessary...I have a Sharon barrel that came with a 3/4" long plug :shake: ) are the right tool for the job. I can't recommend grinding...especially against the side of the wheel. If you had a mill that would be an option but you could likely fit it with a file before you got the thing set up.

Enjoy, J.D.
 
Okay, thanks. I found a GREAT article from TOTW, that talks a lot about this. The one part that I love is how to adjust the cut to make everything line up. See Measure the index angle error, and Calculate the amount of error in the linked article. I don't know how you would measure 0.021" as it is 1/64th and 1/32nd, but I thought it was a great tip.

Just curious, why don't you like notched breech plugs? I thought all breech plugs had to be notched into the stock. Or are you talking about putting a notch into the plug itself? How the hell would you even do that?
 
Back
Top