• Friends, our 2nd Amendment rights are always under attack and the NRA has been a constant for decades in helping fight that fight.

    We have partnered with the NRA to offer you a discount on membership and Muzzleloading Forum gets a small percentage too of each membership, so you are supporting both the NRA and us.

    Use this link to sign up please; https://membership.nra.org/recruiters/join/XR045103

If you had a Pedersoli Bess to refinish...

Muzzleloading Forum

Help Support Muzzleloading Forum:

This site may earn a commission from merchant affiliate links, including eBay, Amazon, and others.

SgtErv

50 Cal.
Joined
Nov 30, 2015
Messages
1,338
Reaction score
19
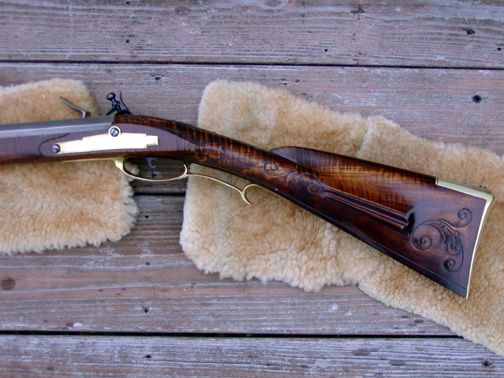
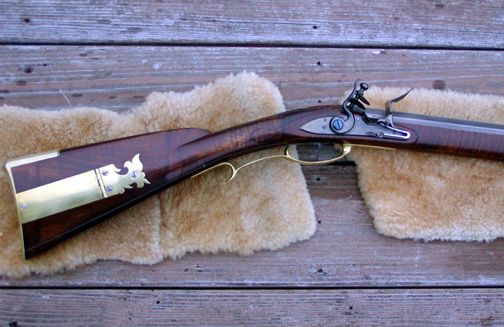
So, I have a Pedersoli Bess. It's straight from the factory, modern looking stock, armory bright, what you see at Canelas, pretty much.

Now that my extra moccasins are made and haversack patched up, etc, I'm considering dressing up the Bess. Mainly, I want to use some walnut stain on the stock. I'm on the fence about doing anything with the barrel, because I know it's a heck of a lot harder to go back to armory bright than it is to get rid of it haha.

So, with the collective experience of this crowd, I am wondering what you talented gentlemen would do if you had a factory Bess that you wanted to make look less like it came from a factory. What materials (strippers, stains, oil finishes, etc.) would you prefer to use? What would you absolutely not do?

The ultimate goal of any refinishing I'd do would be to make it something closer to what was seen in history. I'm not nearly skilled enough to change any of the hardware though.

Anyway, what do you all think? Mainly just getting opinions, possibly examples, musing a bit.

Hope your winter projects are going well!
 
I just drool whenever I see Dave's work. :thumbsup: :hatsoff:

One great point that Dave has made in the past is h scrapes the wood to be period correct, instead of using sandpaper. Maybe we can talk him into giving us some tips on how he does it? I used cabinet scrapers and only scraped a VERY small amount when I refurbished my Brown Bess Carbine that I really busted the stock on and other things.

More coming.

Gus
 
OK, here is a great way to strip the finish off the stock that might look like it is period correct when you are done. Get a package of "Chore Boy" Copper Scrubbing pads, a pint of acetone and a roll of paper towels and chemical resistant gloves.
https://www.stockupexpress.com/cho...rce=msn&utm_medium=cpc&utm_campaign=Chore-Boy

With the chemical resistant gloves on, wet the Chore Boy pad with acetone, scrub an area of the finish and wipe off the gunk with a wad of paper towels. Continue this until the entire stock is done. Do this outside or in a well ventilated area such as having a small fan blowing air across the stock. You may even wet a wad of paper towels with the acetone to wipe the stock down once you went over the whole area with the scrubbing pads. The GREAT thing about using Acetone is that nothing is left on the stock when the acetone evaporates, unlike most chemical strippers. I have tried almost every kind of wood stripper available in the last 40 years and Acetone is my stripper of choice for that reason unless I run into one of the tough epoxy finishes.

MAYBE the roughness imparted to the wood from the copper scrubbers will look like a scraped surface? After that I "bone" the stock by rubbing it hard all over with natural bone, antler, wood dowel, etc. to rub the stock surface smooth. "Boning" was a period wood smoothing technique that crushes down the tiny wood fibers that stand up when bare wood is wetted.

British Captain Bennett Cuthbertson wrote on this for the Military Muskets: “By going to some little expense, it will not be difficult to bring the stocks of the firelock(s) to one uniform colour, by staining them either black, red, or yellow; and then by laying on a varnish, to preserve them always to a glossy, shining condition.” So that means they stained them.

Oh, with all due respect to the good Captain, I would never want a YELLOW stained stock, though some Officer/s probably thought it would complement Yellow colour Uniform Facings. However, this does tell us that some red in the stock colour is period correct. HOORAY!!

You can go with the period acid stains, but you will need to check with someone else on how best to use them.

Of all the dyes or stains I have used on walnut stocks over the years, and God knows I have tried many of them, my preference is to use Fiebing’s MEDIUM BROWN (-04) leather spirit stain (not the oil stain). This colour is a pleasing brown with a nice hint of Red in it. The small 3 or 4 oz. bottle is PLENTY to do more than one Brown Bess stock. I like the large wool daubers Tandy sells to use this stain. OH, you will also need to use your chemical resistant gloves to keep from staining your hands for 3 or 4 days. https://www.tandyleather.com/en/product/fiebing-s-leather-dye

As for the stock finish, for most people who won’t be doing a bunch of stocks, I advise you get a 3 oz. bottle of Birchwood Casey Tru Oil. This is MORE than enough for two or maybe three Brown Bess stocks. You can usually get this at gun stores or outdoor stores. I also recommend going the Paint Department of one of the Big Box Hardware stores and buy the 2 Pad Package of the Abrasive Scratch Pads that are Grey and equal 000 Steel Wool. DO NOT BUY STEEL WOOL, THOUGH!!! https://www.amazon.com/Birchwood-Casey-Tru-Stock-Finish/dp/B002JD3J2M

OK, more to follow, but that’s it for me for tonight. :wink:

Gus
 
Last edited by a moderator:
I put mine up in PHOTOS for you to look at,dull the metal with brillo pad and just take the sharp edges off the wood profiles , but most of all use it a lot and clean traditionaly ,the look will be worth it ,check out my posts and topics for photos etc :grin: :thumbsup:
 
Luckily the only material you mentioned that I have not used before is the acetone, Gus. I had to re-apply a finishing oil to my rifle this winter and it's going well. It's the second stock Ive used tru-oil for, and Ive learned how to do it right. (It is still curing after about 5 coats. That stuff could be a whole other topic. Knocking back a last coat with a grey pad gives it a beautiful sheen imo) The grey pads are waaay better to use than steel wool.

Funny, too, is I don't like how that shade of Feiblings looks on leather but used it on another wood project. I also like the wood daubers!

I noticed the sharp edges are gone in a few examples Ive seen. Maybe best to look at this when the stock is stripped to see if sanding or scraping will do the job? Even just dulled a little would be a big improvement over what it looks like out of the box. Alas, something to contemplate, as I doubt my wood shaping skills the most
 
Hi Gus and SgtErv,
I don't strip the finish because I always take a lot of wood off the Pedersolis to make them look 1) slim like the originals, 2) correct in the details as best I can, 3) correct filed and scraped finish, and 4) handmade. I don't go as far as filing off the Grice 1762 and replacing it with "TOWER" but I may on the next one, which is next in line to be on my bench. Moreover, the engraved or stamped letters are not the correct font. They are even width stick-like letters without the thick and thin accents of the original engraving. Some details that need fixing are the lock and hardware inlets are often too deep. All the parts should be flush with the surface of the wood or slightly proud. On some the beaver tails behind the lock and sideplate are often too large for most SLP Besses and should be reduced in size or done away with. The lock panels are usually too wide. On many Besses, there is almost no flat panel showing around the lock. On others the panel is flat but only 1/16-1/8" wide or so except around the front of the lock. The apron around the barrel tang usually sits up too high and needs to be shaped lower with a concave surface. I solder a lug on the barrel for the forward sling swivel so the screw goes through the wood and the metal lug. I also drill a hole for a pin through the comb that would be anchoring the tang of the buttplate on an original Bess (unless it is a Marine and Militia musket). I scrape off the old finish, use files, rasps, and chisels to shape the details and then scrape the wood surface as smooth as I can. Scraping is not hard but you do have to pay attention to the grain of the wood. You can scrape with the grain and at an angle across it but just like a plane, you have to determine the right direction to scrape that does not tear at the wood. I use a flat rectangular cabinet scraper, a french curve cabinet scraper, several small scrapers that have small curves for getting around the lock panels. Carpet scraper blades from hardware stores also make good flat scrapers and can be resharpened on a stone many times. Traditional cabinet scrapers require the correct squaring and burnishing of the edges, whereas sharpening the carpet blades is more like sharpening a chisel or plane blade. I do about 2 Pedersolis a year for re-enactors. I often have to make extensive repairs because many of them do not take good care of their guns. Sometimes the barrels are a mess inside and out and I end up lapping the bores to clean and smooth them again.

dave
 
Thanks Dave,

Appreciate the tips!

One thing I had to almost force myself to do was use fine files and even a bearing scraper on the bras parts, but that is how they did it. Once one realizes to look for evidence of this, it often shows up on the inside bow of the trigger guard on original muskets. Then I judiciously used brick dust in oil to smooth over that and the other surface3s of the brass parts.

Gus
 
OK, when I rebuilt my old Brown Bess Carbine, I had to pull the barrel out of the stock. That is where I first learned to really dislike the otherwise nice looking barrel loop pins that were filed flush and even with the curvature of the outside of the forearm. Removing the barrel loop pins was obviously a challenge to period Artificers/Armorers/Gunsmiths, as well, judging by careful examination of those areas of original Brown Bess Muskets stocks in the book “The Brown Bess,” by Goldstein and Mowbray. It shows the area around some of the barrel loop pins ALL buggered up and chipped/ wallowed out.

I used very small carbide dental burs in a Dremel like tool to cut a small half round indent on the pins on the left side of the stock. That allowed me to get small starter pin punches to “catch” on that end of the pins to start driving them out towards the right side of the stock and switching to longer pin punches once I got them moving. Once I got the pins out, I filed a TINY flat area sort of close, but not real close to the end of each pin that would show me which side to drive the pin back in from right to left. I have no idea if they followed the modern method of pins and screws normally going in from right to left on military arms as is pretty common today, but that’s how I do it. Then I filed the ends of the pins just perpendicular and flush to the length of the pins and lightly file chamfered the ends. Of course when you drive the slightly shorter pins back in place with the now squared ends, they will not fill up the holes on both sides of the stocks. I used beeswax to fill in the open spots left by the shorter length pins and later found out that was one of the ways they did it back in the period.

You probably will not need to take the barrel out of your Brown Bess, but if you ever do, you might find use for this tip.

Changing subject, we know from Cuthbertson's quote that the British Military really liked the "glossy and shining" stock varnish finish, rather contrary to what we think a period finish should look like or is too glossy for what most folks like today. If you like that kind of finish, then Tru Oil will give it to you.

If you don't like that glossy of a finish, I extremely doubt a British American Militia Sergeant would have kept his musket looking that way. You can knock off the shine of the last coat of the finish with the abrasive pad and then take an old terrycloth rag and rub the dickens out of the stock until the finish looks like a nice, warm glow.

Back in the period, they MAY have rubbed Beeswax into the stock after the varnish or oil finish was done, but I would NOT recommend you do that. Beeswax is only slightly better than nothing at all to stop water vapor or water getting into the stock and it can wind up a gooey mess in some climatic conditions. The hard rubbed Tru Oil finish, al by itself, will more than protect the wood of the stock.

Gus
 
I kinda use the bees wax method of sealing the barrel pins in, even on ky. Guns. I use crayola crayons. Find the closest color to your stock slightly warm over a candle and melt into hole left by pin. Then gently scrape off excess and buff smooth. I have several guns that have had this for years and it seems to seal and is hardly noticeable. Also it is easy to remove pins if necessary. I think it keeps out moisture and dirt. Just a thought.
 
Hi Gus,
That is how I treat the pins as well. It is always dicey the first time the pins are removed because they were often just filed flush with the wood and can actually have a little jagged lip on them that catches the wood. I don't get too worried about chipping out wood the first time because I am going to remove the extra wood anyway. However, when reinstalling the pins, they are a little shorter and the end inserted first is slightly rounded. The shorter pins are best because you have a hole on the other side in which to catch the punch rather than risk it sliding off a flush pin and damaging the wood. My pins all go in from the sideplate side, like most English sporting guns. I also harden and temper the pins so they do not bend in the stock and the ends never get mushroomed from the punches. They did not do that on the originals as far as I can tell, hence many of the holes are badly buggered. I almost always use Sutherland Welles polymerized tung oil for finishes. I can make it into any look I want from "in-the-wood" low sheen oil to high gloss almost French polish. Tung oil is more weather resistant than any of the linseed oil based finishes like Tru-Oil, Linspeed, and BLO and I can achieve the same look as the varnished originals. Tried and True makes a very fine linseed oil varnish that is very close to the original linseed copal resin varnishes found on many original guns. Ken Gahagan uses it on his beautiful long early fowling guns with great effect. By the way, Tru-Oil is polymerized linseed oil, which is essentially the same thing that I use except mine is tung-oil based. You put it on the same way. Sutherland Welles is based in Vermont and I kind of like using a local product.

Gus, I also have a question. The Pedersoli lock is the earlier SLP design showing only 1 screw behind the flintcock. Should those locks be marked "Dublin Castle" rather than "Tower" or were SLP muskets with the early lock marked "Tower" also issued to troops in North America?

dave
 
Len Graves said:
I kinda use the bees wax method of sealing the barrel pins in, even on ky. Guns. I use crayola crayons. Find the closest color to your stock slightly warm over a candle and melt into hole left by pin. Then gently scrape off excess and buff smooth. I have several guns that have had this for years and it seems to seal and is hardly noticeable. Also it is easy to remove pins if necessary. I think it keeps out moisture and dirt. Just a thought.


Len,

What you described is a modern update on a very old method to fill in holes or small voids by furniture makers and others that most likely goes back to as far as the 17th century for those making “Royal Quality” furnishings.

It involves colored shellac sticks, a small open flame lamp and what we would describe today as an Artist’s Pallet Knife. The very thin and flexible blade of the Pallet Knife was warmed over the open flame, then placed on the end of the shellac stick and it melted some of the shellac stick onto the knife blade. The worker quickly pressed the melted shellac stick into the hole or gouge and as it returned to room temperature, it would become semi solid. Then they scraped the surface around the shellac patch like you mentioned.

Now, it would have been rare to almost non existent for an 18th century American Gunsmith to use this technique, but it was being done then by those who were making the highest grades of furniture in this country.

Gus
 
Dave,
I did not know that pins usually went from left to right on English Sporting Guns. That is great info. OK, then it is probably a safe bet they did it on 18th century British Military Muskets as well.

Yes, one has to be VERY careful of the sharp/jagged/pointy ends of the barrel loop pins when you drive them out, so you don’t mistakenly stick yourself with one. Guess how I know? :haha: I really like the idea of hardening and tempering barrel loops pins. That is a great tip as well, because they used Iron pins in the period unlike the Brass Pins on Pedersoli Muskets.

I thought about mentioning the Sutherland Welles product, as you and others often recommend it. The reason I didn’t was because to my knowledge the smallest quantity available is a Quart or maybe a Pint? Even a Pint is a lot more than most folks would ever use at home, unless they do other types of woodwork, so I stuck with Tru Oil. I am going to have to get some of the Sutherland Welles product, as you and others have really intrigued me about it.

Dave Person said:
Gus, I also have a question. The Pedersoli lock is the earlier SLP design showing only 1 screw behind the flintcock. Should those locks be marked "Dublin Castle" rather than "Tower" or were SLP muskets with the early lock marked "Tower" also issued to troops in North America?
dave

Dave, that is a GREAT question and I hope I will do justice to it. For other Forum Members, I think I should start with some background information.

De Witt Bailey points out that during the FIW, British Regulars were almost all sent over here with Wood Rammer Muskets. Some of the Units that came here, already had been issued the then “newer” Steel Rammer Muskets, BUT those were taken away and saved for the British Regulars who fought on the Continent. Then they were replaced with Wood Rammer Muskets. This was because the Greater Threat to the British Military came on the Continent and the FIW in America was somewhat of a side show in that conflict.

However, British Ordnance did an abrupt “About Face” and changed this 180 degrees in the AWI, because they intended to save their vast holdings in America and were not fighting anyone else of import at the beginning of the AWI. So generally speaking, British Regular Units were rearmed with Steel Rammer muskets before they came over here, if they still had Wood Rammer Muskets in England. However, British Ordnance also sent over Wood Rammer muskets to arm the Loyalists.

In the AWI, it was quite often the case that Regular British Units that were stationed on the “Big Island” of England/Wales/Scotland, turned in their Muskets to British Ordnance at the Tower and then were re-armed with Muskets when they stopped off in Ireland on their way to America. ALSO, between the FIW and the AWI, slightly over half the British Regular Army was stationed in Ireland between the wars. Dublin Castle was responsible for arming/rearming any British Regular Units that were stationed in Ireland.

So, when all these factors are taken into account, a large percentage of Muskets that British Regulars were armed with in the AWI were Dublin Castle made Muskets. One of the best known of these Units was the 23rd Royal Welch Fusiliers.

OK, but there are flies in the ointment of the general way the Muskets were issued to British Regulars, who came here in the AWI, so I will go over that in my next post.

Gus
 
Gus,

I'm awaiting the final curing of my rifle stock. (Through lots of sweat and grease, the wrist and foregrip had gotten down to the grain so it had to be done.) Ive used about 5 coats of Tru-Oil. I may knock this one down and do yet another.

At the end, however, you mention knocking it back with the pad then buffing it with a terry cloth. Question: How do you avoid witness marks? Do you use a lubricant or anything? Or does the terry cloth rubbing dissipate those?

They are minuscule and easily covered with a THIN coat of tru oil when I go back over it. I thinned it a bit with mineral spirits to get more time to smooth it out, also cleaning my hands halfway through so my hand rubbing isn't tacky.

Lord knows Tru-oil has been much discussed. I'm certainly going for a sheen and not a gloss (Although I'm tempted after seeing some originals at the fort that were fairly shiny - could that be some sort of preservative curators applied?). Ive googled this to death, too. My thoughts right now are applying a final coat ever so carefully, then using the BC stock sheen and conditioner, buffing that out, then using Howard's Feed and Wax.

The Bess is going to get a lot of use in the next few years, so durability is a factor. I'm guessing the knocked back and terry cloth rubbed would be more durable.
 
Hi SgtErv,
Gus's suggestions are good ones. You can also use Scotch-brite pads. The maroon and grey colored pads are very good for cutting back a sheen. Don't worry about witness marks, just wet the pads with water and rub gently. Worry more about rubbing too much on the corners of things. The most important thing, however, is to let the finish thoroughly dry before rubbing back. That can take a week or more depending on the weather and humidity. If your Tru-oil dries too quickly as you are hand rubbing it in, thinning will help but you can also add a tiny bit of raw linseed oil to a quantity of Tru-Oil. That will slow down the drying and allow you to rub the finish in better. Use raw artist grade linseed oil from an arts and crafts supply store. I built the early Reading rifle below for Morgan's Rifle Corps and finished it much as I just described. I used my favorite polymerized tung oil but the oil dried too fast for good hand rubbing during the hot summer. I did not have raw tung oil on hand but did have raw linseed, which is compatible. I poured out a small amount of tung oil and added a few drops of linseed oil, which did the trick. The finish is deep, a little shiny but mellow.

dave

ReadingGun4_zpsf14f530e.jpg

ReadingGun3_zpsd20fe0ff.jpg
 
Great advice...last year I did a CVA and noticed, too, that the more coats you're into it the longer it takes them to dry. My office has two heat vents and my hands and sinuses attest to the dryness, haha. Probably part of the issue with application.

There is considerably less carving on a Brown Bess, but I have noticed with the rifle that the corners around the carving are difficult.

Great advice. Thank you.

Beautiful rifle by the way! Ole Dan'l Morgan's Corps is well equipped!

(All, I apologize for bringing up different projects in the same thread. Just my own frame of reference, compiling knowledge so to speak.)
 
Dave,

Sorry to take so long to respond, but I'm having a little trouble wit my eyes and we had a long power outage today.

I hope I have not lost anyone yet on whether and when Dublin Castle or the Tower Short Land Pattern Muskets were issued to British Regulars sent here in the AWI, as it can get even a bit more confusing, unfortunately.

In Appendices of De Witt Bailey’s book, “Small Arms of the British Forces in America 1664 ”“ 1815,” Bailey has a lot of information on when British Regulars were re-armed with new muskets by Regiment and by date. There is also some information on where the Arms were made, though that is not as precise as the number and type of arms. One also needs to investigate where each Regiment was stationed before they came here and if stationed on the “Big Island,” did they stop off in Ireland before coming over?

When referring to the use of the Short Land Pattern (SLP) Muskets in beginning of the AWI, I began by breaking down the British Regiments by these periods:

1. Those first Regiments sent here prior to the huge reinforcements sent in the Spring of 1775. I checked where they had been stationed from the FIW forward, the dates they were issued updated Muskets during and after the FIW and before they left for Boston. In short, it seems none of those units had SLP’s when they came here. The 23rd Royal Welch Fusiliers came over in this group in 1773, and while they were re-armed with Muskets from Dublin Castle before coming over, it seems they did not get SLP’s there. This was not unusual as those forces were sent over more to “deal with rabble rousers and some local insurgents,” but not to fight in a full-fledged war.

2. The Regiments sent here as the additional 4,000 Regulars to take Boston Back. These forces were gathered up in a hurry, if not an emergency to put down an Armed Insurrection. It seems they did not stop off in Ireland before leaving England for other than boarding troop ships to America. So they pretty much came with the type of muskets they already had, though not completely.

For a long time, it seemed the major, if not only British Regular Force that had SLP’s were the British Marines and their SLP’s had come from the Tower of London and then through the Plymouth Ordnance Board, that was responsible for arming the Navy and Marines with Small Arms. The documentation Bailey worked from was a little lacking in this regard, though.

Reenactors from at least two, if not three of these Regiments heavily researched into other areas and found that some SLP’s had been issued to their Regiments from the Tower, before they came over. We are not talking about total replacement of their Long Land Pattern (LLP) Muskets, though, but it seems as if they were more to replace unserviceable arms. As I remember looking at some of the numbers of SLP’s other Reenactors mentioned, it seemed there were not enough to arm a full company of Light Infantry for each Regiment, though their Light Companies may not have been full strength, yet.

So it seems that most, if not all the SLP’s with these forces came from the Tower of London. Now, even though it happened so long ago, I am not sure new information may yet come to light that could change this. However, a huge amount of documentation was lost during the Tower of London Fire in the 19th century and it seems much of the documentation on the Dublin Castle documentation and Warrants for arms were never saved.


3. The Regiments sent here after the British captured and later were forced to retreat from Boston. This is the period from which SLP’s from Dublin Castle with locks where only one screw showed behind the Cock, would have been issued in large numbers to British Regiments coming over and also sent over as replacement arms.

The simplified Pattern Lock, that had the shorter Sear Spring Screw and thus showed two screws behind the Cock, was set by British Ordnance as the P 1777 lock. I don’t think the Dublin Castle Arms had this simplified lock before the Tower and it seems it took them a little while to switch over to this simplified lock, BUT one can never be sure with Dublin Castle Arms. So it seems likely the earliest Dublin Castle locks of this pattern may have been made in late 1777 or early 1778 and then available for issue to British Regiments on their way over here or sent here as replacement arms.

Much to the chagrin of modern collectors and reenactors, Dublin Castle Arms often did not hold strictly to the then current British Ordnance approved Patterns for most of the 18th century. It is often said the Dublin Castle arms were not finished as nicely as those made or accepted by British Ordnance. However what is somewhat bewildering, they did introduce some technical innovations to the Arms they made before and even long before the British Ordnance Board at the Tower of London.

Gus
 
SgtErv,
Dave’s point about not rubbing the oil with the abrasive pad too hard on the corners of the wood is excellent. I barely apply any pressure on the pad when going over the corners or find I would take the finish off the corners.

I cannot agree more strongly with Dave that you have to allow each coat of Tru Oil to thoroughly dry before you abrade it, wipe it down with a clean, lint free rag and apply your next coat. I would add that I always start on the butt end of the stock when I rub the coats in and then work my way forward. This is because the butt area of the stock and wrist requires more work than the forearm when you rub the oil in.

I am a huge believer in hanging a stock to dry, if the barrel is not in the stock. I put coat hanger or other wire in the front barrel loop pin hole and make a wide loop that will not touch the sides of the forearm and extends beyond the front of the stock, where it is twisted together and formed into a hook. I have a few hooks in the rafters of my shop to hang it indoors well away from my work area. Before I had that, I would hang the stock in a closet. I hang the stock outside on a clothes line or even from a short tree or something else and so the stock does not touch anything as it hangs. If the barrel is in the stock, I put a long hardwood dowel down the bore that sticks out a few inches from the bore. I put the buttplate on the floor and lean the dowel in a barrel against the wall, making sure the buttplate is not able to slip and allow the gun to fall. This keeps the wood from touching anything while the stain or oil dries.

After I have a stock that is finished scraped/boned and before I put any stain on it, I use the very old furniture maker’s trick of putting one thinned coat of Tru Oil on the stock and letting it dry thoroughly. I let it dry overnight then take it outside, if possible, to allow the sun to bake/dry it for the whole day. If I can’t put it outside, I allow it to dry for at least 2 or 3 days inside and up to a week, so it is bone dry. The reason for this coat of Tru Oil is it will keep the end grain in curved sections of the stock, like around the grip, from absorbing too much stain and causing smudged looking areas of the stock. When that coat is dry, I scrape the whole stock again OR at least rub it down hard with a common Scotchbrite Pad to take just the surface Tru Oil off the stock and the bone it and hard rub it with the terrycloth towel.

I then apply the stain and get it as even in color throughout the stock as I can. I let that dry overnight and then rub the dickens out of it. I then take it outside to look at it and see if I’m pleased with the color. If not, I stain it more and repeat the process. If possible, I like to hang it outdoors for another day to bake in the sun. If not, I wait until that evening to put my next coat of Tru Oil on it.

Now, this is the point it can really mess up the whole finish if you don’t allow the stock to thoroughly dry. This coat of oil over the stain takes the longest of any coat of oil to dry. After drying one or two days inside, it goes outside for a day and maybe the next day. If I can’t put it outside, it may well be a week before that coat is dry inside.

When it is warm or hot outside, I allow each coat to dry overnight and then hang it out in the sun to bake/dry the whole day, unless the wind is blowing hard. That will blow particulates onto the stock you don’t want. After hanging in the sun all day, I rub it down the Grey Abrasive Pad that is the equivalent of OOO Steel Wool so the entire surface of the oil shows abrasion marks and is smoothed to as level of a surface as possible. (This keeps what I think you are referring to witness marks or high spots or waves from forming in the finish.) I wipe that off well with a clean, lint free rag and apply the next well rubbed coat. That coat dries overnight and is baked in the sun the next day.

I am not sure what it is about the Sun’s rays that dries the stain and oil the best. It may be the UV light or something else. In the production shop I worked in for years, we had a long bank of windows. There was a long board above it with hooks every few inches that we could hang the stocks from and the Sunlight shine on them. The Sun’s rays baked/dried the stocks even during the Winter. Since I’ve never had the same set up at home, I hang the stocks outside to dry.

If I want the finish to look like a soft warm glow, I only put 3 or 4 coats of oil on the stock, but one could put more on if one wishes. I LIGHTLY abrade the last coat with very little pressure on the abrasive pad. Then I rub the dickens out of it with the terrycloth towel and that’s it.

If I want a shiny finish, I normally put 6 or more coats of oil on it and maybe as many as 9 coats. (On two presentation rifles I did, I applied over 30 coats of oil so the oil looked like glass when finished.) The last coat was always extremely thin and I did not rub it so it was tacky. You have to be extremely careful not to touch it before it dries. I rub that coat with the Terrycloth towel and normally stop there.

I have tried rottenstone and other abrasives over the years after the last coat and it never worked well for me. Way too easy to cut through layers of finish. I have used Birchwood Casey’s Stock Sheen a few times, but only VERY SPARINGLY and rub it with very light pressure. The only problem with Stock Sheen and some other abrasives is that it may hurt applying more finish to the stock when/if you scratch it and have to repair the finish. So I normally don’t use it.

Gus
 
Good info Gus!

Here's another tip if one doesn't want to fool w/ rotten stone or other products to modify the top-coat. I used to used to Tru-Oil, but switched to the 'wiping varnishes' as sold by the Arm-E-Seal company, that an award winning custom. furniture maker turned my on to. And like our firelocks, his products were meant to be used.

To me, the ARS wiping varnishes appear to be like a thin premium tung oil - the good stuff. It goes on as good, if not better, than ANY finish I have ever used, dries well, and is easily 'scuffed' for the next or subsequent coats by burlap and/or those gray color Scotchbrites as mentioned, as I never use steel wools on wood anymore.

TIP - For a gloss finish, just use their high gloss finish. For a satin finish, use gloss for build coats and switch to their satin for the last or last 2 coats. My prep and preference of materials, before a final coat is put on, is old clean burlap I have from my Dad. No more rotten stone for me!

The depth of finish these ARSeal products deliver must be seen; the chatoyance observed in premium tiger-striped maple products is so deep! And best of all, it stands up well for hunting use guns and spot re-finishes extremely well, as in if you can't do it ... then just take up golf ...
 

Latest posts

Back
Top