loading block

Muzzleloading Forum

Help Support Muzzleloading Forum:

This site may earn a commission from merchant affiliate links, including eBay, Amazon, and others.
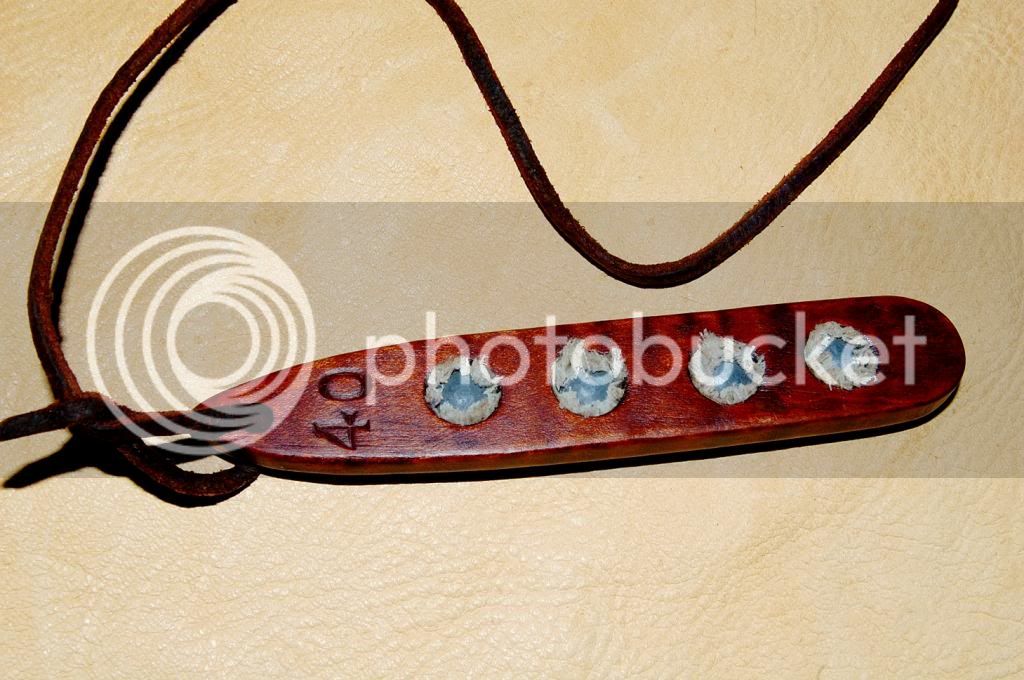
Gene just make your own. The 2 in this pic is for my Brooks .40 cal. The one on the strap is center of my chest an holds 10 shots but still doesnt weigh much an the other stays in the bag till needed an it hold 12. I made both from curly maple an a slightly undersized drill bit an then used a rat tail file to finish rounding out the holes till I got the fit I wanted. Very easy an cheap :thumbsup:
 
I use paper for my cartridges, because of several reasons. One because it is plausibly PC. Two I've used all sorts of plastic gizzies, I don't care for them. Three, they are paper, essentially a leaf, when I drop them after charging my rifle I don't feel bad when I realize I didn't pick it up after I realoaded my rifle in the excitement of reloading after shooting a deer. I store them in Altoids tin, for the season.
My loading process; Starting with a full loading block. Mine usually hold three to four patched balls. I tear open my cartridge and pour the powder into the muzzle. Load as usual, Then I replace the loading block and starter in my bag together, upside down. I leave one hole empty in the loading block. My short starter is already inserted in the empty hole in the block, and the block and starter are in my bag upside down, so they come out of my bag in one hand full. I prime and now are ready to hunt. I find leaving the starter in the block makes my loading process more efficient, when my hands are shaking, especially after shooting a deer. BJH
 
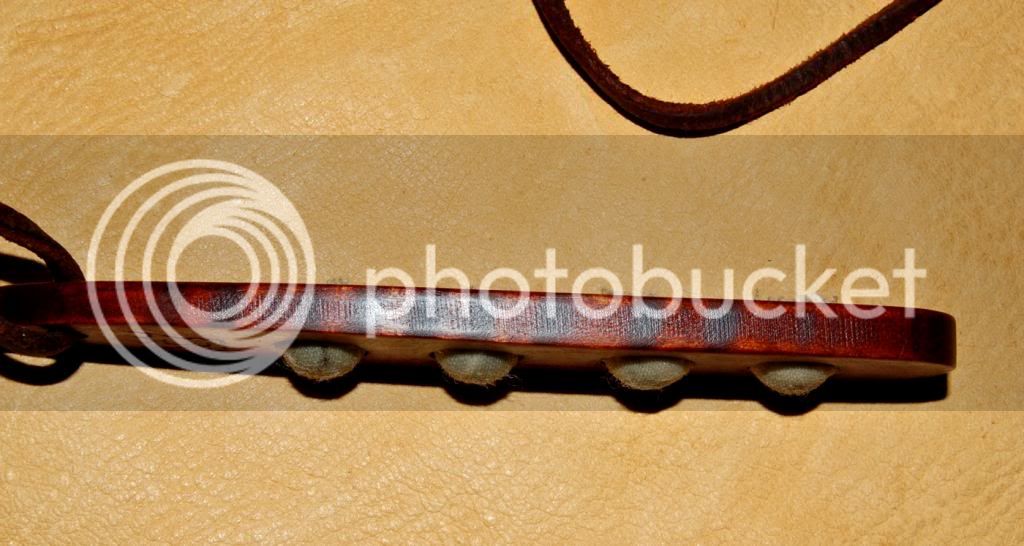
Let me add a :metoo: to what grenadier1758 said. I, too, like to have the ball project slightly from the bottom of the board. It makes it easier to position it over the muzzle. The distance between the holes is more important when using this design. Follow grenadier's advice and you will have some very nice loading blocks.
 
Thanks guys for all your suggestions, I think I will try making one and maybe more depending on how that turns out.

I'll shop around for some maple or walnut to make it out of, I wouldn't want it to split while loading.

Just wondering if when your loading your block do you smear some lube in the holes before pressing in the lubed patched ball or just push them in, for me it's hard to get them suckers seated in them holes.
 
Grenadier1758 said:
When I use a loading block or make one, I like the thickness of the block to allow the ball to partly protrude from the block. The distance between the holes in the block should be slightly greater than 1/2 of the barrel width. The protruding ball can easily be located over the muzzle and aligned with the bore.
Exactly. Like this.


Spence
 
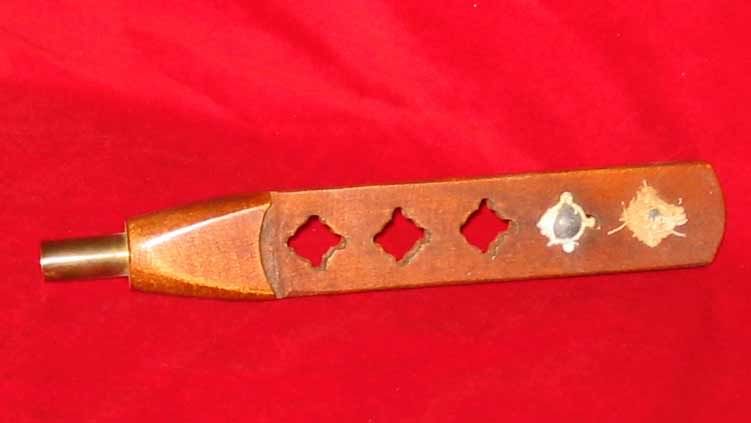
I got this loading block with a buckskin shirt I bought at a gun show.


Whoever made it included a brass cartridge case glued into a hole to serve as a powder measure.

I'm not sure why a lanyard hole wasn't included but it was carried in a deerskin hunting bag that came with the shirt.
 
Zonie said:
I got this loading block with a buckskin shirt I bought at a gun show.


I'm not sure why a lanyard hole wasn't included but it was carried in a deerskin hunting bag that came with the shirt.
I drilled it for you.

ZonieBlock.jpg
 
Nice work Claude!

I i post a pic of my barrel think ya could get me a dove tail in it? It's on an enfield if that matters. MUCH appreciated!

(whats the turn around time?)
 
azmntman said:
Nice work Claude!

I i post a pic of my barrel think ya could get me a dove tail in it? It's on an enfield if that matters. MUCH appreciated!

(whats the turn around time?)
It takes quite a long time to cut a dovetail in Photoshop. Very expensive. :wink:
 
Mean Gene said:
Just wondering if when your loading your block do you smear some lube in the holes before pressing in the lubed patched ball or just push them in, for me it's hard to get them suckers seated in them holes.

If the holes on your bullet block are too hard to get the patched ball into, first check the size of the hole. If the size is okay, then work on the inside of the hole to get it smoooooth and well waxed or lubed.

You need to drill the holes just a tiny bit undersized to allow for sanding. After you drill the holes, use a piece of sandpaper on a dowel to sand the holes to the needed size. This will smooth the holes as well as adjusting the size. If you have the holes smoothly sanded, they may still need a bit of bees wax or your lube worked into them at first, but once you have greased them, they should not need any further lubing. The patch lube will be enough. While bees wax is preferable for preparing the holes since it is better able to fill the tiny pores and irregularities, any stiff lube will work. The main secret is to sand the holes smooth and then work some lube into them. After that, the lube on your patch is all you need.

I just know someone is going to say that they don't work lube into the holes before using the newly made block and it works just fine. That may well be true but from personal experience, I know that a well used block is easier to load and load from than a newly made one. Why? The holes have become well filled with lube and are worn smooth from use. So, if you make the holes smooth and well lubed from the start, they will be just about as easy to load and load from as a well used one. Just sayin' :grin:
 
Yep, Spence, you nailed it!

I once made an experimental block for my .50 cal. rifle. I started with a piece of Maple that was 3/4 inch thick. I used a spade bit to drill some partial holes that were the size of the barrel. I spaced them far enough apart so that they did not touch. Then I drilled through the middle of them to make the holes for the balls. The idea was to have holes on one side that would fit over the end of the barrel and center the ball on the muzzle. It worked like a charm but it made a 5 ball block too large and a bit heavy. It is okay for use at a bench but I don't care for it as a way to carry balls in my bag. It sure seemed like a good idea on paper. :doh: Oh well, you live and learn. :idunno:
 
I carry a 3 holer for my .62. Its about 3/8" thick, so the .62 PRBs protrude and make centering over the muzzle very easy. Pre-lube the patch material, seat the ball, cut the patching, and repeat.

Heritage Products sells the fancy variety, and I suspect that they are made buy the same guy that I bought mine from at the 18th Century Artisans Show in Lewisburg, Pa (first weekend in February).
http://www.heritage-products.com/images/SH-020a.JPG
 
Last edited by a moderator:
When I made loading blocks, I "stained" with Aquafortis reagent then finish with beeswax (applied with a heat gun until the wood wouldn't accept more wax readily). Removed the excess surface wax with a piece of canvas leaving a polished, smooth and relatively non-absorbent surface.
 
Those are very attractive loading blocks. Esthetically more attractive than what I make but likely no more functional than mine. I have to give the artisan who makes them credit for his work because I do not have the skill to do what he does as far as the decorative carving. Actually, I wouldn't mind having one just because they are so pretty. What does he charge for them?

I just looked them up.......$30.......OUCH! :doh: But they seem a bit high on everything when compared to other sources. $2.25 each for flints that you can buy many other places for $2.00 or less.
 
Flints there might seem high at $2.25 each or $26/dozen (13 per dozen last time I ordered), but less than the $3-$4 each if and when I can get them more locally.

The loading blocks and ball bags are nice, but a little pricey if you can make your own. Not everyone has the skills or even wants to try to when they can buy it already made.
 

Latest posts

Back
Top