Looks good, like that full stock!How about now? Forum member Gangreen ... his first build some time back from Track of the Wolf kit I think. Dale BTW: His pictures from ad
You are using an out of date browser. It may not display this or other websites correctly.
You should upgrade or use an alternative browser.
You should upgrade or use an alternative browser.
What Muzzleloading Stuff Did You Do Today?
- Thread starter PathfinderNC
- Start date

Help Support Muzzleloading Forum:
This site may earn a commission from merchant affiliate
links, including eBay, Amazon, and others.
I admire your work sir for getting that gun back to where it ought to be, you had a job! It looks like it will be a nice rifle. I too, had my hips replaced, one, one year and the other one the next, still hurts once in awhile! Good luck with your rifle, I'm sure it'll be fine.I got a race horse deal(so I thought) on a second hand TOW Isaac Haines kit 2 years ago, $650 or half the catalog kit price for what was in the box, rice barrel, deluxe Siler lock, and a precarve with spectacular wood.
TOW had even installed the buttplate and cut all the dove tails for the underlugs and sights.
I started on the kit and realized the precarve was a nightmare of flaw after flaw. The lock inlet put the pan below the barrel. I had to drop the barrel and glue wood in the inlet to get the pan up where it was supposed to be. The web between the ramrod hole and the barrel at the lock was 3/8".
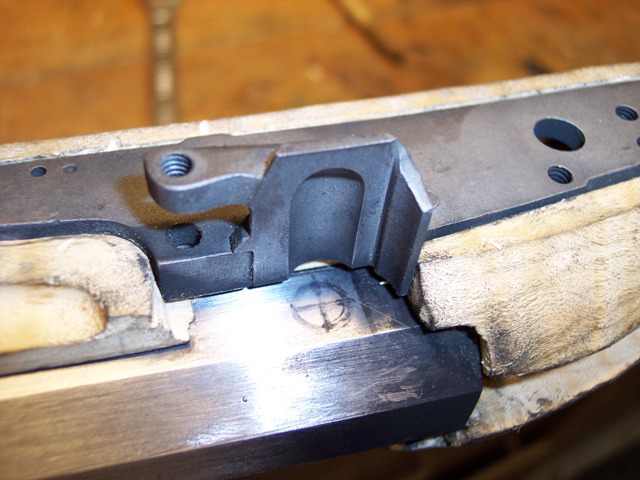
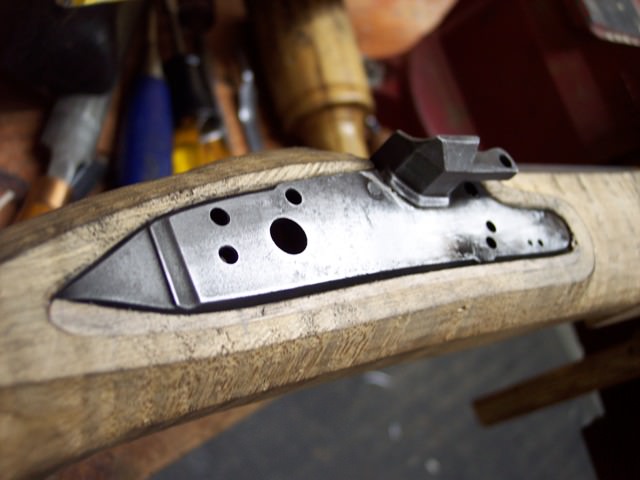
I am going to move the barrel back just a hair.
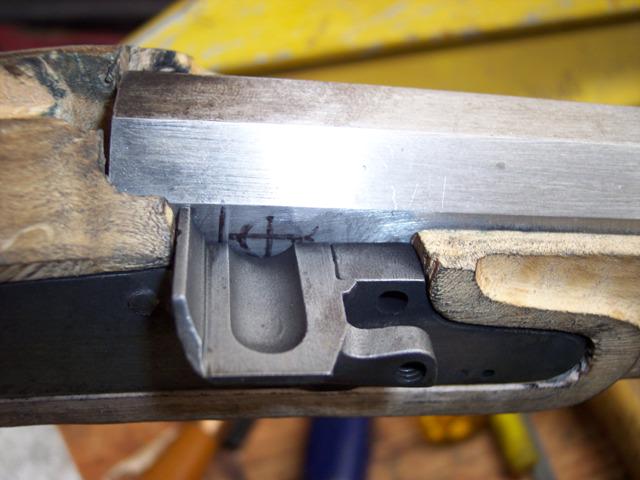
Every time I worked on the kit I found another serious flaw, I started to get ticked off while working on the gun and would find yet another precarve flaw, the quality of my work suffered as a result. I started making mistakes like drilling pin holes for ramrod pipes and missing the lugs, something I had seldom done before. My inletting was sloppy where it had been tight and almost perfect before, I was beginning to HATE this project.
I would walk away for the project for months at a time out of frustration.
I walked around the gun laying across a chair in my shop for the last few months, I was sick of looking at it, it was essentially in the white with a little stock wood left to be removed.
I had several surgeries in the past year that went poorly, a hip replacement and TURP on my prostate, my days consisted mostly couch potato stuff.
A few days ago I thought "get off your butt and finish that gun and stop watching endless youtube videos", out to the shop I went.
I decided to cut some moldings along the ramrod groove, dang if I didn't enjoy the process for a change. I did get them a little uneven side to side but not that bad. I didn't take into account the very distinct bow that the ramrod channel had been cut in instead of straight so one side is slightly pinched down at the apex of the bow. (flaw #, well there were so many I forgot the number).
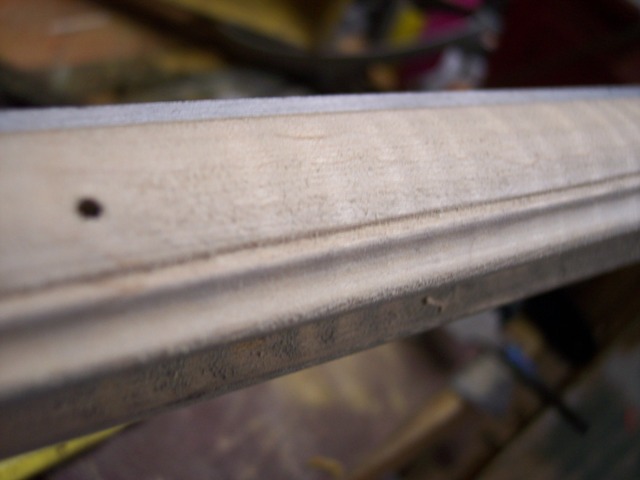
Next I brought the forestock wood down to the finished level at the entry pipe, this exposed my sloppy inletting, it was time to fill a few gaps. Super glue and shims to the rescue.
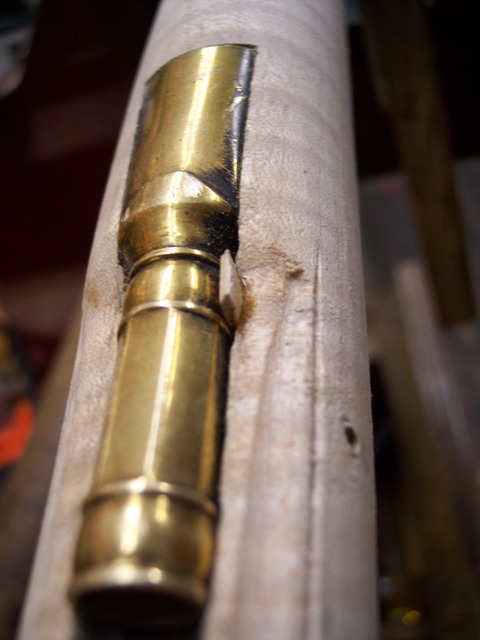
On to shaping the forestock being mindful of not ending up with the dreaded slab sided look that shouts of rookie stock shaping. I did my final rounding with sandpaper and a contour gage to check the shaped consistency end to end.
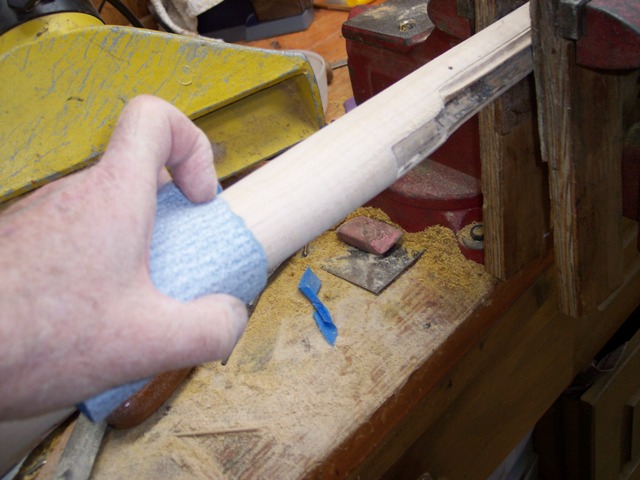
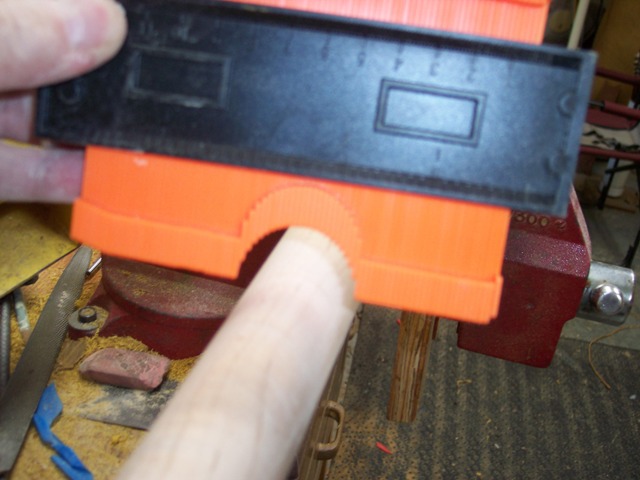
I have one side of the buttstock thinned and shaped, I am going to shape and thin the cheek piece side today.
I had about given up on gun building, my work is good again and I am actually enjoying it for a change, I am even thinking about my next build.
Thank you Hatman. The wood is maple, the stain is the remains of black walnut, lancaster and cherry Laural Mountain stains mixed all together. The dark areas representing an aged and oxidized linseed oil varnish are from black high temperature aerosol paint sprayed on and strategically wooled off, followed by an all natural pure tung oil varnish, some dents and dings a coat of wax and done. This was only my second attempt at artificially aging a gun and I'm pretty happy with the results, a very old gun that was very well taken care of.Like that color, what kind of wood and stain is it?
Robby
Crow-Feather
32 Cal.
I logged into this forum
Griz44Mag
70 Cal.
- Joined
- Nov 12, 2017
- Messages
- 4,326
- Reaction score
- 4,387
- Location
- Republic of Texas, District of Krum
Took the 50 cal Dixie to the range and hung a steel plate at 100 yards to pound on.
The old girl was faithful and accurate - the 12" gong was ringing her virtues to us all morning.
Also took my target grade (very small caliber super heavy barrel "T" series unmentionable that shoots many times without reloading and we can't talk about it) gun and shot it a few hundred rounds.
Weather was a warm 60-65 degree day with a light wind and full sunshine -
Fun fun day -
Now - time to grab a bite to eat, a cold brew, maybe a quick nap - and then do the cleaning.
Thanks Robby, nice job! RichThank you Hatman. The wood is maple, the stain is the remains of black walnut, lancaster and cherry Laural Mountain stains mixed all together. The dark areas representing an aged and oxidized linseed oil varnish are from black high temperature aerosol paint sprayed on and strategically wooled off, followed by an all natural pure tung oil varnish, some dents and dings a coat of wax and done. This was only my second attempt at artificially aging a gun and I'm pretty happy with the results, a very old gun that was very well taken care of.
Robby
your pants are finished all I have to do is sew the buttons on tomorrow, they turned out very nice. I'll post up some photos either tomorrow or the day after.That little mulehide wrap I put on dried super snug. It really makes a nice grip on the rifle.
Excellent!!your pants are finished all I have to do is sew the buttons on tomorrow, they turned out very nice. I'll post up some photos either tomorrow or the day after.
I started working on that little Spanish .40 pistol I got from BigSkyRambler. It's now no surprise to me that some of these Spaniards are out of business.
I'll be working on the lock (yikes), refinishing the stock, MAYBE re-drilling the ramrod channel to 5/16ths. We'll see.
Stay tuned.
We'll see how glossy we can polish this turd.
I'll be working on the lock (yikes), refinishing the stock, MAYBE re-drilling the ramrod channel to 5/16ths. We'll see.
Stay tuned.
We'll see how glossy we can polish this turd.
- Joined
- Mar 13, 2020
- Messages
- 7,600
- Reaction score
- 21,352
- Location
- On the Border in Idaho looking at BC
started cleaning my work space after finishing the SMR .32.
got distracted (wife says i'm ADD) and made a couple hundred patches out of a bed sheet for the .32.
put the punch away and went back to trying to clear the bench tops. got distracted and weighed out some powder and matched it to volume. put the powder and measures away and went back to cleaning.
noticed some scrap leather and made some padded jaws for my vice. backed the leather with plywood , while the epoxy was drying i cleaned some more.
finished the vice jaws.
gave up on cleaning. i can see the bench tops in a few places, thats got to be good enough!
put another coat of renaissance wax on my new SMR.
adjusted the trigger's on my cva mountain rifle. the trigger blades were binding with the sear arm.
now everything is getting along perfect and shining like a mirror.
Deerstalker, sounds pretty much how I do things around here. Only difference is that I don't have a wife that says I'm ADD. I get to tell my self.
- Joined
- Apr 16, 2021
- Messages
- 824
- Reaction score
- 756
Today I got my .40 barrel back from my machinist buddy ready for a new vent liner, and also just ordered a few more pounds of powder from Powder Valley.
PS: Powder Valley has powder right now if anyone needs it.
PS: Powder Valley has powder right now if anyone needs it.
- Joined
- Mar 13, 2020
- Messages
- 7,600
- Reaction score
- 21,352
- Location
- On the Border in Idaho looking at BC
sat in the garage and shot my TC hawken flinter .45
50g of fffg and it sang! once i got used to those gawd awful TC sights it was putting prb one on top of the other! only down side was that i had to fuss with the flints every other shot. finally found one the thing liked and got 15 consecutive shots with it.
cut and lubed a bunch of 7/8 inch patches for the .45
knapped another hand full of flints for the .45.
got a shipment from TOTW with a ramrod for my SMR.
chucked one end in a cordless drill to turn it for the brass end. had it running through a drilled block and filed the loose end to fit the end.
the relieved end was 3/16 to long so i was cutting it to length when the drill tipped off the bench, still attached to the rod.
snapped it length wise of course about 13 inches long.
just made another order to TOTW. amazing how you can't just order a replacement rod, found a bunch of other stuff i needed!
now i get to wait another week for the goodies. darn! should have ordered Round balls for the .32!

Messed around on this forum, learning new stuff and searched for
best powder deal & Remington cap availability.
best powder deal & Remington cap availability.
hanshi
Cannon
Hmmm...what else can I say. 


- Joined
- Jan 30, 2021
- Messages
- 1,045
- Reaction score
- 1,119
I decided this afternoon to take inventory of supplies and sort components (lead round balls and wads) by caliber. I also found I had purchased way more percussion caps this summer than I had realized (I have to find several dozen more tins of my CCI #11s which are not depicted in this photo)!


- Joined
- Mar 13, 2020
- Messages
- 7,600
- Reaction score
- 21,352
- Location
- On the Border in Idaho looking at BC
shot my smr. finally decided to put a vent liner in it as the touch hole was eroding.
put the vent liner in.
cleaned the lock. swabbed out the barrel .
stained and installed the tip on the ramrod i broke yesterday.
discovered some kind of obstruction in the ramrod hole so i turned down the shank on a 5/16 inch drill bit, threaded it to fit my field rod and reamed out the obstruction.
spent the rest of the day knapping flints.
Oh yeah! i shaped my makeshift peep sight for the smr.
puttering in the shop just now finishing the ramrod for the smr. 7:45. reaming a rod thimble with the wrong tool, a drill bit and caught the end of my left bird finger. guess i have to quit. wife just hand's me a mop and says clean up the blood.
Attachments
Last edited:
Shopping for powder deals. Checked for more caps.
Similar threads
- Replies
- 46
- Views
- 2K
- Locked
- Replies
- 67
- Views
- 4K


