• Friends, our 2nd Amendment rights are always under attack and the NRA has been a constant for decades in helping fight that fight.

    We have partnered with the NRA to offer you a discount on membership and Muzzleloading Forum gets a small percentage too of each membership, so you are supporting both the NRA and us.

    Use this link to sign up please; https://membership.nra.org/recruiters/join/XR045103

My Apprentice and Her English Fowler

Muzzleloading Forum

Help Support Muzzleloading Forum:

This site may earn a commission from merchant affiliate links, including eBay, Amazon, and others.
It would be great if you consolidated all of your posts with Maria into one post and made a sticky out of her work for future use and to be able to refer to.

A lot of useful in formation for folks to refer to in a build.
I feel this way about all of the build topics by @dave_person
And I don't even build guns.
 
Hi,
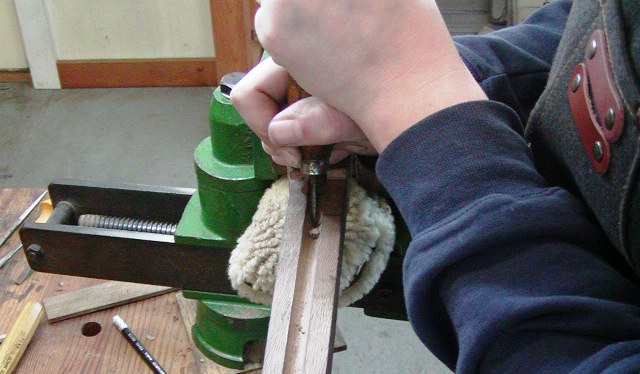
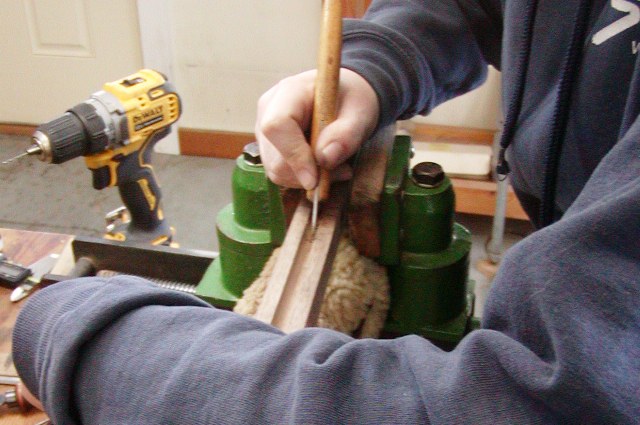
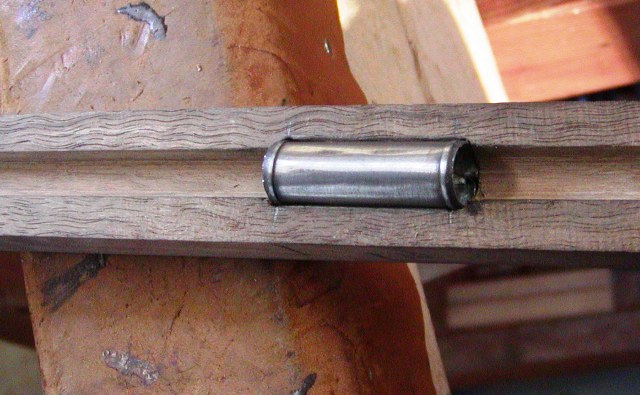
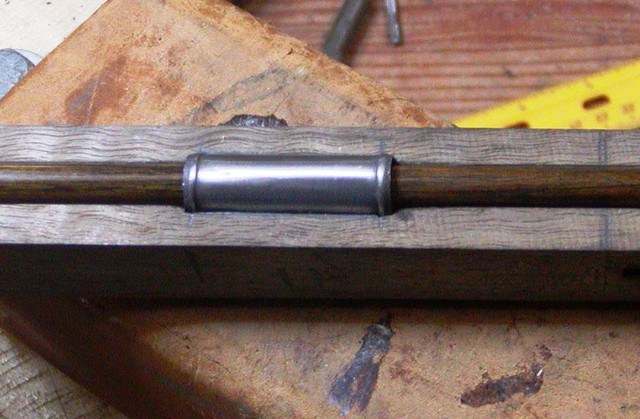
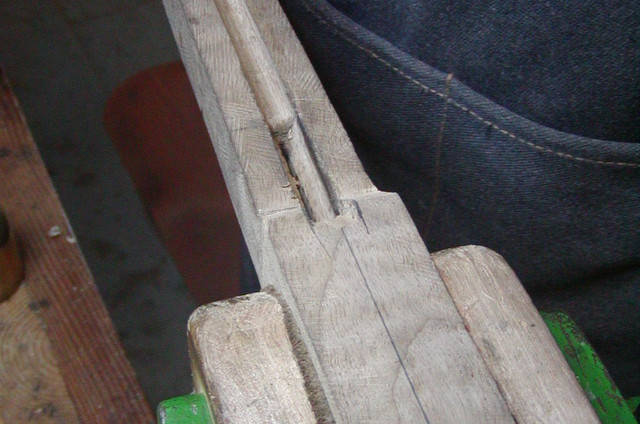
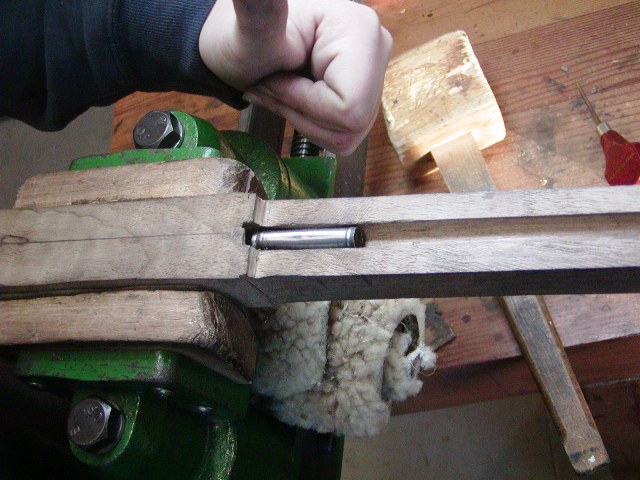
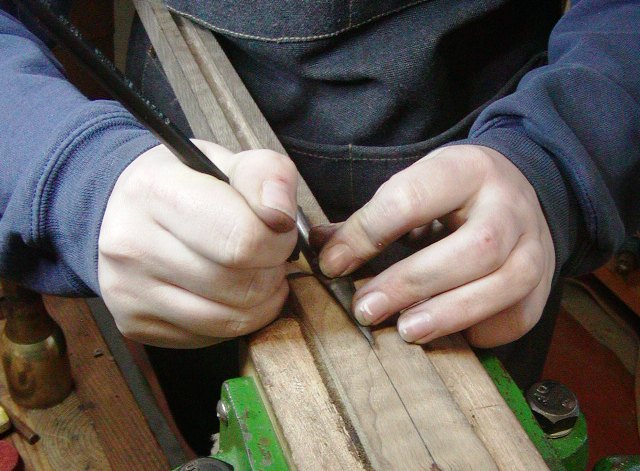
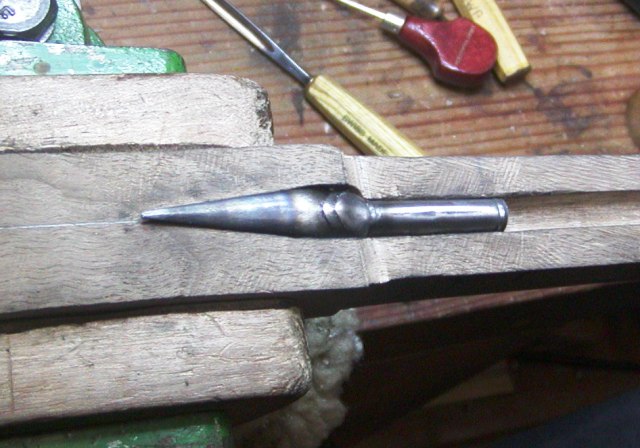
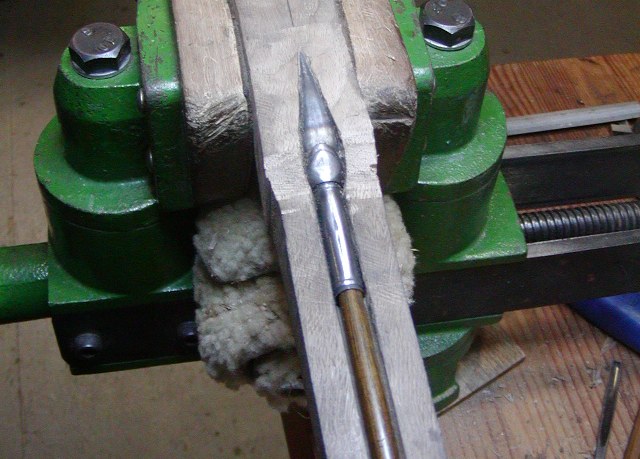
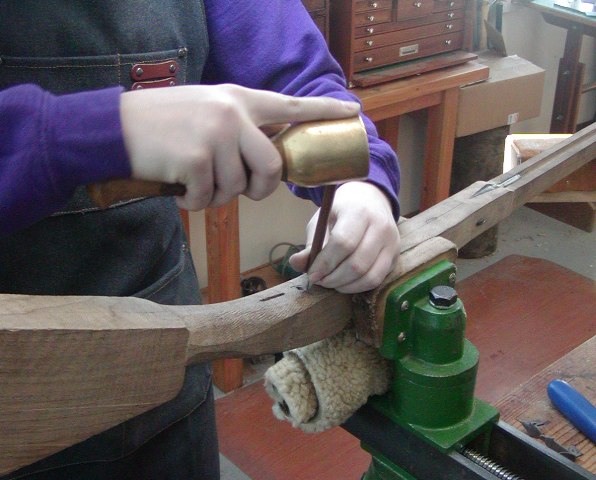
Another milestone day; inletting the ramrod pipes. We got them all in Tuesday afternoon. We did the forward pipes first. After marking their positions, Maria marked and drilled holes for the tabs.


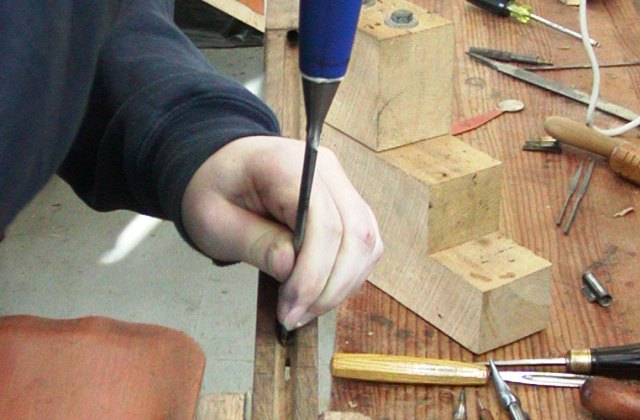
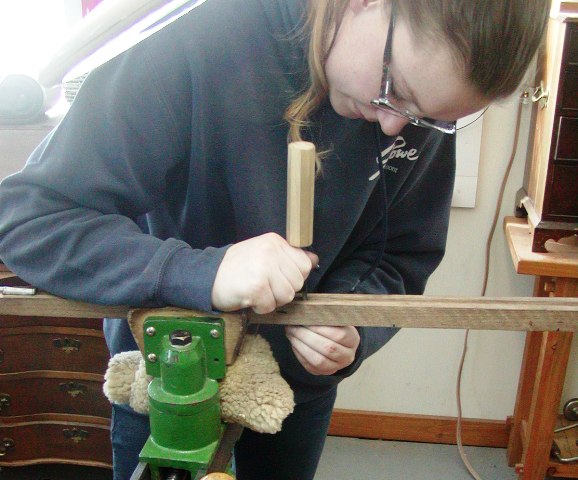
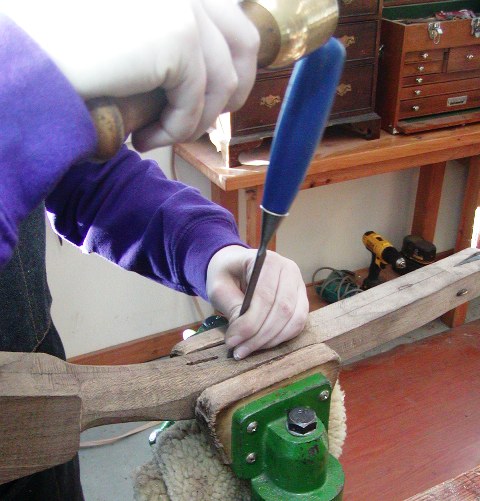
Then she used small flat chisels to outline the edges of the slot for the tab and simply runs a carving knife down the middle removing wood for the slot.


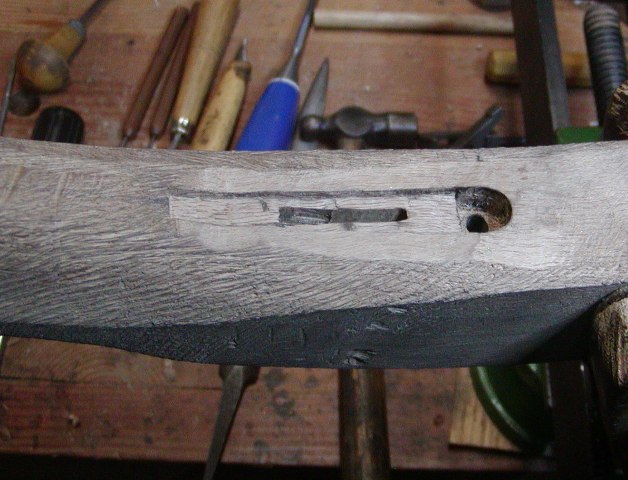
Then she saws the rest of the wood away with our little saw made from a needle file.


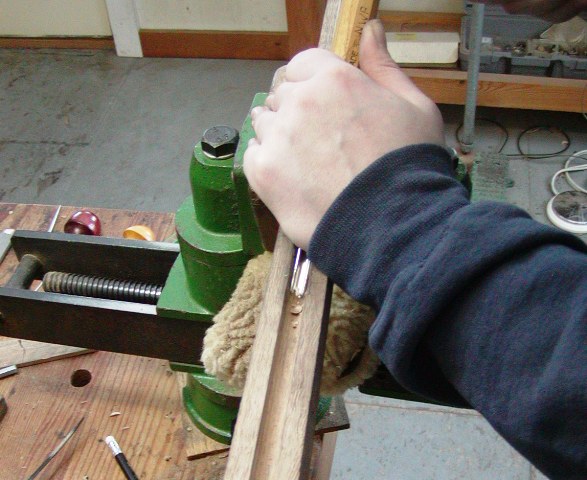
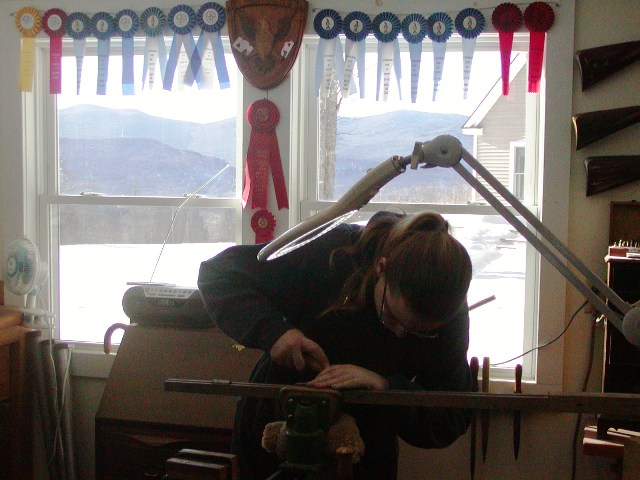
The pipe can now be inserted with the tab in the slot and she outlines the pipe on the stock with a pencil. She stabs in the ends with a tiny flat chisel and the rest of the wood is removed with small gouges. It was a beautiful sunny winter's day today as you can see through the window. We spent some time outside playing with Willow. The shop is a really pleasant place to work on days like this because the natural lighting is so nice.


She uses inletting black to mark the high spots and cuts them away until the pipe sits down properly.


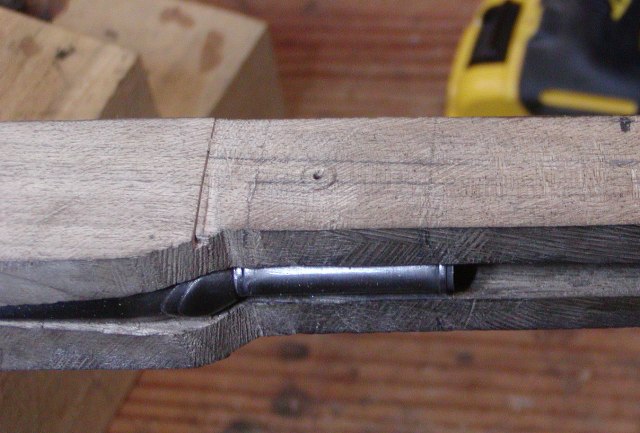
So much for the easy stuff. Now the rear pipe. An advantage of our 2-piece soldered rear pipe is that we can heat and pop the tang off. Then we just have the pipe to do first. This is a huge advantage.


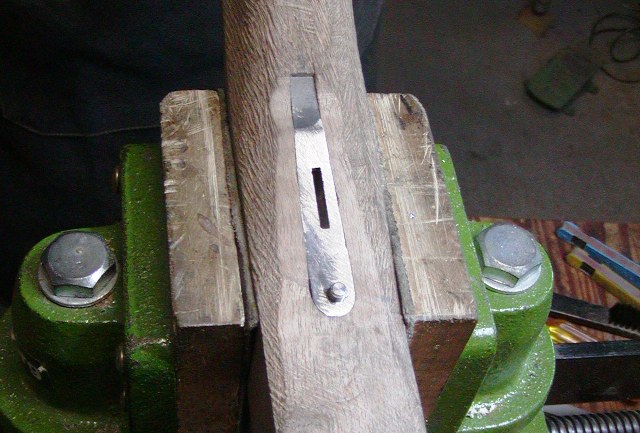
Next we reattach the tang and inlet it gradually toward the rear. When inletting the tang, get the inevitable "pinch" point at the step almost fully inlet before cutting the mortise for the tang. The pipe will rock back and forth about the step if you don't and you may mismark the tang outline as a result. Get the tang down flat on the wood before marking it. Maria did a first class job on her first rear pipe.


We trim off the tabs so they are flush with the barrel channel and then will drill for the pin holes. To be clear, Maria is doing all the work. I buzz around like an annoying bee teaching her how to use the tools and methods but mostly I get out of her way. Occasionally, I do a task while she watches so she sees how I do the job but then I just hand off the tools and let her go at it.

dave
 
Last edited:
Hi,
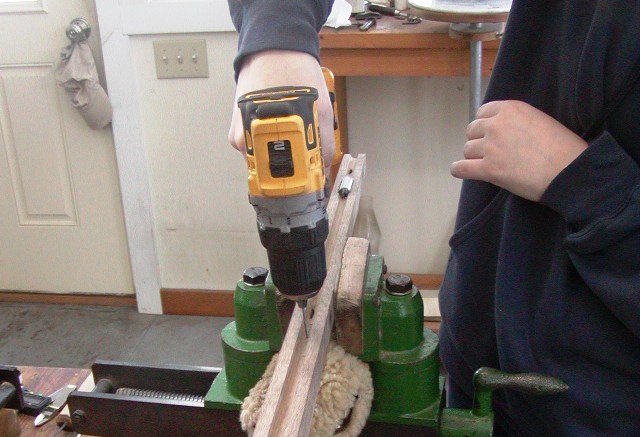
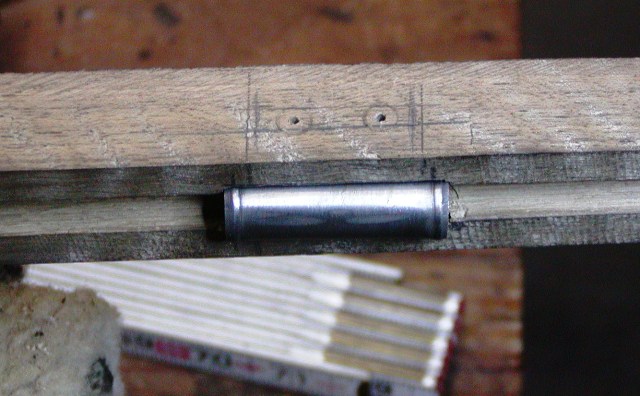
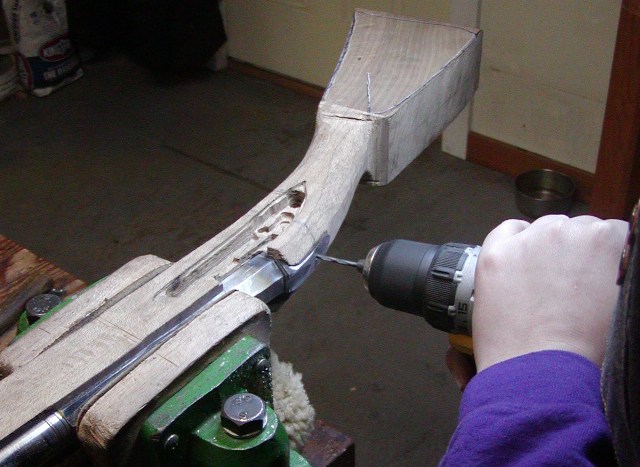
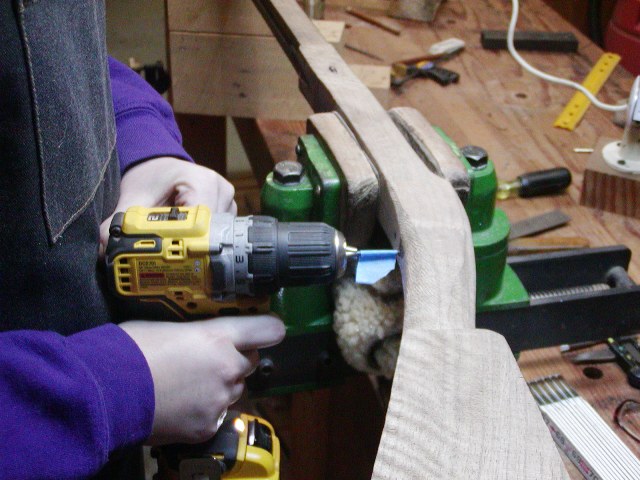
Got more done. I forgot to mention that the ramrod pipes get larger in diameter toward the muzzle. The rear pipe is 5/16" inside diameter, the middle pipe is 3/8" inside diameter, and the front pipe is 27/64" inside diameter. That will accommodate a robust tapered and swelled ramrod while preserving a slim appearing gun. Maria drilled the pin holes today for the pipes. We opted to drill 2 holes for the first pipe, which suffers the most stress and leverage when the ramrod is removed and returned. We also positioned the hole for the rear pipe a little toward the back, which tends to anchor it and the tang better. No jigs or milling-drilling machines. We just hold the drill level and perpendicular by eye and drill. We mark the bottom of the pipe measuring from the ramrod groove walls and then drill a little above that line.


The holes came out very well. Next we drilled for the tang bolt so we could position the trigger and trigger plate. We just draw a guideline on the side of the stock, find the center of the hole in the tang, hold the drill level by eye and aligned with the guideline, and drill it. The hole is undersized so we can make adjustments if needed. It came out well but needed a slight adjustment with a round rasp to center it on the bottom of the stock.


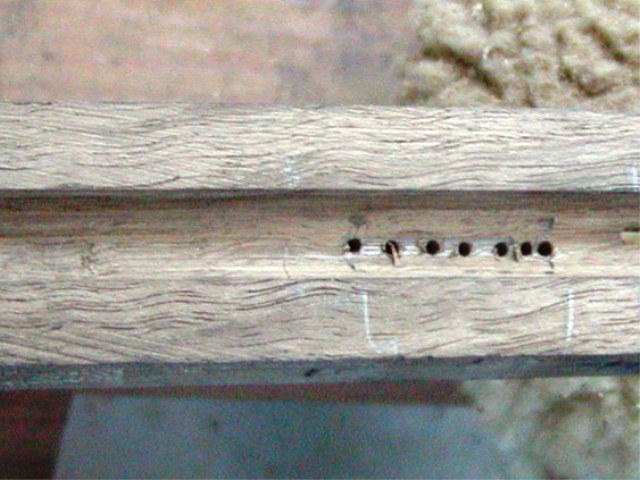
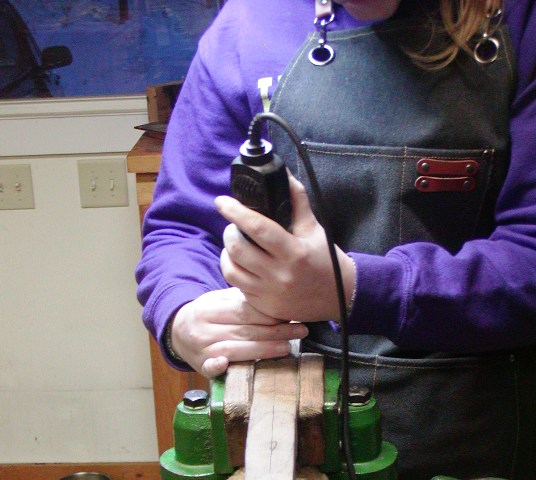
Finally, we located the trigger slot, marked it and drilled a series of holes, and then routed out the wood between the holes with a router bit on the Dremel Destroyer.


Needs to go a little deeper.

Done! We leave it at that for now.


dave
 
Hi,
Maria and I did not get a lot done today because we were visited by some reenactor friends with faulty guns. The first was a Miroku Brown Bess that would not hold at half ****. It became clear to Maria and I that the gun was a kit assembled by someone not very knowledgeable or skilled. It has a lot of problems but the lock issue is the primary one. Solving it was just a simple matter of grinding off a little of the top of the trigger lever so the sear could fully engage in the tumbler notches. The trigger plate is inlet almost 1/8" too deep resulting in the trigger issue. We fixed that. The other gun was a Pedersoli Charleville model 1777. The story was the owners bought it second hand and it never worked properly. It always stopped at half **** when fired but sometimes if the trigger was pushed to the right, it fired properly. The owners sent the lock to Pedersoli who did nothing saying it was fine. They brought it to a number of local experts who could not solve the problem. After testing the lock, I shocked the owners by telling them with certainty that I will show them what the problem is. I disassembled the lock and then measured the height of the halfcock notch lip relative to the height of the full **** notch lip measured from the center of the tumbler spindle. It was at least 1/32" higher causing the tip of the sear to catch in the half **** notch or mash down the lip every time it was fired. I ground down that lip to be lower than the full **** notch and polished the notch with a diamond file. That solved a problem that none could figure out for many years for this gun. It just took someone who actually understands lock geometry to fix it. It was a good lesson for Maria. She learned it well.

dave
 
Hi,
Thank you guys. Maria is going to write a paper on her experience as well as give a presentation to her school. Maybe I will encourage her to write a condensed version for publication in Muzleblasts, Muzzleloading, or Black Powder magazines. Boy, Maria has sharpening chisels and knives down pat. She gets them scary sharp every time.

dave
Perhaps a female Mark Baker in the works, who knows a thesis down the road worth hundreds of dollars in the future. Good job and going to be a fine gun when finished.
 
Hi Folks,
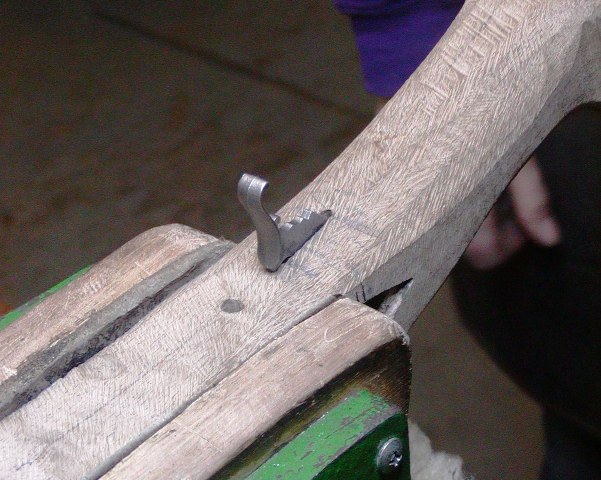
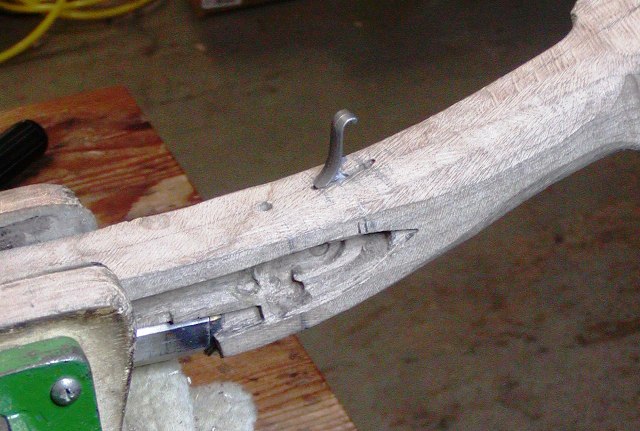
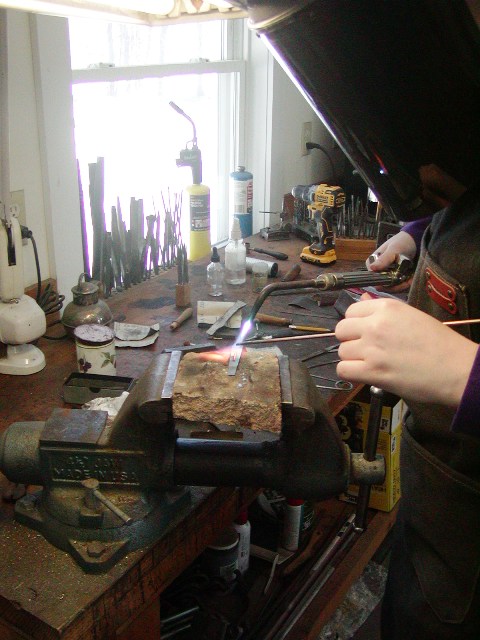
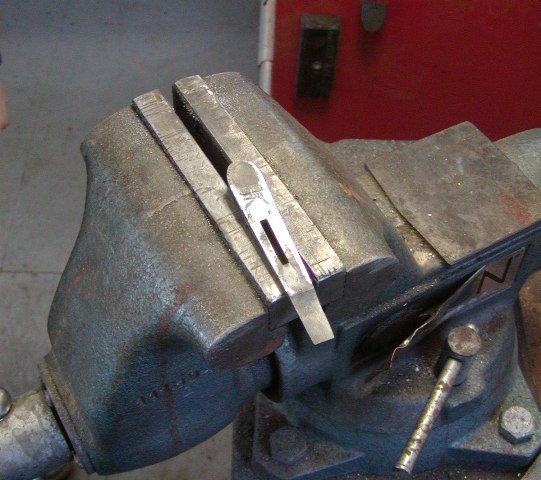
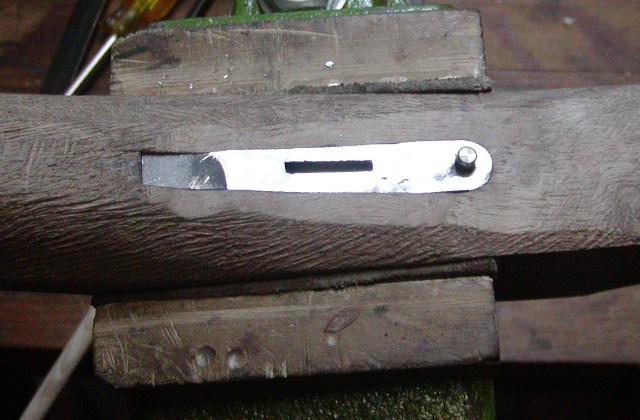
This may seem like a boring post but there is really good information here if you read it carefully. Maria and I installed her trigger plate today. It was not as simple as you might think. The trigger plate is cast steel and sold by TOW for fowlers. It is a fine plate and goes well with the trigger we are using. The problem is the trigger position is wrong if you are using a round faced English lock whether by Chambers or Kibler. Both of those locks are too long and would be more valuable for a much greater range of guns if they were 1/4" to 3/8" shorter. Anyway with those big locks and a standing breech, the trigger position is so far back that the tang bolt from the standing breech has to enter at an angle divergent from perpendicular to the tang. You cannot push the extension on the trigger plate too far forward because it will interfere with the lug on the trigger guard. So to make this work, Maria and I had to make a lot of modifications. The first step was to move the trigger back in the trigger plate and fill the extra slot in front of the trigger. We did that by drilling holes to the rear of the slot, cutting and fileing away the steel so the trigger could move backward, and then welding steel to fill the slot in front of the trigger.


With that accomplished, Maria inlet the trigger plate after filing draft on all edges. She began by inletting the thick forward extension first.


Then the rest of the plate could sit down against the wood after she beat it with a hammer. She traced the outline of the plate and cut the mortise.


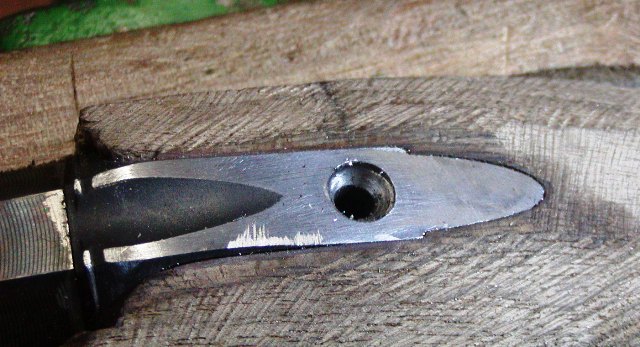
Once in, we then drilled and tapped the plate for the tang bolt. It was a tiny bit off center but will work just fine.


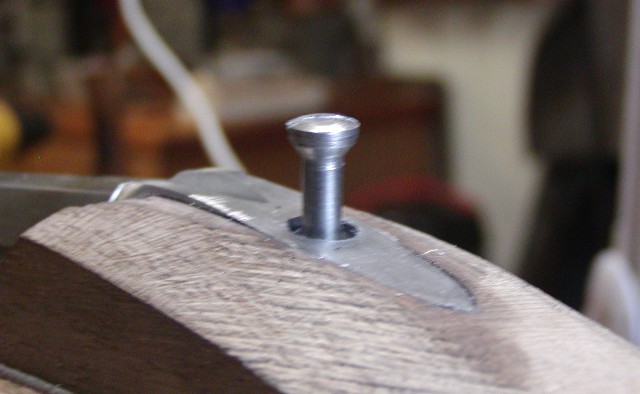
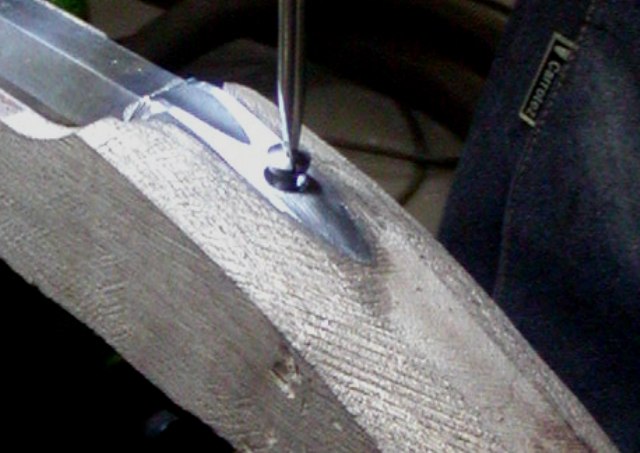
Next, we fitted the tang bolt. To make everything work, the tang bolt had to enter the tang of the standing breech at an angle and not perpendicular to the tang. That required we counter bore the bolt head rather than simply counter sink it into the tang. To do that we turned the head of the bolt such that it had flat sides and 5/16" diameter, then drilled the hole in the tang with a 5/16" drill a the appropriate angle. The hole is drilled deep enough to form vertical side walls. Then the bottom of the hole is counter sunk with a 5/16" counter sink that matches the angle of the bolt head. We counter sink it until the screw slot is aligned with the barrel and the head of the bolt sits down deep enough so when filed flush with the tang, has a deep enough screw slot and substantial thickness to be able to file the head to fit the angle of the tang.


It all came out well and eventually the tang bolt head will be filed flush or slightly domed and engraved. Good days work.

dave
 
It's so cool to think through a 'problem' and come up with a solution that works so well. I bet Maria is getting a very good understanding of the many unanticipated surprises that gun builders are challenged with.
Do you sometimes do a full-size layout of just the lock/trigger/tang arrangement?
 
Hi Bob and thanks,
Yes, our drawing of the gun eventually had the trigger plate bolt and tang included so we anticipated the positioning. However, as the gun was shaped, we saw we needed a little more angle to the tang of the standing breech because we needed a little more drop at heel to fit Maria. That changed the positioning of things a little. I considered just making a new trigger plate but that still wouldn't work because of the position of the tab on the trigger guard. We would have to notch the front of the trigger plate to create space for the the front tab. So the solution was simply to use the existing plate and counter bore the tang bolt, something you see on many original British guns.
The trigger guard will be a story in itself. We simply cannot get the right parts commercially anymore for these British guns. The diversity of our selection has diminished these last 3 years and the ones available now are not shaped right.
dave
 
Hi,
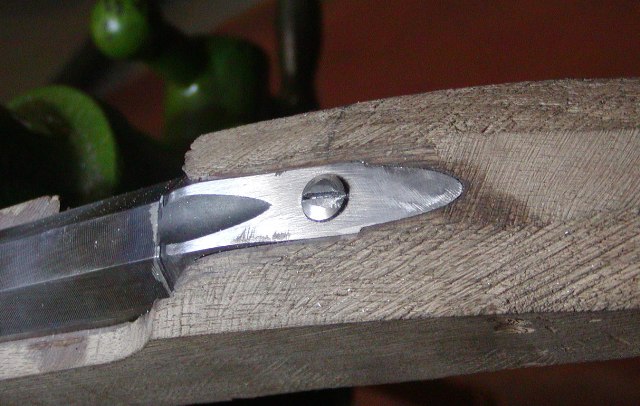
Bit of a bump in the road for Maria and I. I had a really bad episode of arthritis in my left knee that hindered me pretty badly. My old-age ailments are not liking the roller coaster winter weather of deep freeze and then record heating that we experienced the last 8 years. In addition, Maria contracted bacterial pneumonia. It was relatively mild but both of us slowed down a lot these last few weeks. But we are back at it, weather and transportation to my shop permitting. It's English fowler butt plate time! Her previous inletting tasks were good preparation for this one. I know a lot of folks are intimidated by these butt plates but they are not really difficult as long as you pay attention to the details. The first step is preparing the butt plate, making sure there is some draft on the tang edges and that the edges of the face plate that fit against the stock are flat and true. Next, we hold the butt plate against the side of the stock and trace the profile of the face on the stock. Usually, we would remove the extra wood with a bandsaw. In this case, she needed the full length of the stock blank to achieve her desired length of pull. We had to remove so little wood so she just rasped it away using an 8" Liogier cabinet makers rasp.
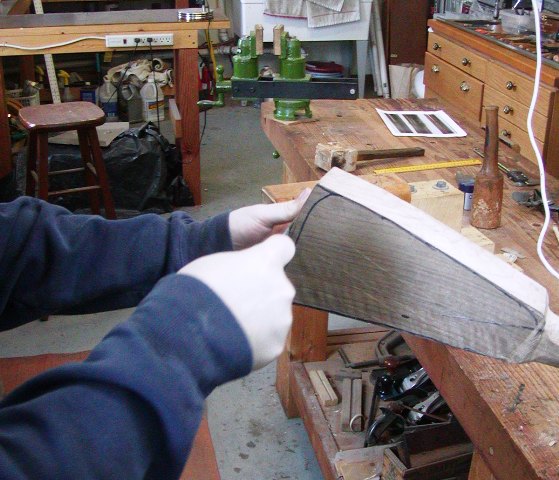


Next we want to shape the step and radius at the heel. We traced the curve on the stock and she cut down at the border of the step and in to remove the extra wood.
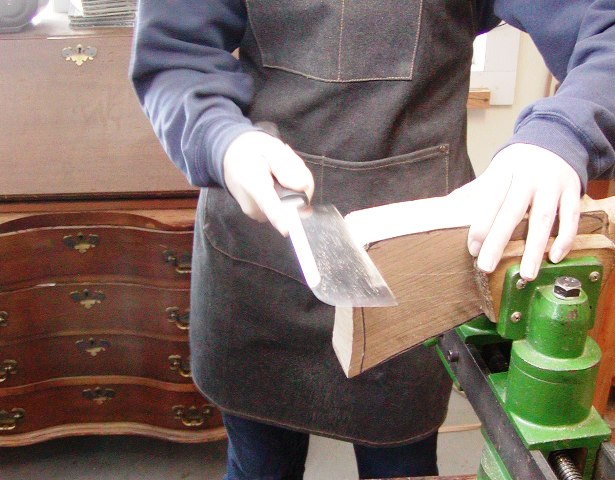


We use a Japanese saw that cuts on the pull stroke. They are superior to anything else for this kind of task. Then Maria uses her cabinet makers rasp to shape and round the step.
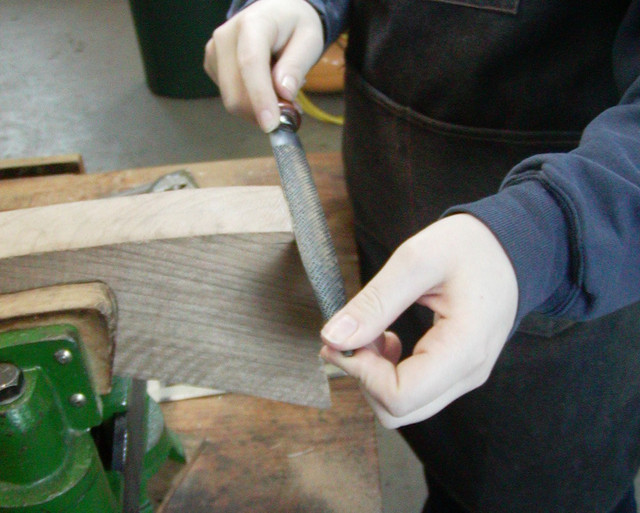


In addition, we locate the position of the lug under the tang on the stock. Inlet it using drills, small flat chisels, and a router bit in my Dremel. We make sure the forward edge of the mortise has extra room to allow the plate to move forward in the slot. The mortise for the lug does not have to be precise.
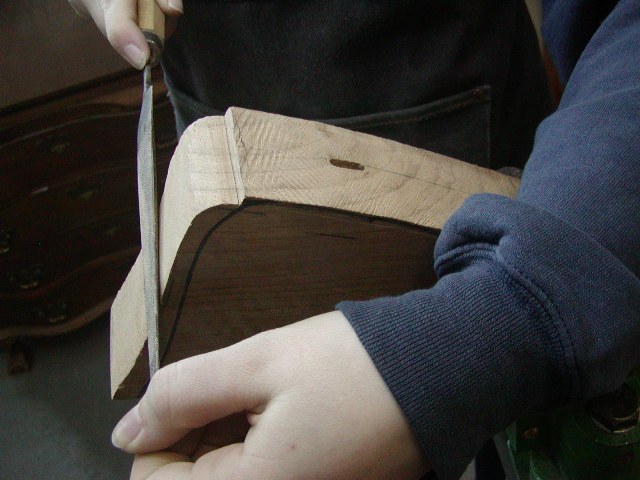


Next is using the cabinet makers rasp and my dragon rasp to fit face of the plate against the stock enough to make a good tracing of the tang. The tang is inlet with the realization that it will gradually move forward in the mortise as the face of the but plate is fitted to the end of the stock. We inlet the rear of the tang first and move forward but even after the entire tang is cut in, it will always need to be moved forward.
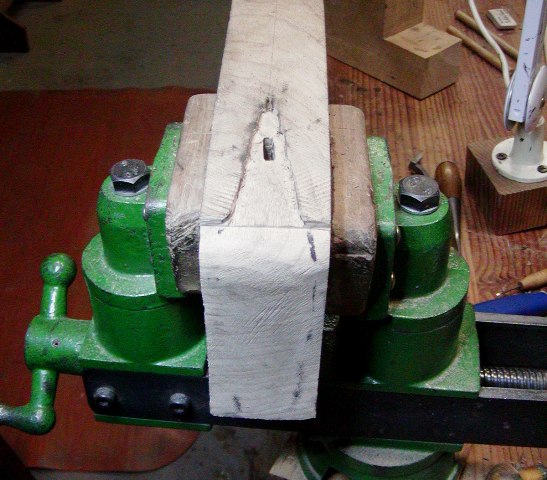


This is why the classic English plates that narrow consistently from heel to front are relatively easy to inlet. As you move them forward, they just close up any gaps. Butt plate returns that have swells are much more difficult.

Here is where we are. Maria is now using inletting black to guide her and the plate is almost in. It needs to move more forward but not very much.
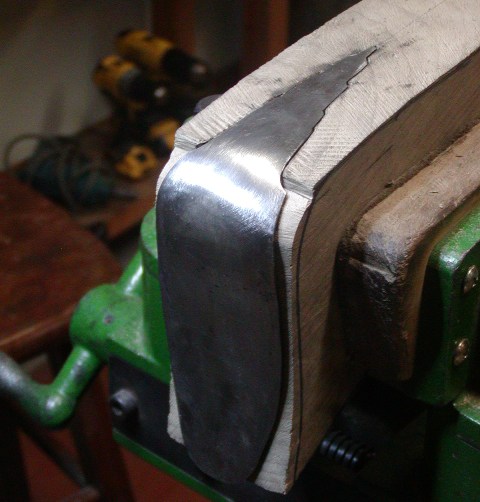
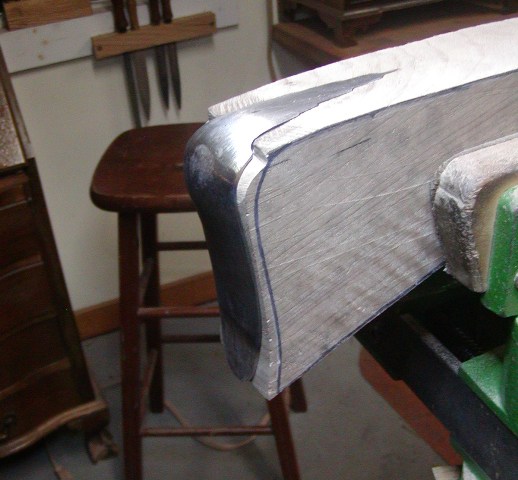
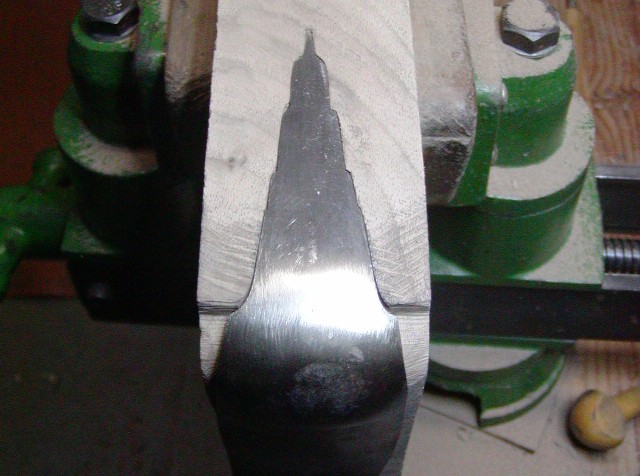


In the process of inletting the plate, Maria and I got into a conversation about history and all the while she kept distractedly brushing blacking on the plate. She covered the plate and got it all over her hands. We laughed and then cleaned the plate and started again.
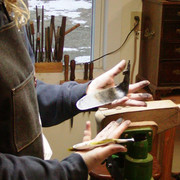


More to come. Next up is finishing the butt plate inlet and beginning shaping of the butt stock.

dave
 
What an incredible thread . Thank you for posting it .. It is great to see this young lady not only enjoying the work but she seems to be a natural . So wonderful . :)
 
Back
Top